I don't make New Year's resolutions. I haven't made them for years. Of course I could say I'll work out more, learn to make croissants, travel to unknown places, and aim to live in the moment. Partly, I don't make any resolutions because I don't want to make promises I most probably won't keep. Let's be honest, most resolutions are forgotten by February anyway. Do I really have to make them only to be disappointed in myself later?

Partly I don't make New Year's resolutions because I don't believe that New Year is the time when change needs and will happen. Mostly it's like any other night of the year. Nothing special except that people gather with friends, light sparklers (they're so pretty!), and find a reason to drink champagne straight from the bottle (it happens). It's not a make-a-decision-to-change-or-be-doomed-forever moment.

So as the year 2014 kicks off, I think the same as on the 364 other days of the year. Yes, we need to strive to be the very best version of ourselves. But we also need to get lost, take the wrong turn at the crossroad. We need to aim high, move out of our comfort zone, and take big leaps no matter the risk of falling down on our knees. We need to make mistakes because through mistakes we learn.
Every mistake, every crossroad, pretty much every moment, is an opportunity for change.

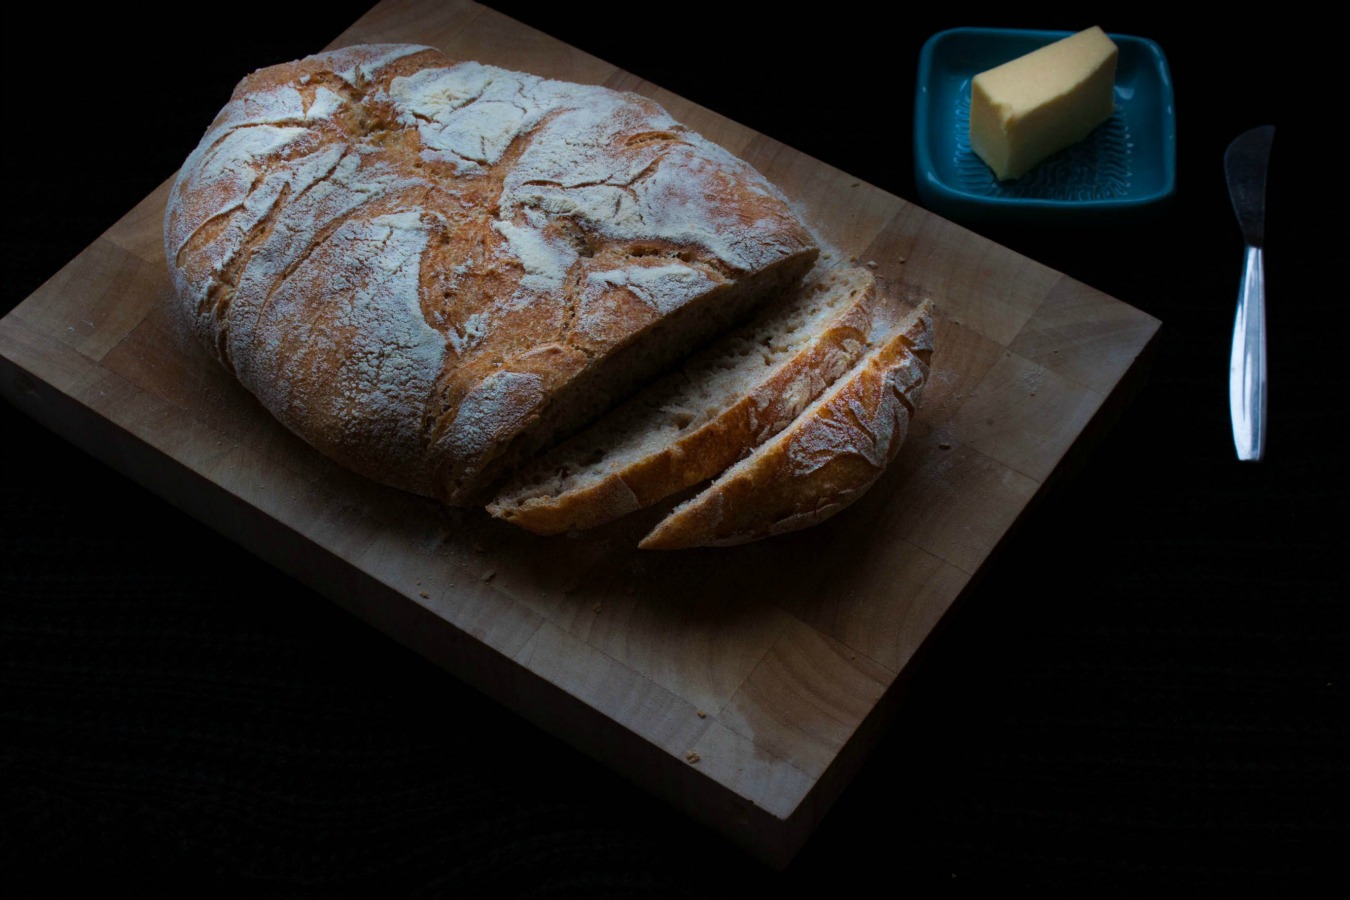
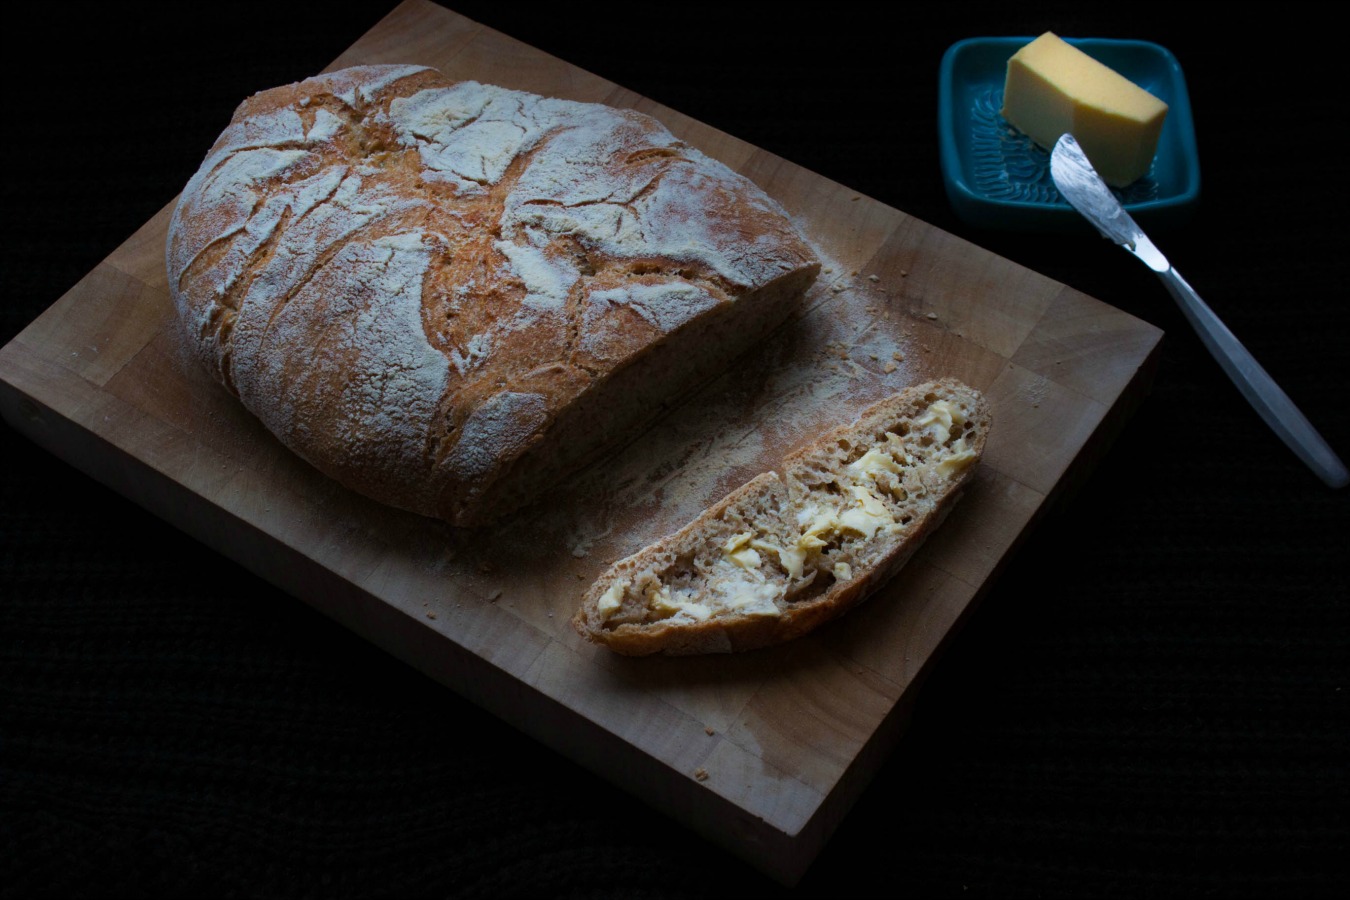
No-Knead Country Loaf
recipe slightly adapted from NYT, November 8, 2006; original recipe from Jim Lahey's book "My Bread"
yields 1 loaf
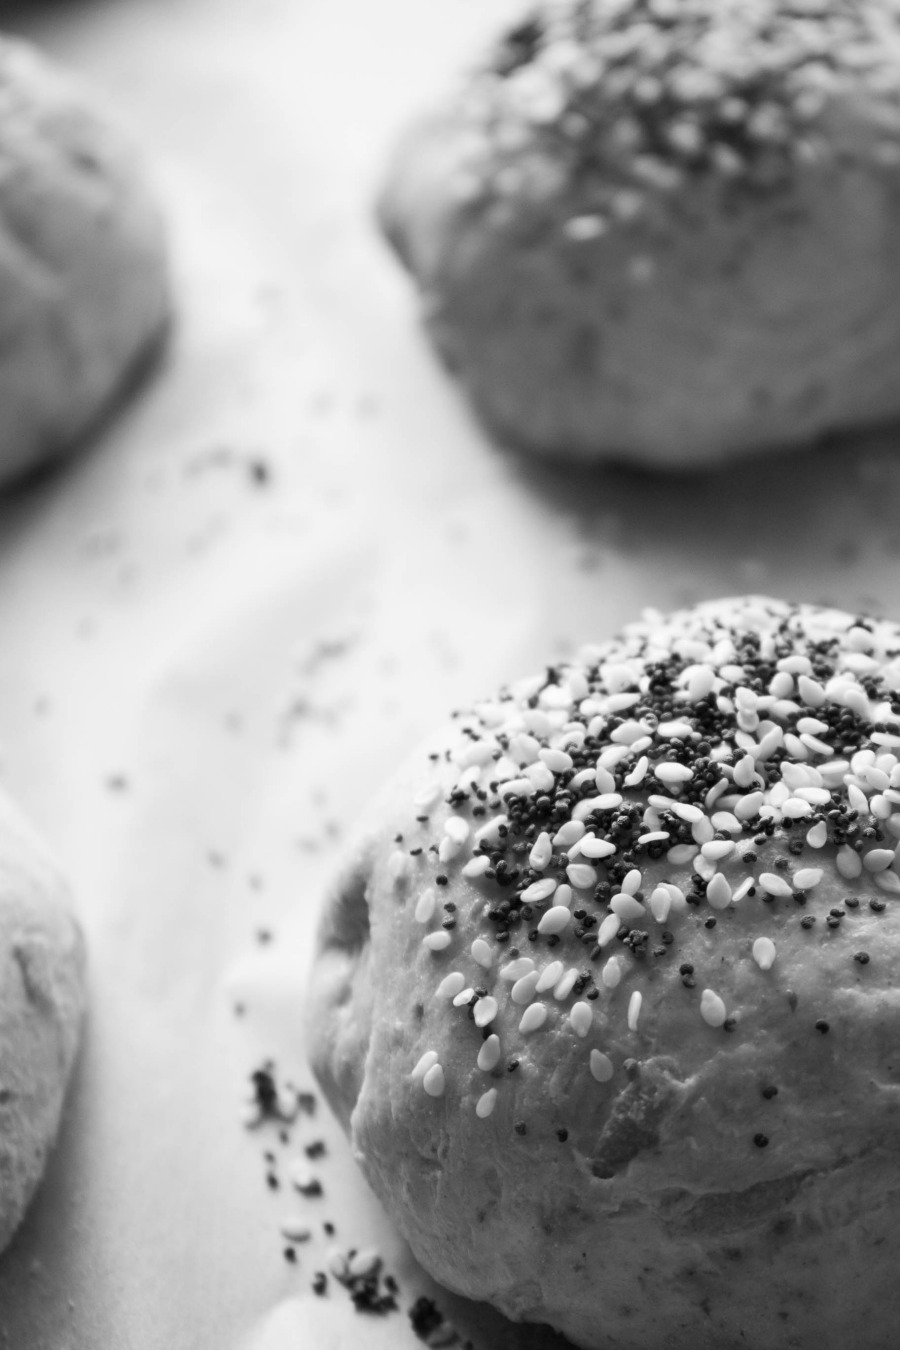
This is a great and easy method to create an irresistible loaf of bread. I warn you, this recipe is addictive! There's no need to knead the dough which means little to no work. The only thing you need is time. The long rising time, also called fermentation, ensures a delicious flavor. The baking method, on the other hand, is the key to the crackling crust. The no-knead method most probably isn't what you're used to – the long fermentation time and the wet dough that's almost impossible to handle. However, it's dead simple and the result is incredible. I still can't believe that I used this method from Jim Lahey, the owner of the Sullivan Street Bakery in New York, for the very first time last week! I've made three different versions so far, playing around with different flours – spelt, like in this recipe, einkorn, and rye. Next time I'm going to sprinkle sesame seeds on top of the loaf. You could even fold in some nuts, seeds, herbs, cheese, or olives. This is also what I want you to do. Play around! Get creative! Just remember that substituting works by weight not volume. Basically, there are three reasons why I prefer to use the scale instead of measuring cups. The first one is accuracy and the second fewer dishes. The third one is that by baking by weight it leaves me the freedom to play around with the ingredients. So get that scale.
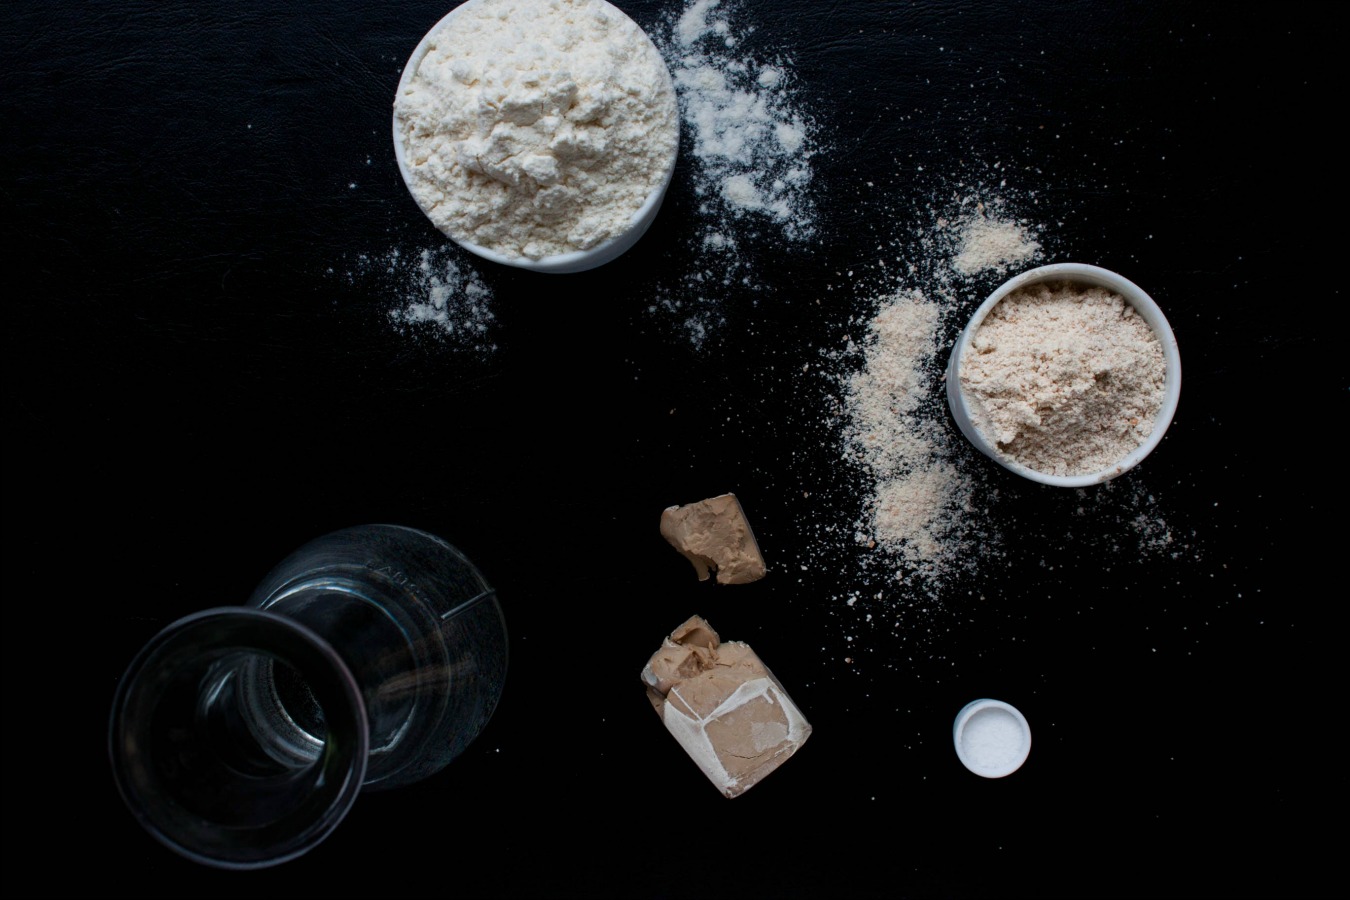
300 g (4 ¼ dl; 2 ¼ cups) bread flour
100 g (2 dl; ½ + ⅓ cup) whole wheat spelt flour
1 ¼ tsp (8 g) fine sea salt
3 g fresh yeast (or alternatively 1 g / ¼ tsp instant active dry yeast)
1 ½ cups cool water (about 13–18°C / 55–65°F)
more flour for dusting (I used durum flour but bread flour is okay as well)
In a large bowl, combine both flours and salt. Dissolve the fresh yeast in the water (if you're using instant active dry yeast skip this step and add the yeast straight to the other dry ingredients – there's no need to dissolve it in water first). Add the yeast water to the dry ingredients. Using a bowl scraper or a wooden spoon, stir until blended. The dough will be quite wet and very sticky. If it's not tacky, add a little more water. Cover with a kitchen towel and let rise for 12 to 18 hours at room temperature. The dough is ready when it's more than double in size and the surface is dotted with bubbles.
With the help of a bowl scraper, pull the dough onto a generously dusted work surface. Dust the dough with a little flour, cover with a kitchen towel, and let rest for further 15 minutes.
With lightly floured hands, pull the edges of the dough into the centre to form it into a round or oval shape (depending on the shape of the pot you're using). Wrap the shaped dough, seam side down, in a generously dusted kitchen towel (no terry cloth). Let the dough rise for 1 to 2 hours. It's ready when it's more than double in size and will not spring back when poked with a finger.
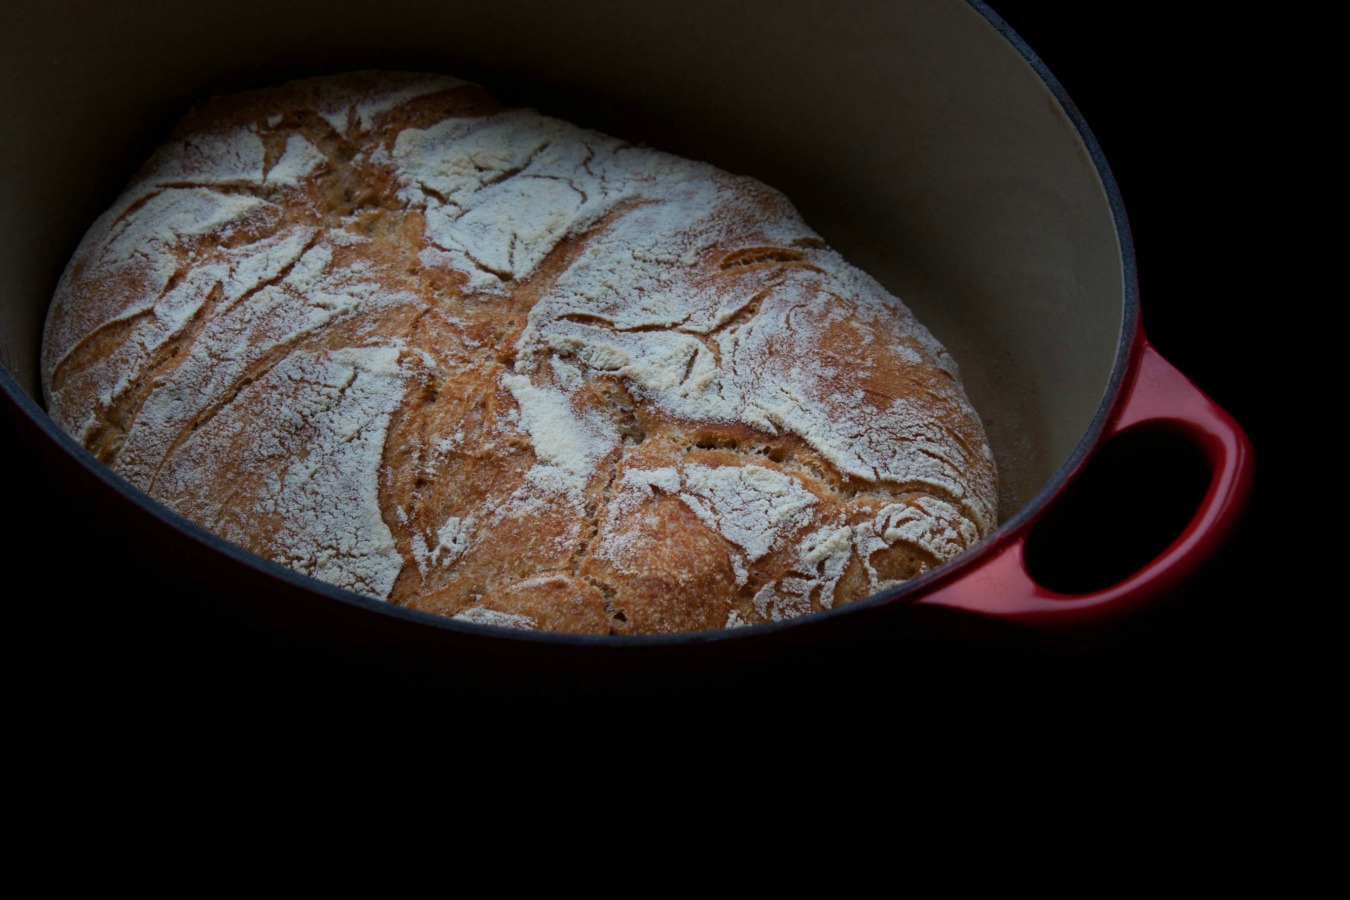
At least half an hour before the end of the second rise, preheat the oven to 225°C (450°F) and place a heavy covered pot, like cast iron, enamel, or ceramic, on a rack in the lower third position. When the dough is ready to be baked, remove it from the oven. Lightly dust the bottom of the pot with flour. Gently turn the dough over into the pot, seam side up (this will ensure beautiful cracks). Shake the pan a couple of times if the dough is unevenly distributed. Bake for 30 minutes covered and for further 15 to 30 minutes uncovered until the crust is deep golden. Cool on a rack or rip it into pieces while steaming hot (probably my favorite part of bread baking).
>>>•••••••••<<<