Saint Lucia's Day – Saffron Knots with Orange Almond Filling for Life & Thyme

Saffron Knots with Orange Almond Filling | My Blue&White Kitchen

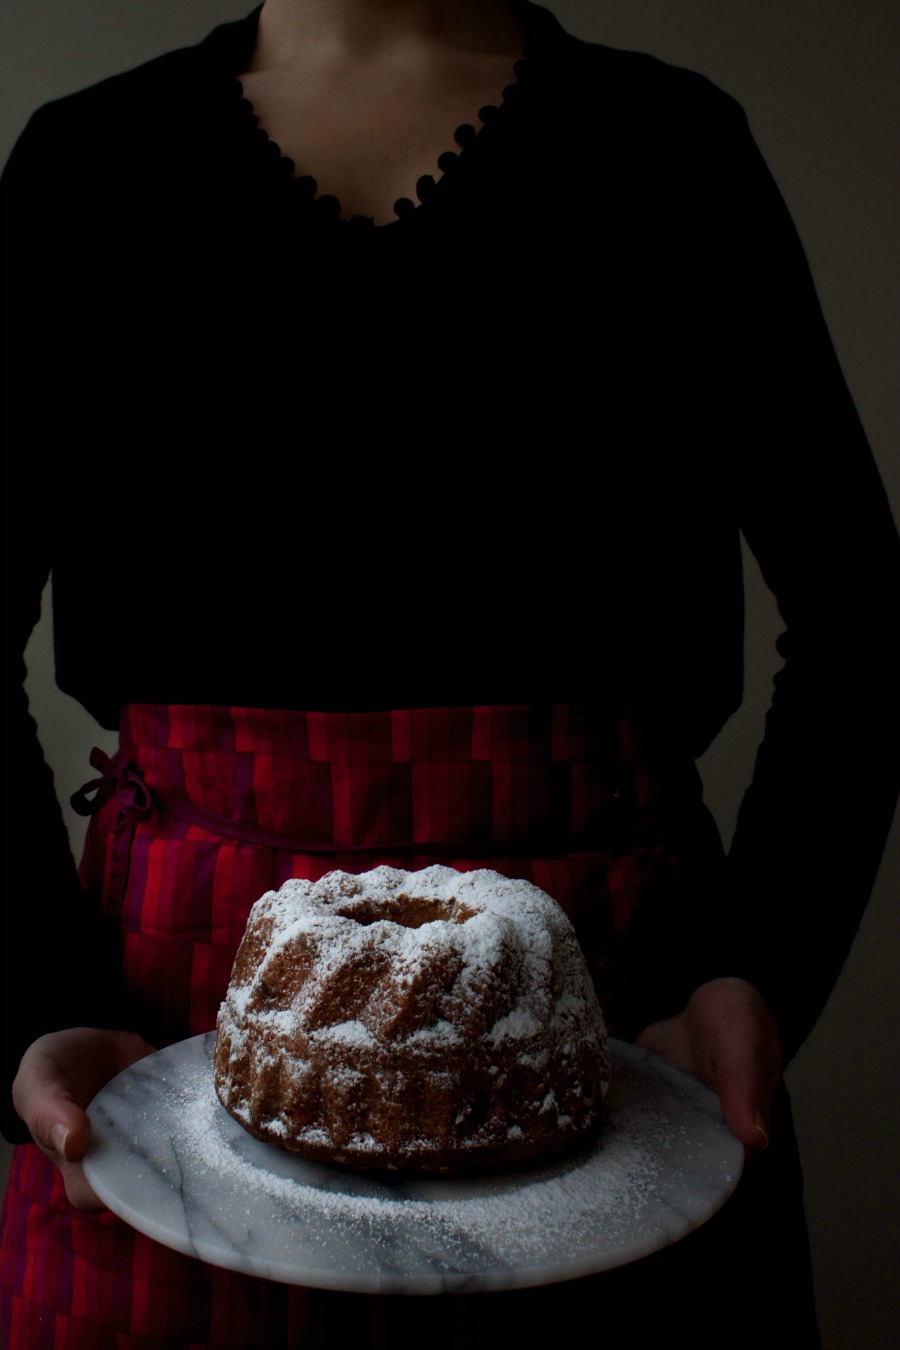
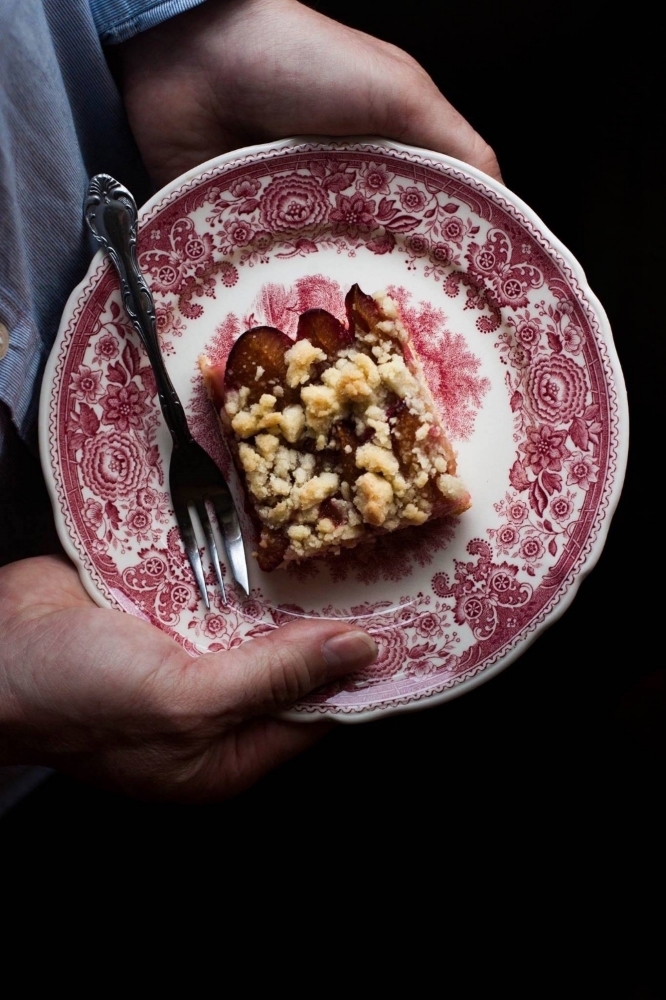
December is a month packed full with holidays and traditions, especially in the Nordic countries. Last Saturday, we celebrated Finland's Independence Day, one of the most festive days of the year. I made rack of lamb with roasted Provençal vegetables (haha, totally neither Finnish nor Nordic but delicious). For dessert, I made a vanilla parfait with roasted cinnamon plum sauce and gingerbread. The parfait was really nice but a tad too sweet for my taste; it need a few tweaks before it's ready to be shared.

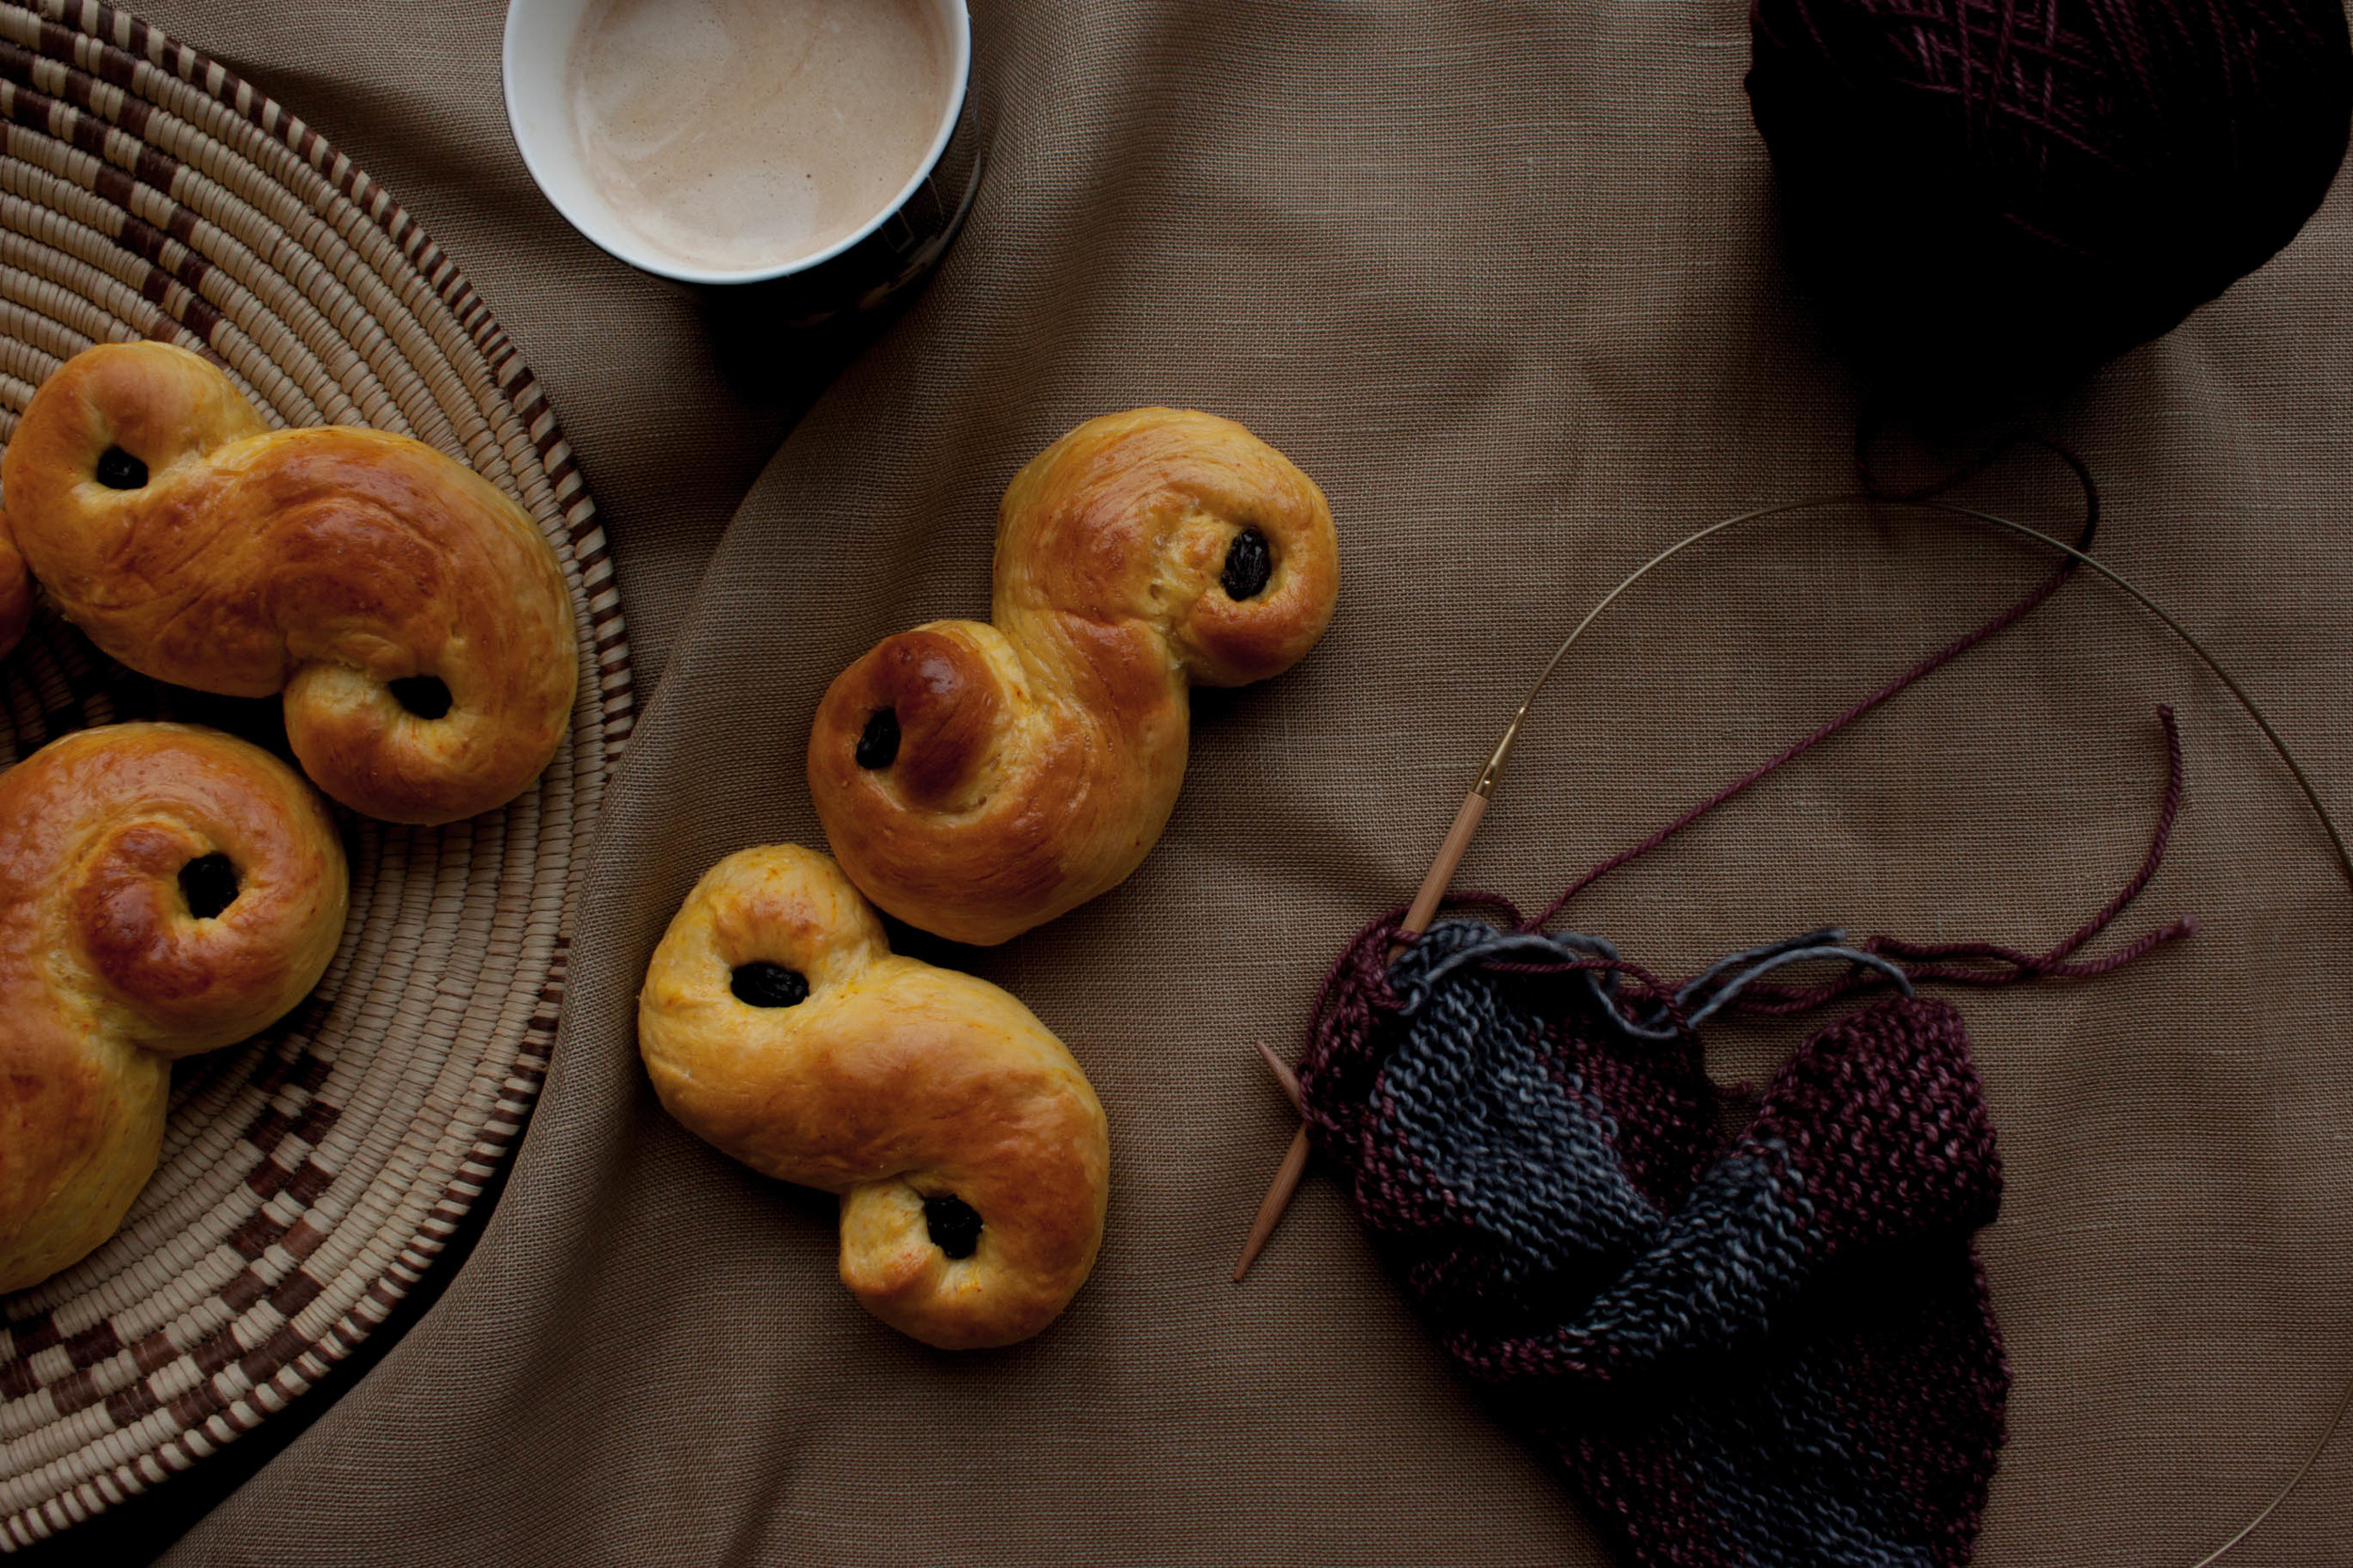
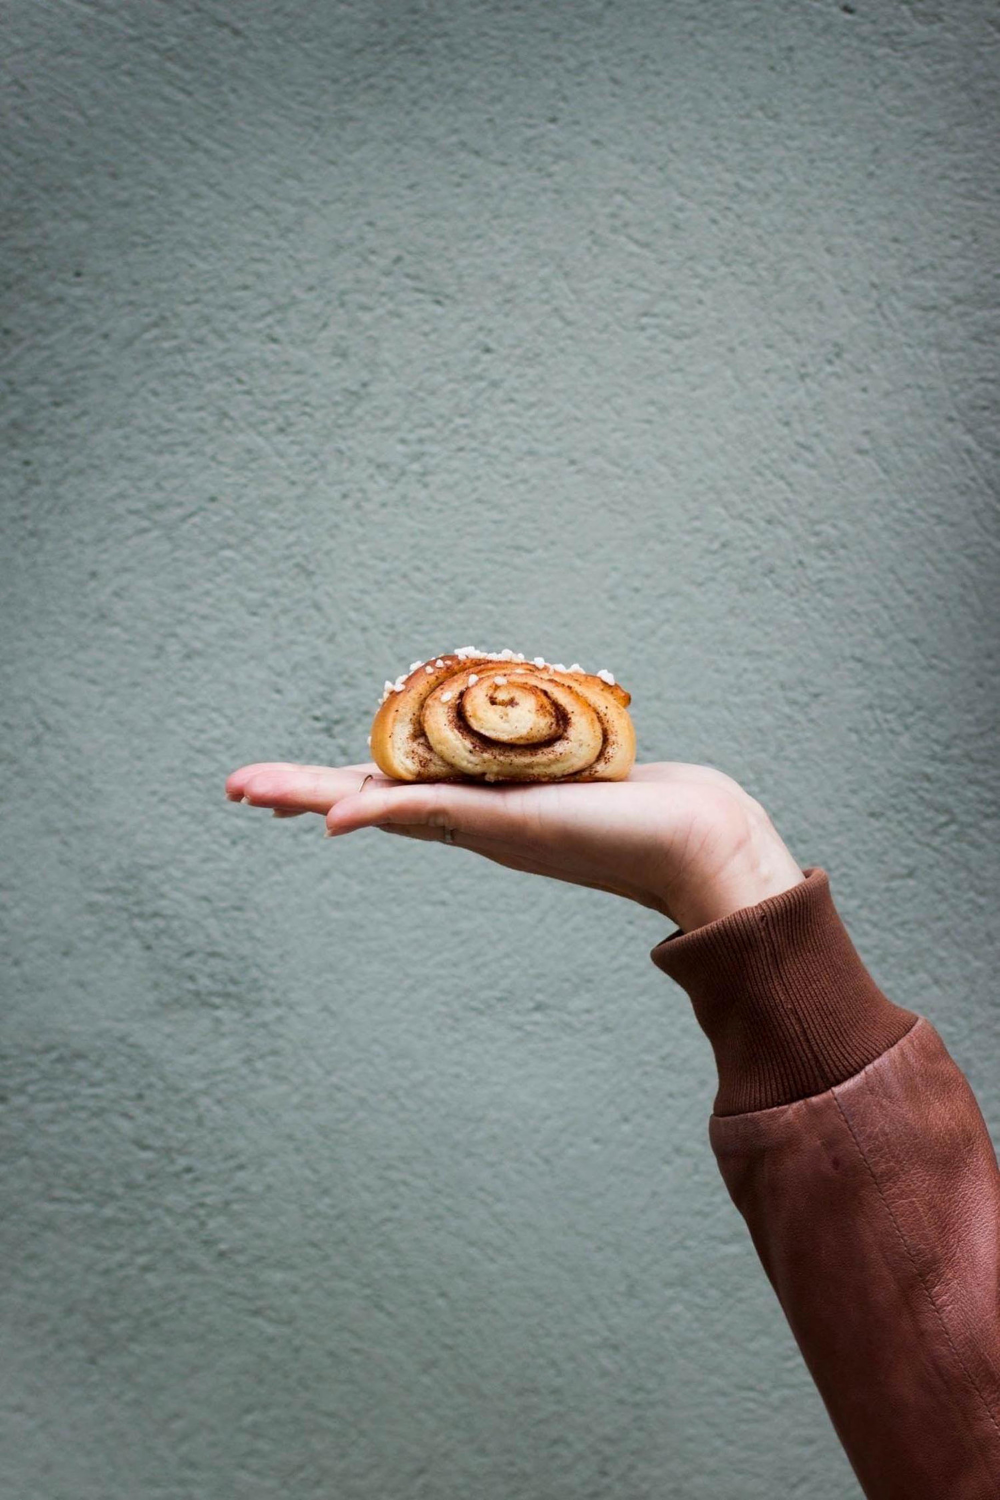
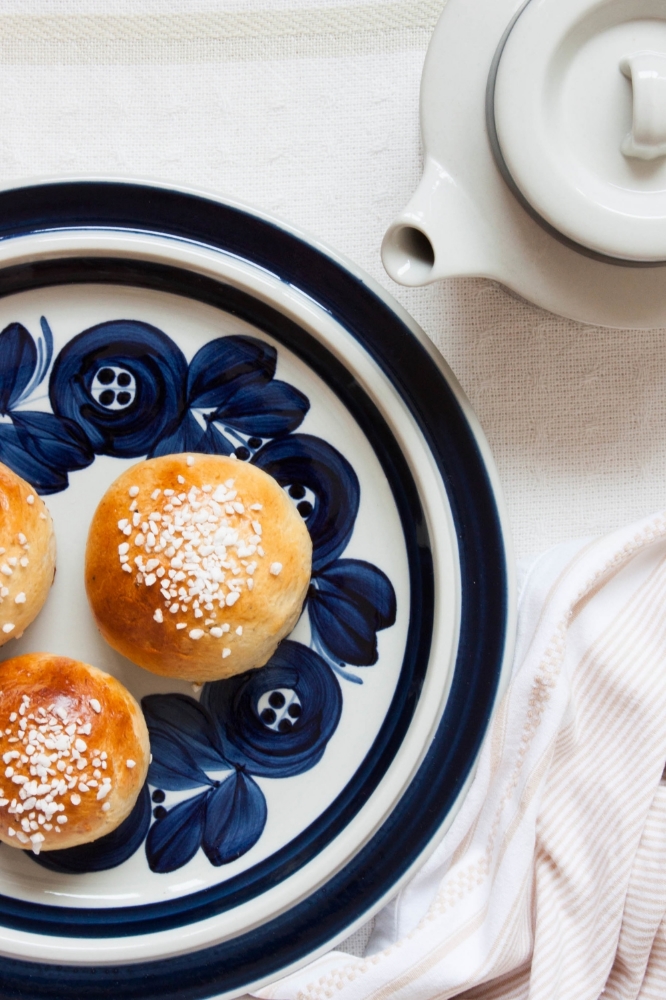
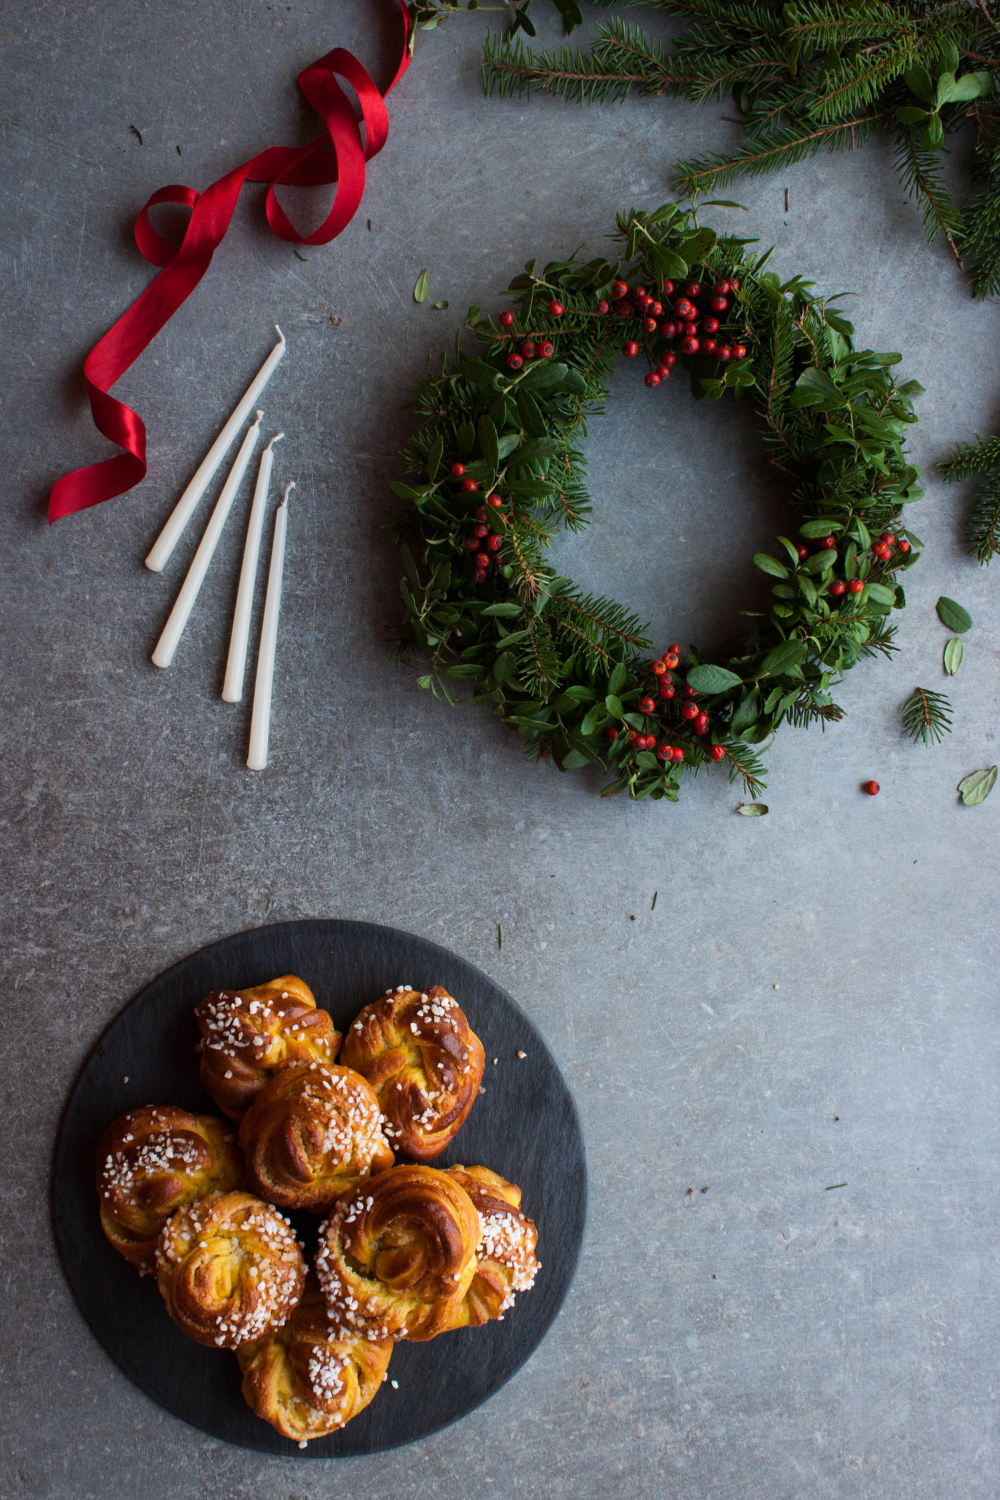
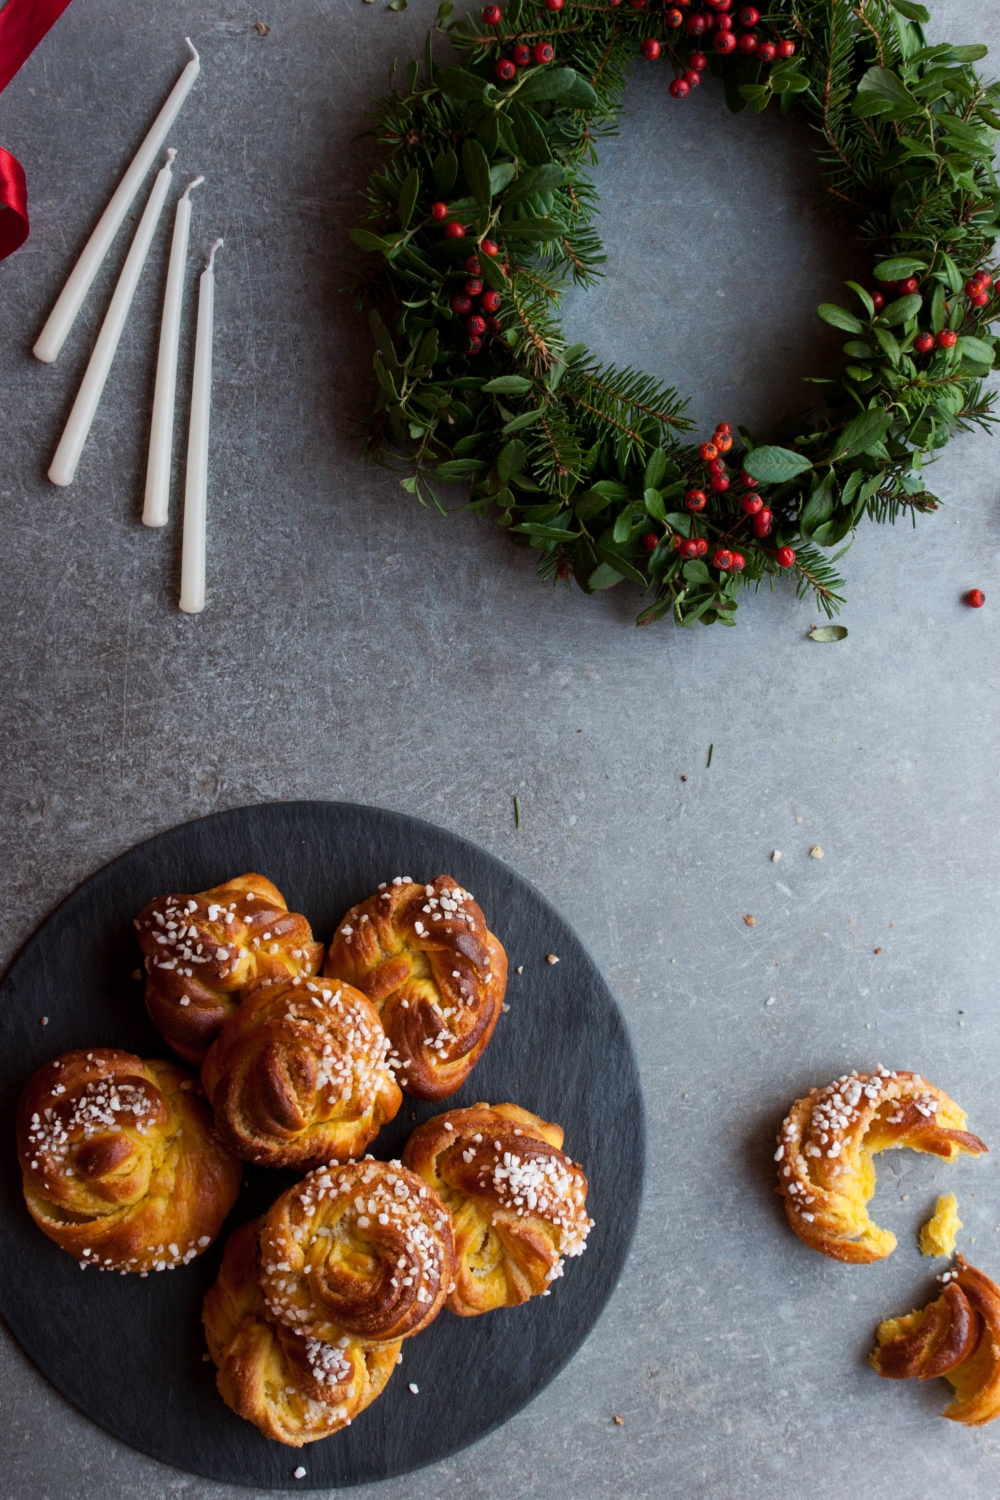
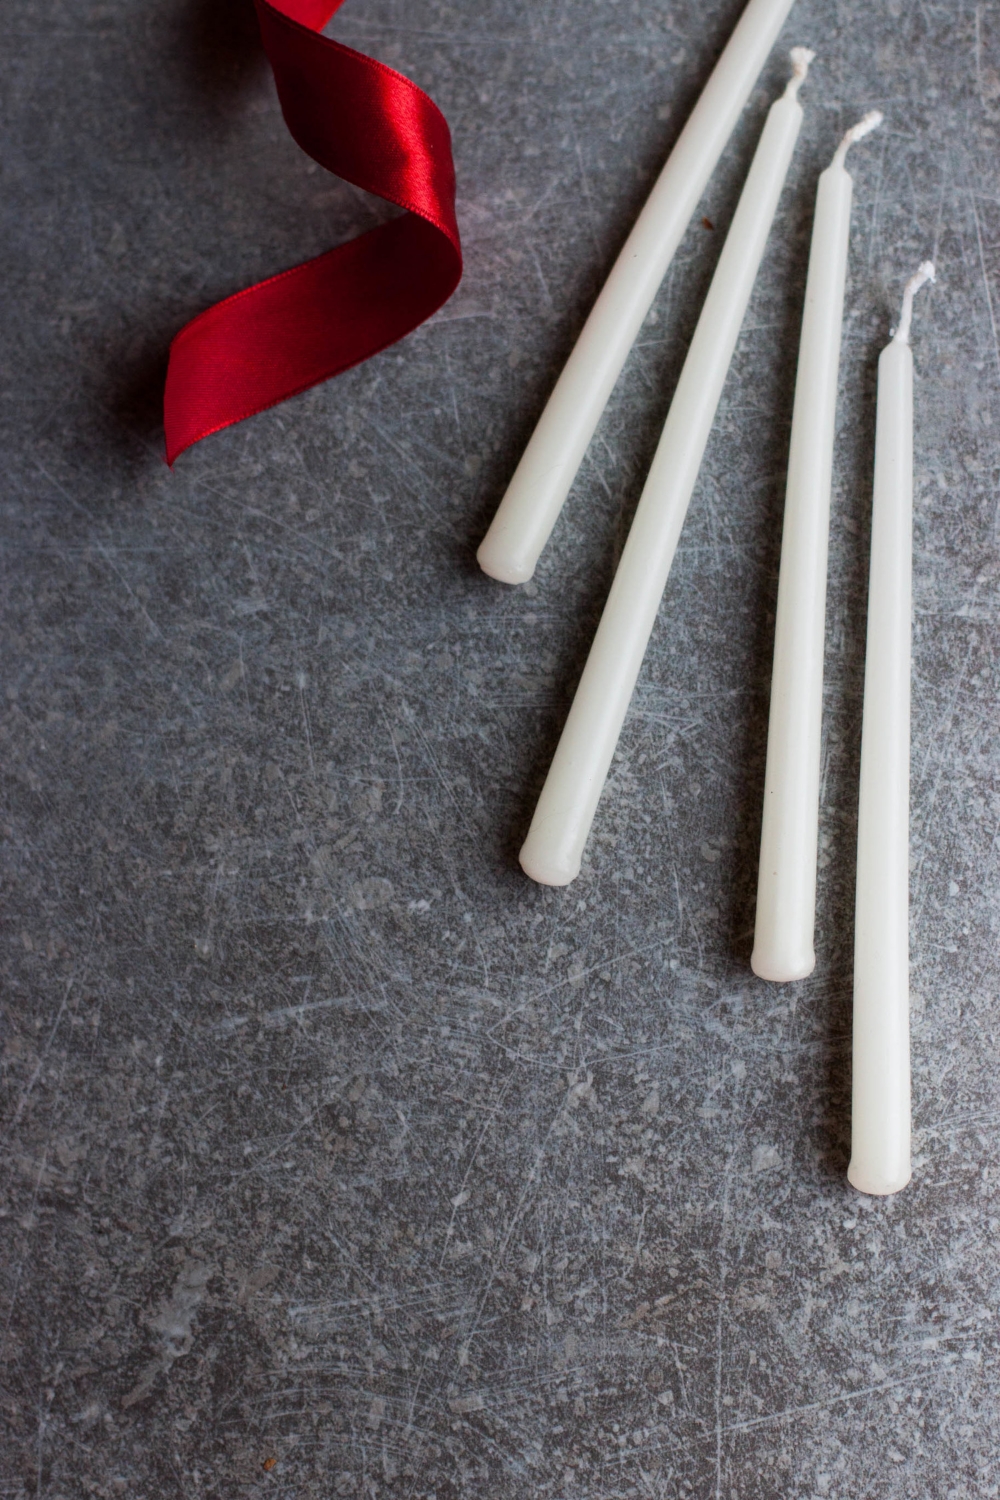
Next Saturday, December 13, is Saint Lucia's Day. It's mainly celebrated by the Swedish-speaking community but few can escape the lovely sound of the Lucia song or the luscious saffron buns. And let's be honest: every occasion that brings some joy and light into these dark Nordic winter days is more than welcome. Saint Lucia's Day is the very essence of that; according to the Julian calendar it was the longest night of the year. Lucia, the girl wearing a white cotton gown with a red sash tied around her waist and a crown made of lingonberry twigs, was believed to bring the light into the winter darkness.


"The night treads heavily
around yards and dwellings
In places unreached by sun,
the shadows brood
Into our dark house she comes,
bearing lighted candles,
Saint Lucia, Saint Lucia."


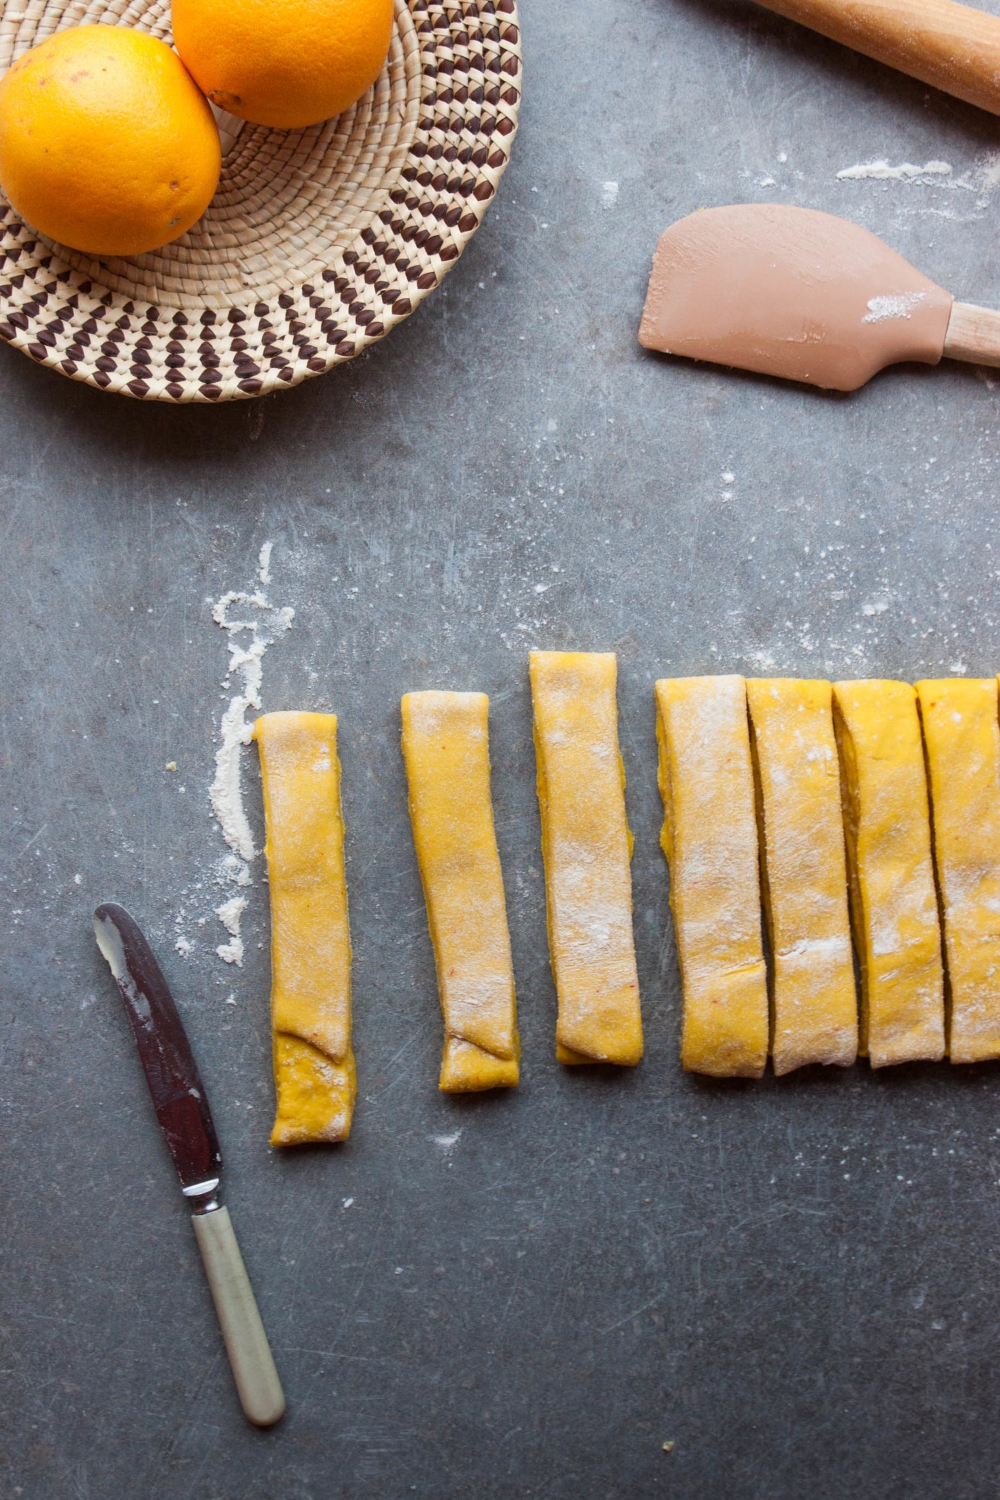
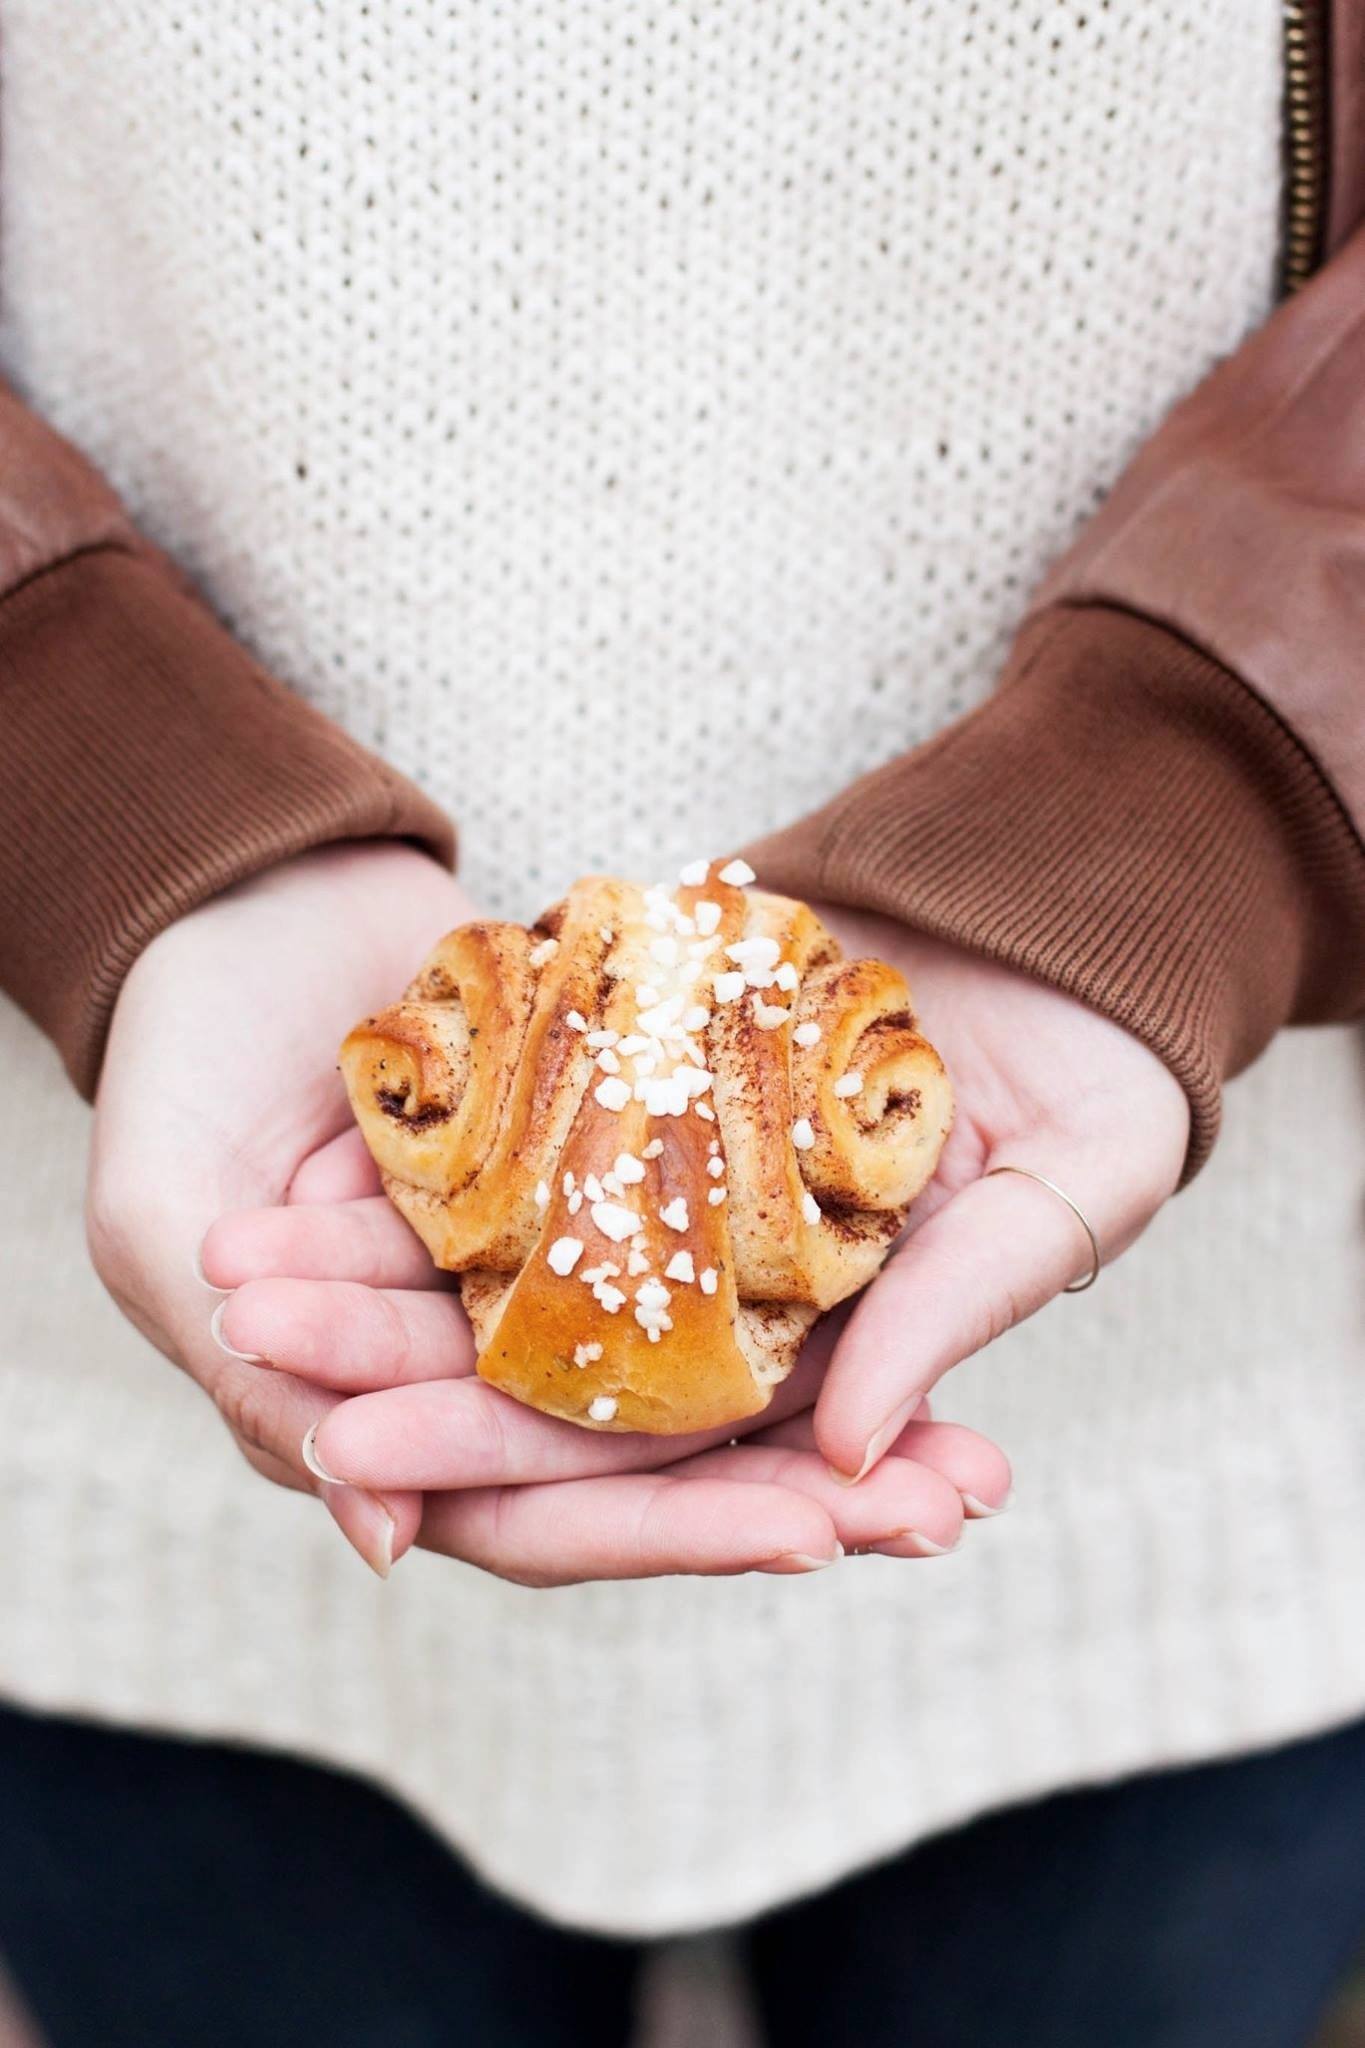
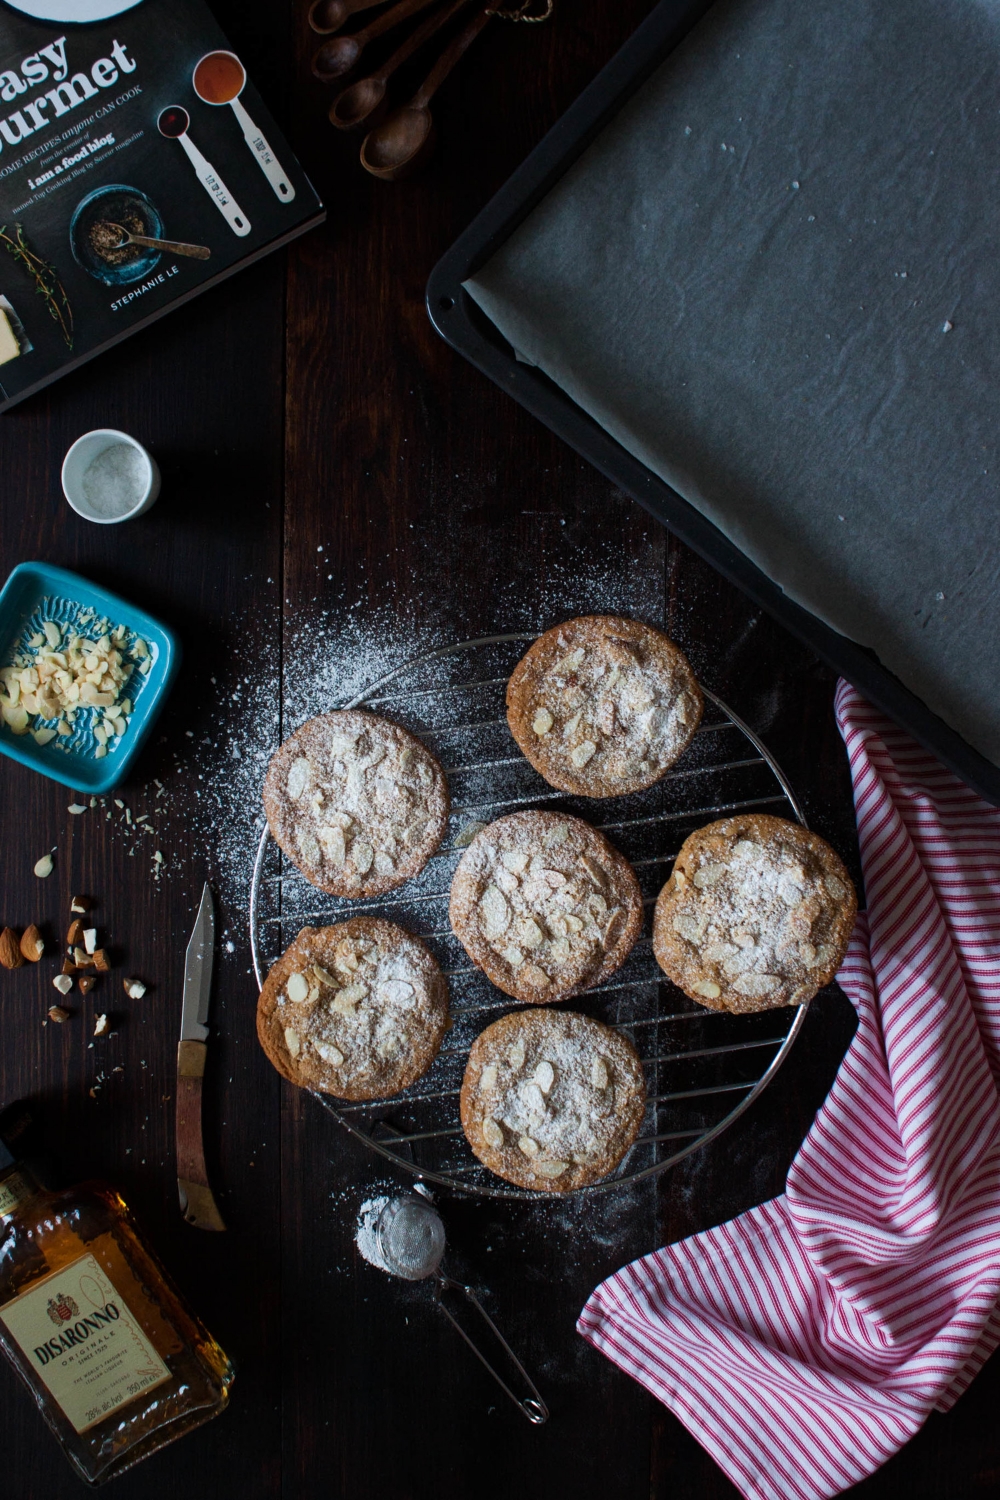
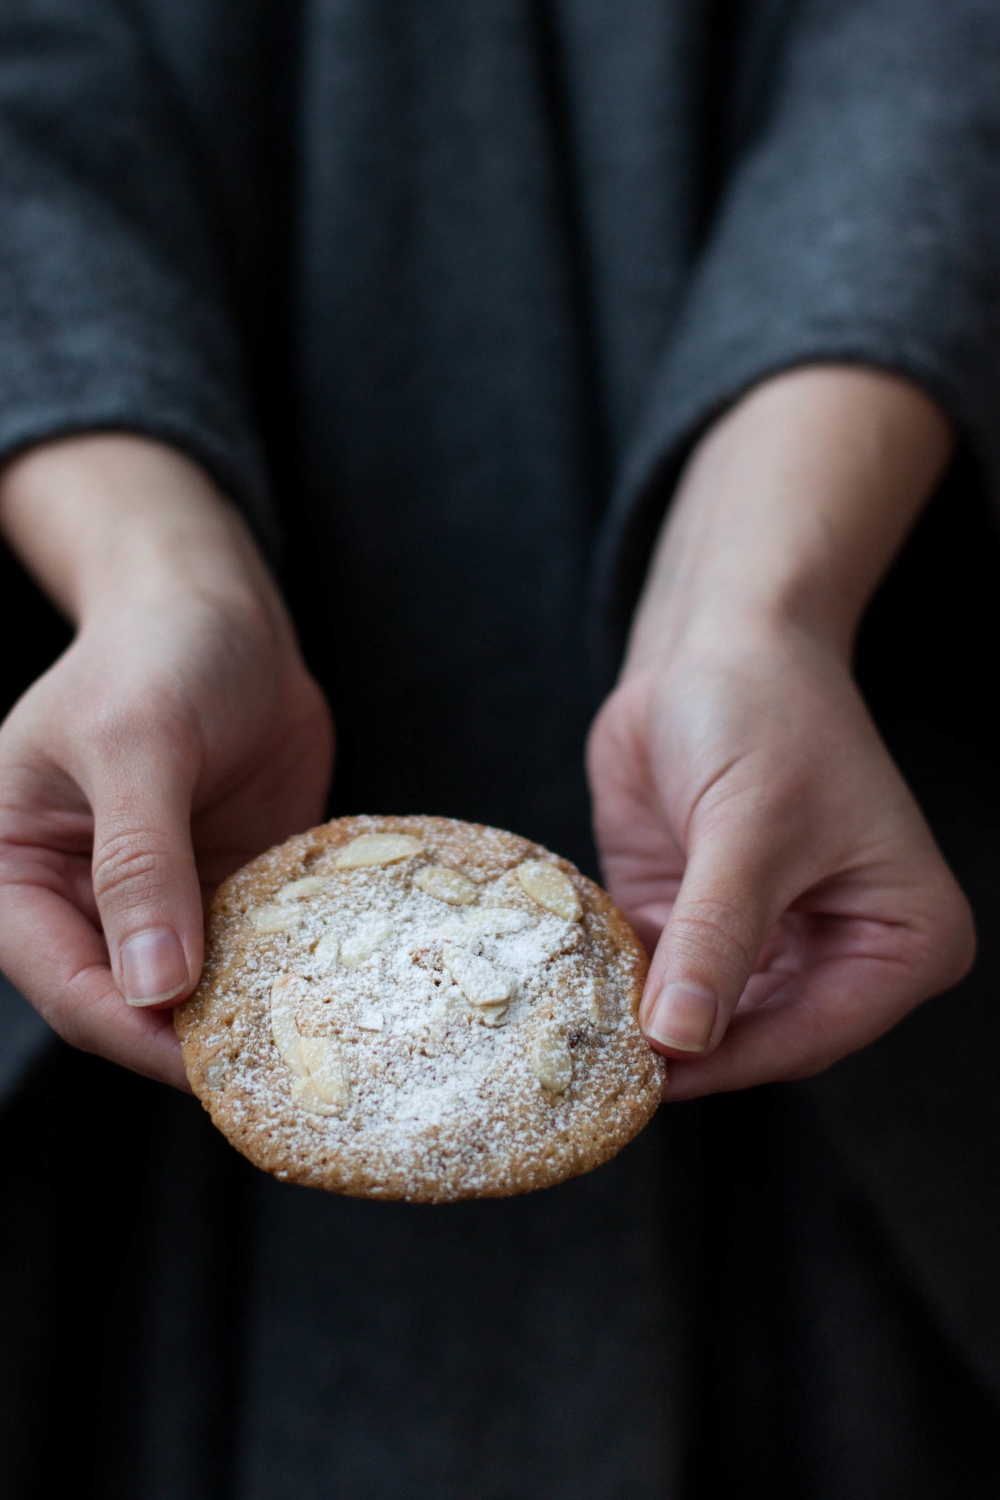
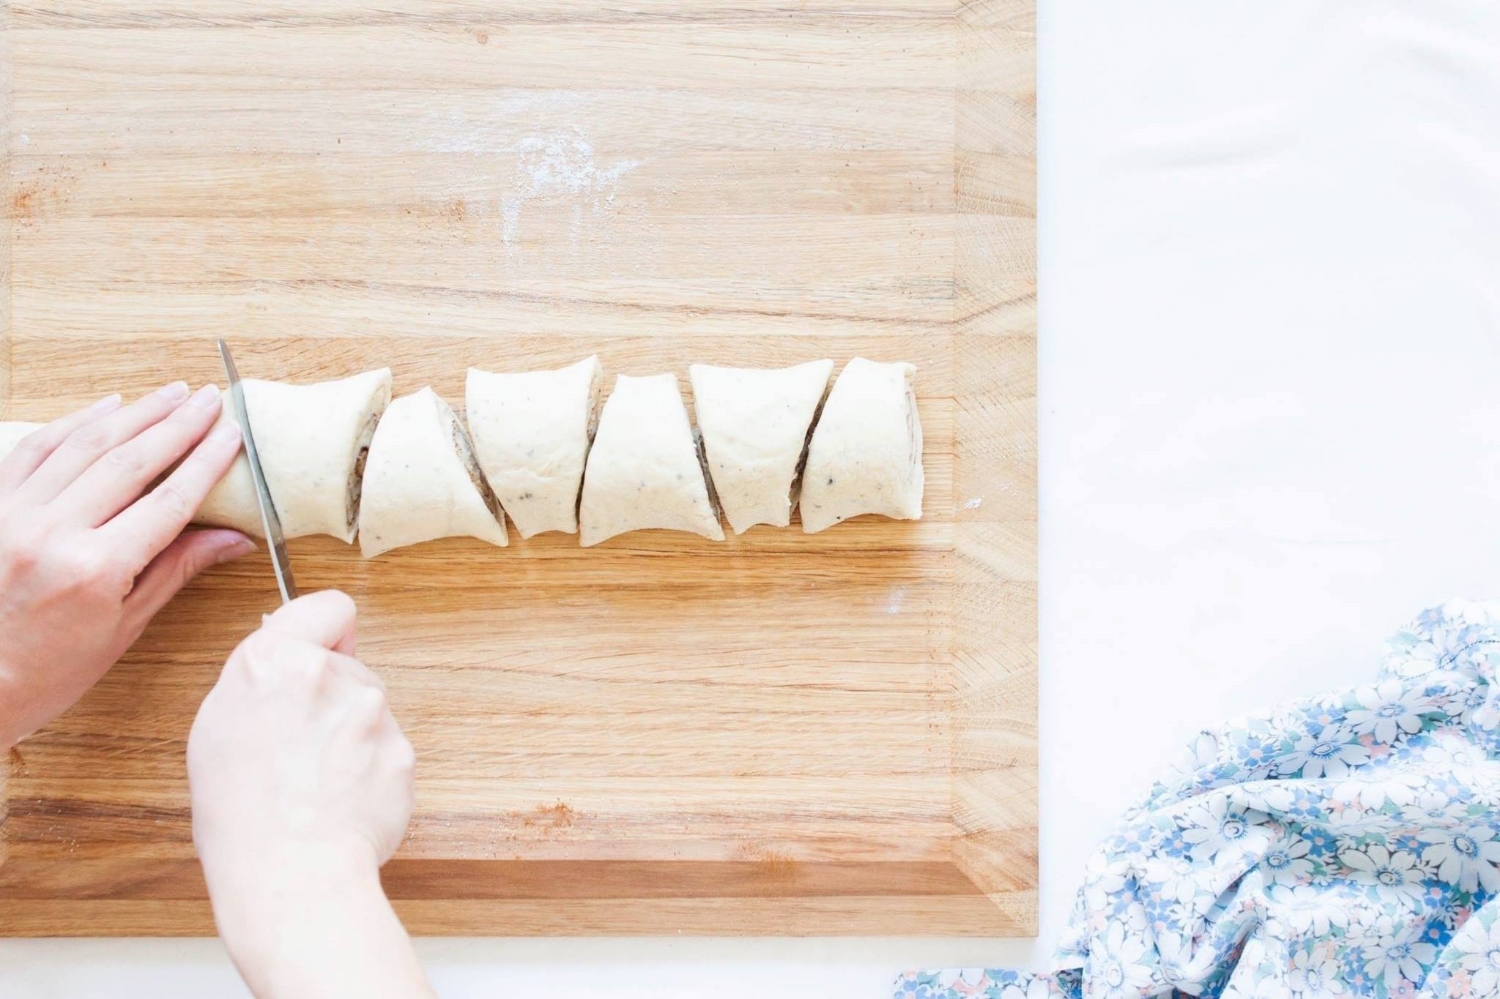
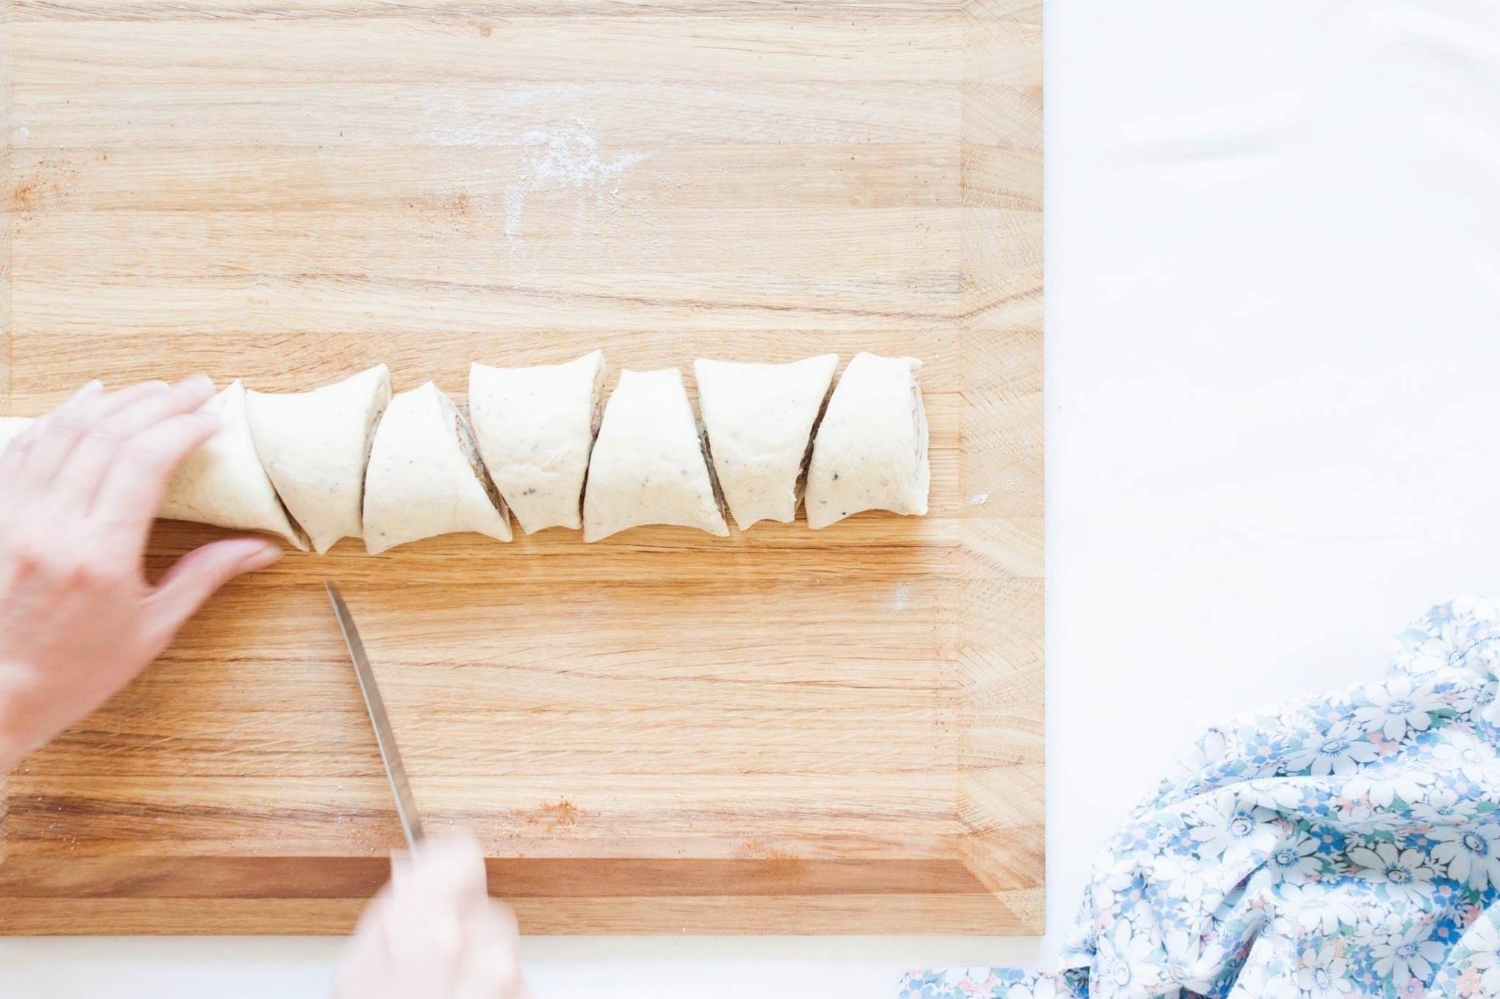
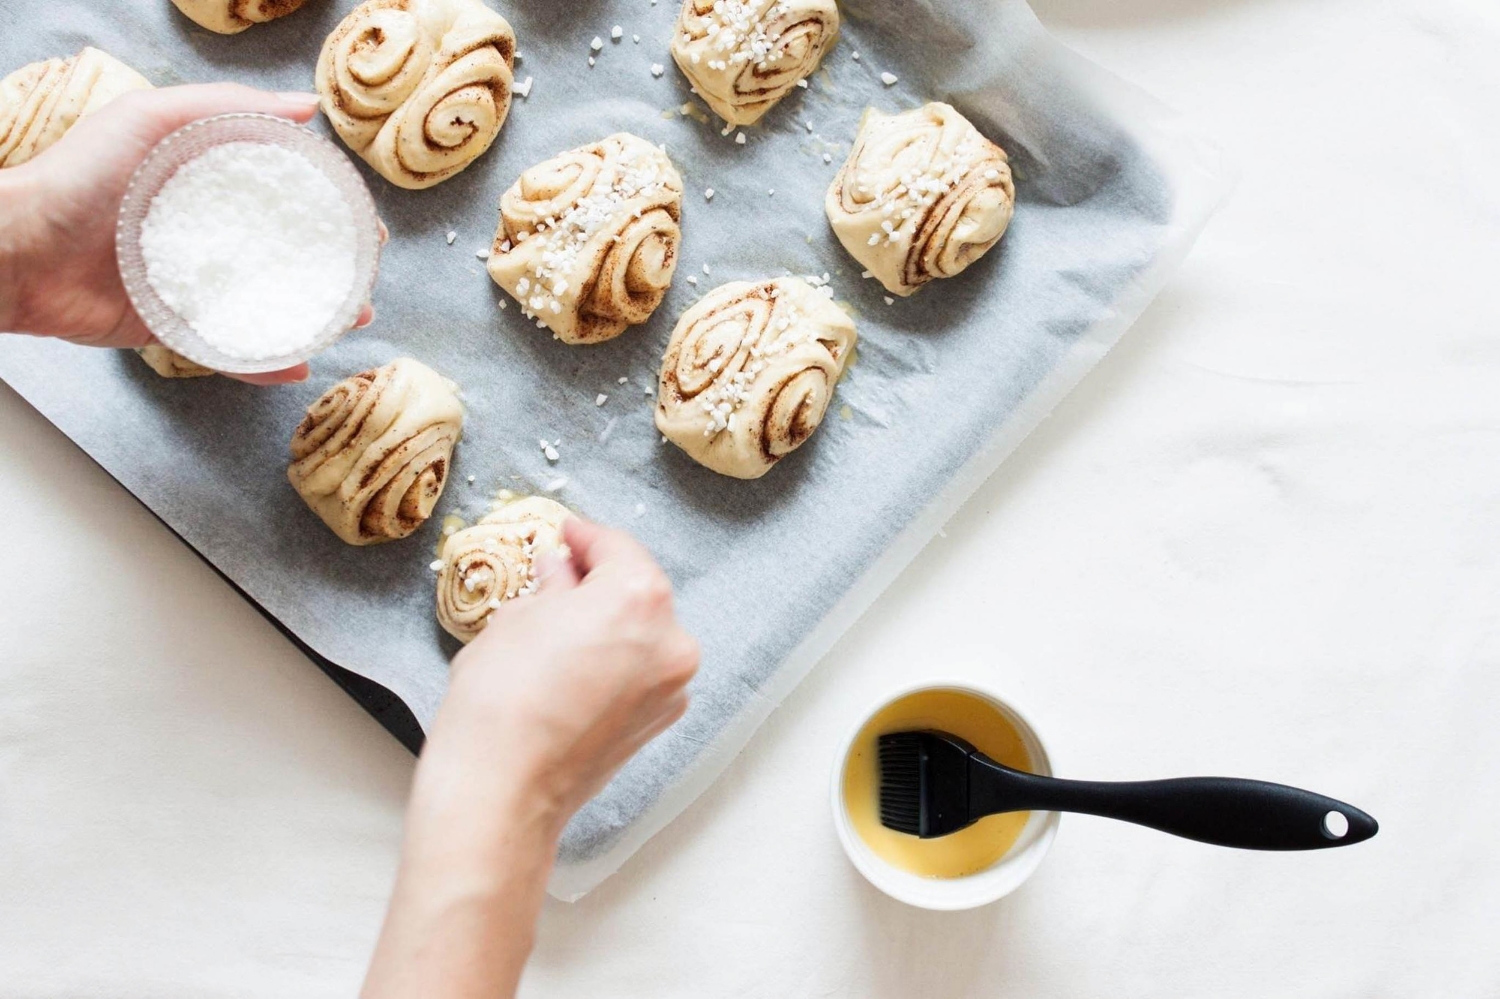
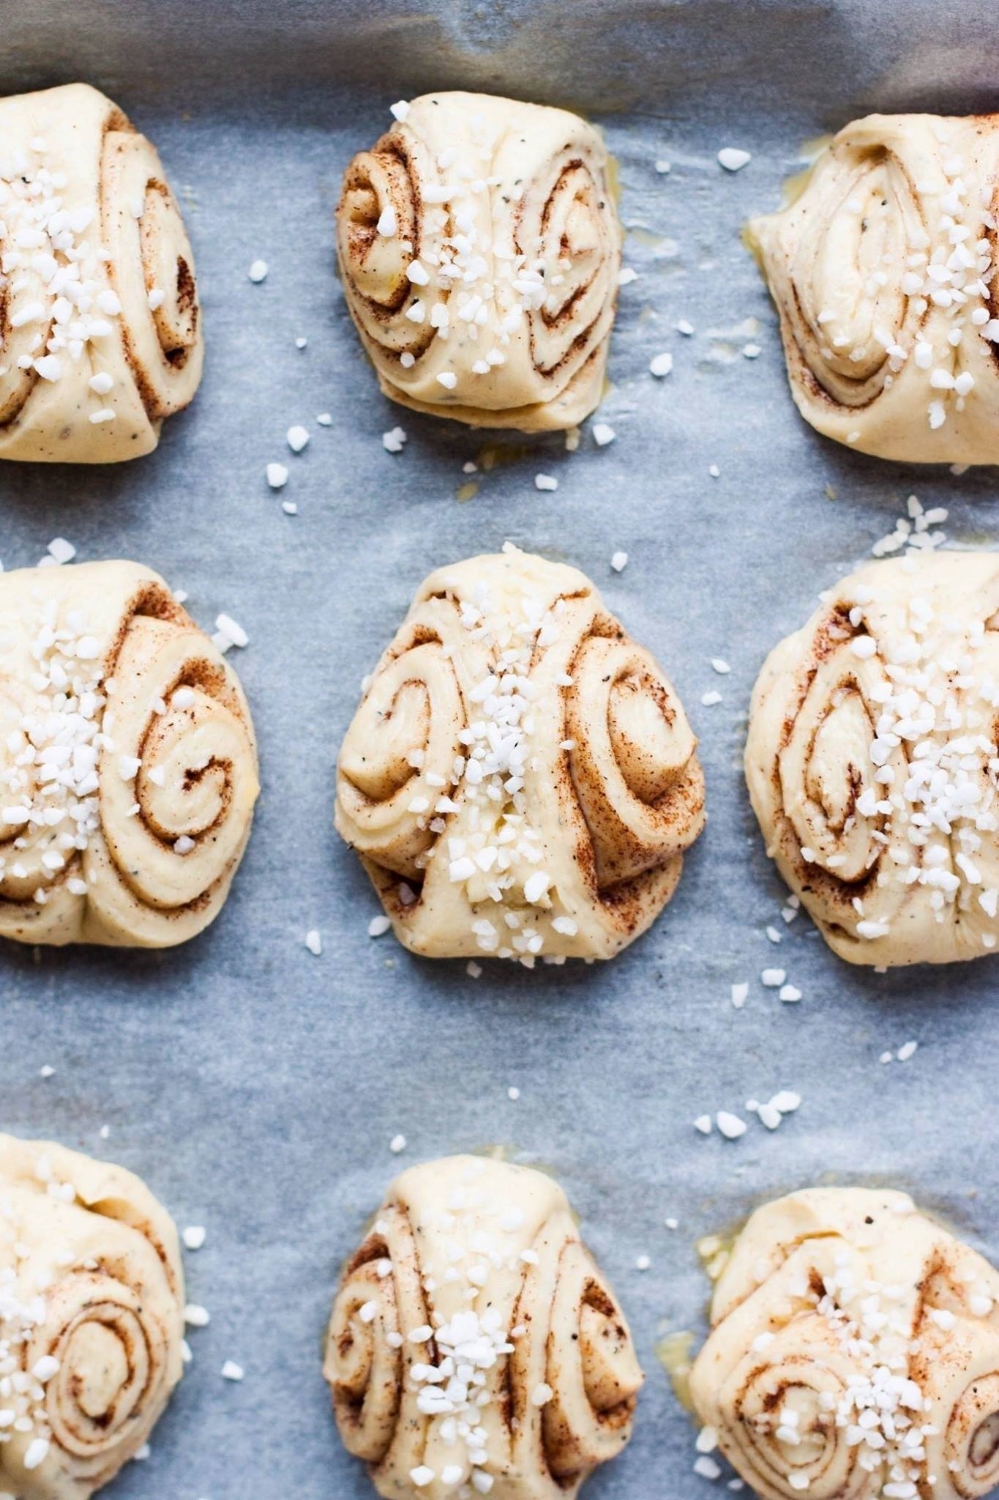
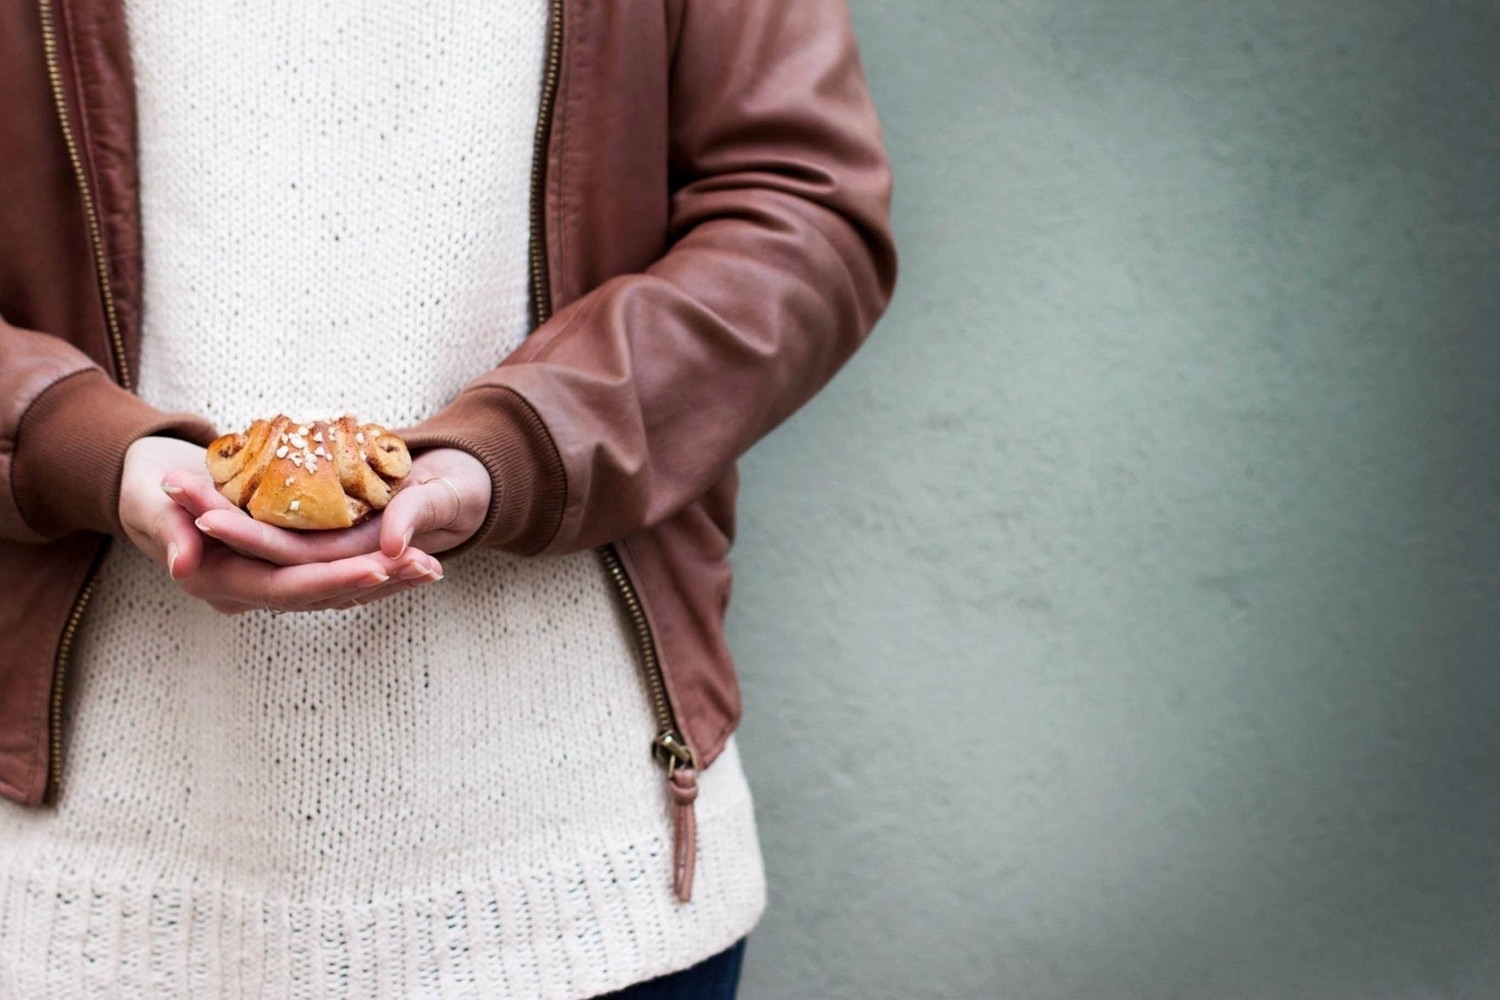
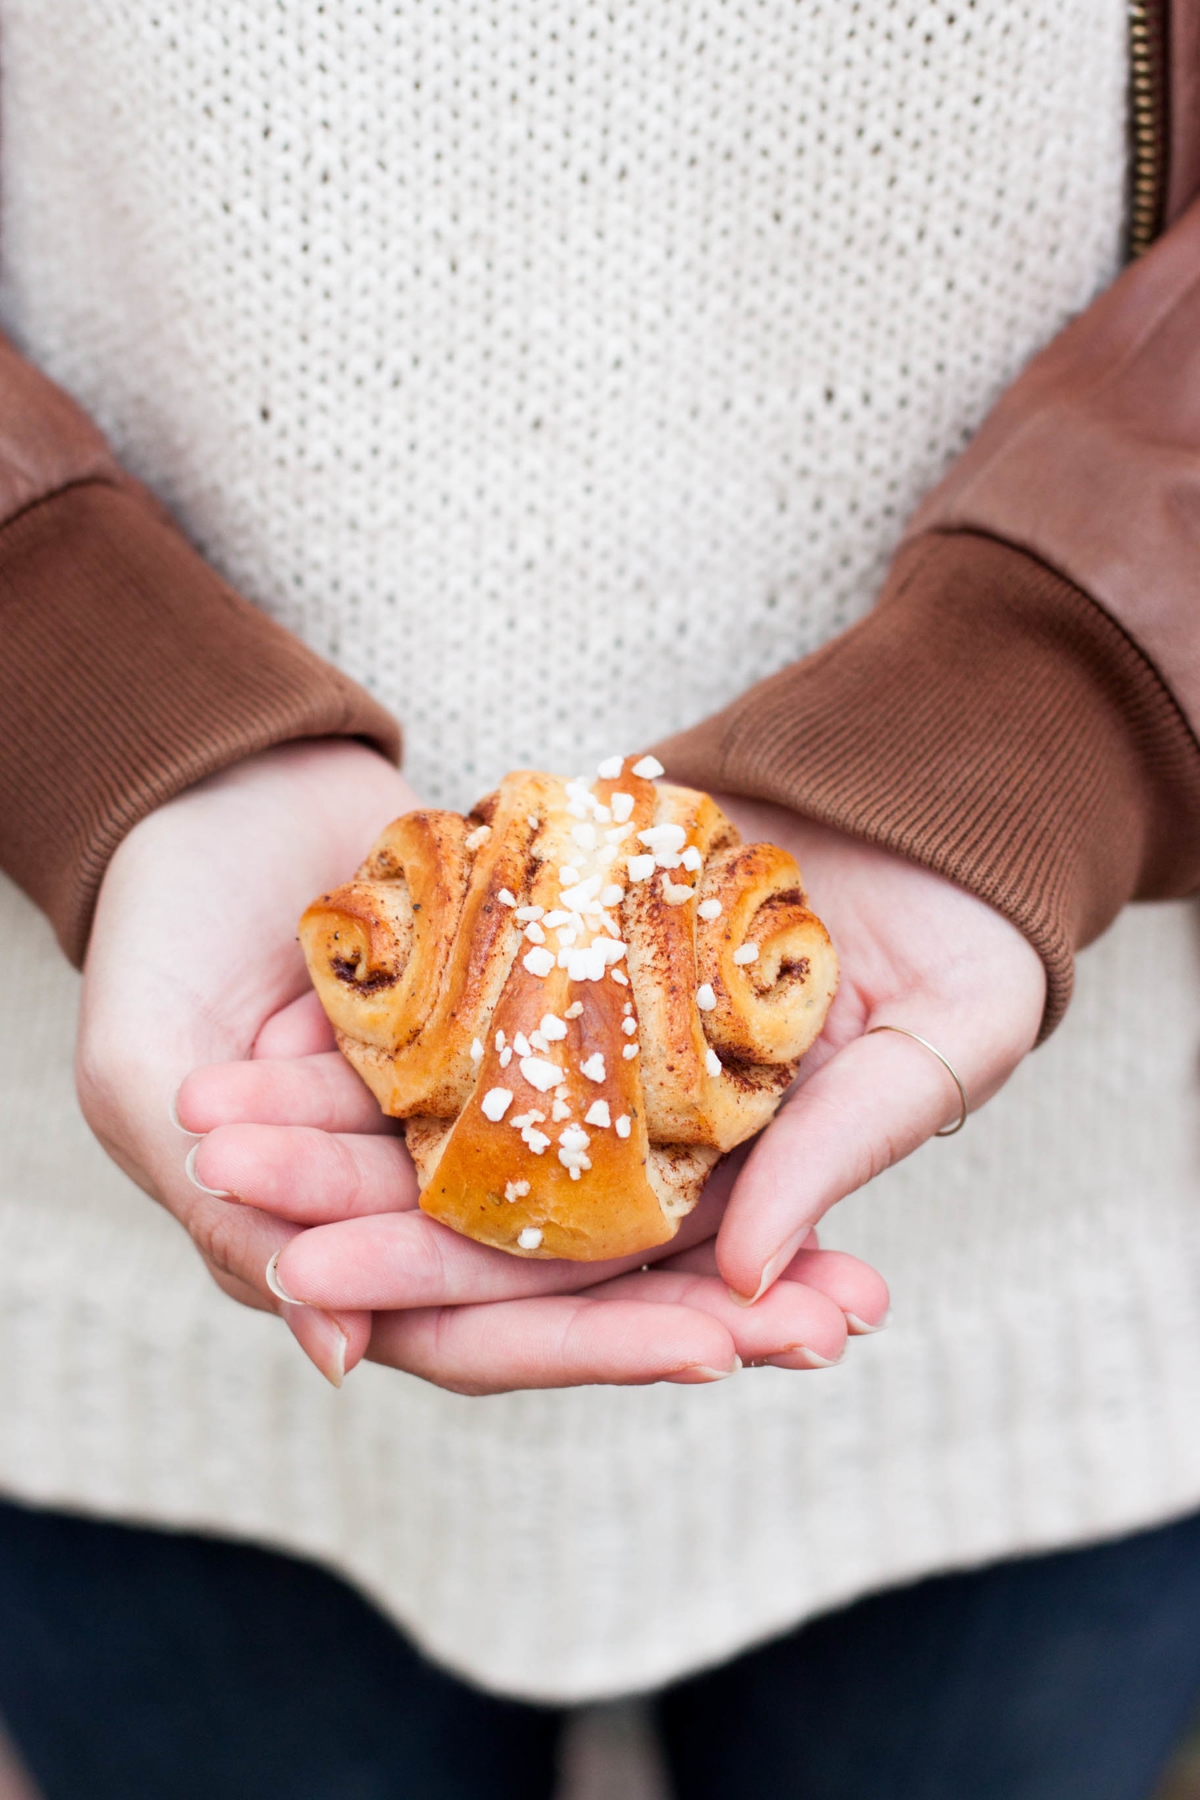
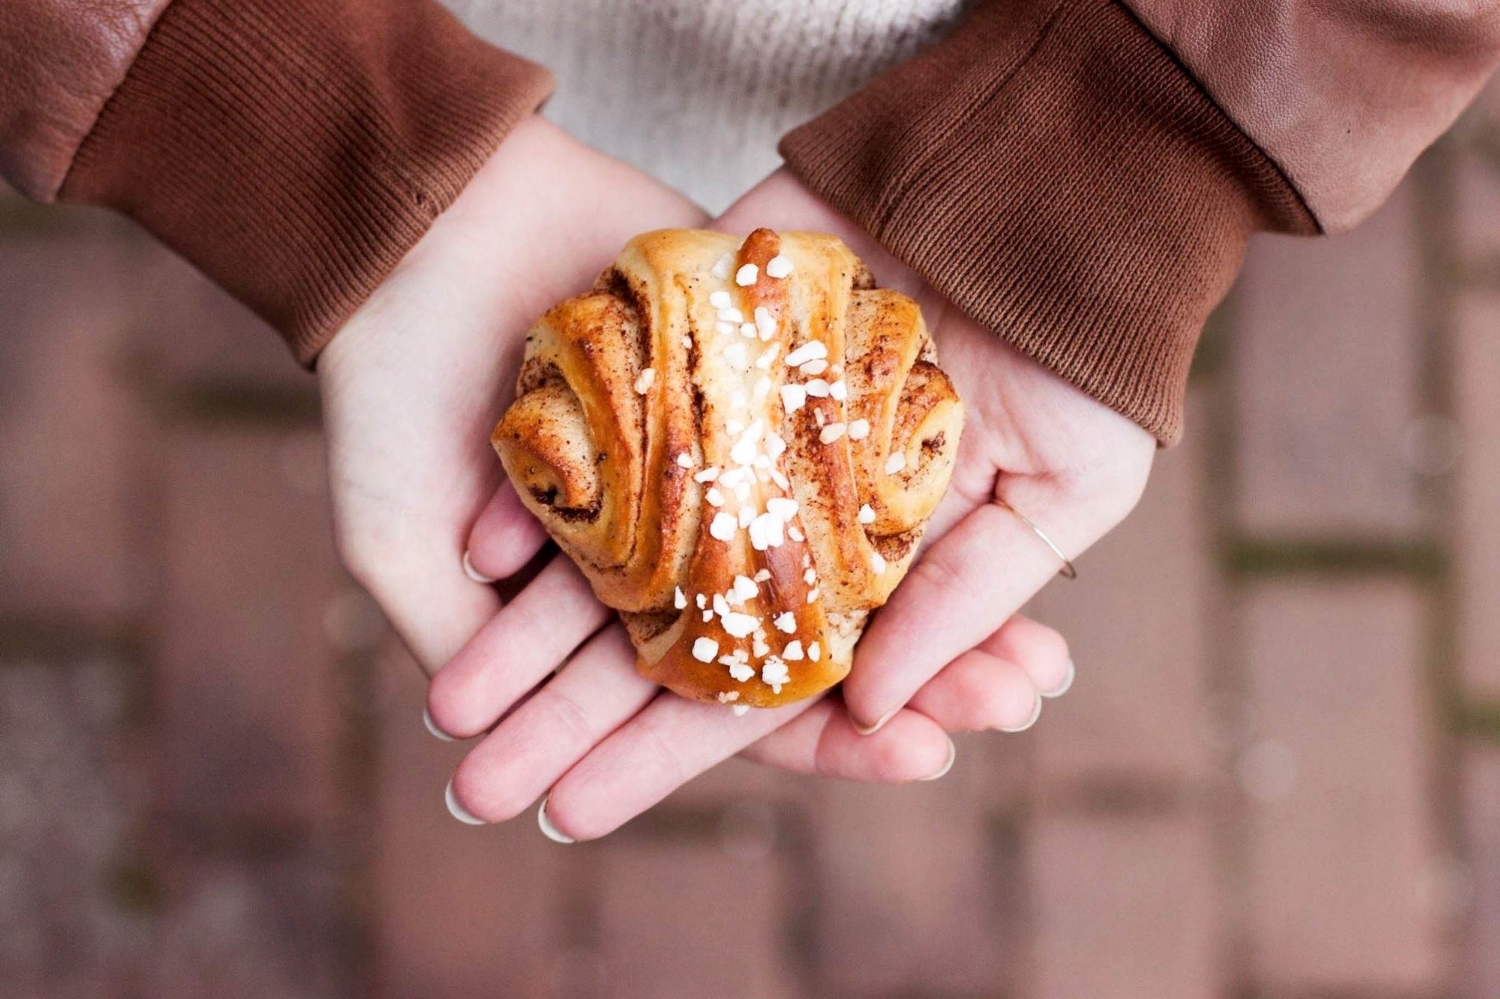
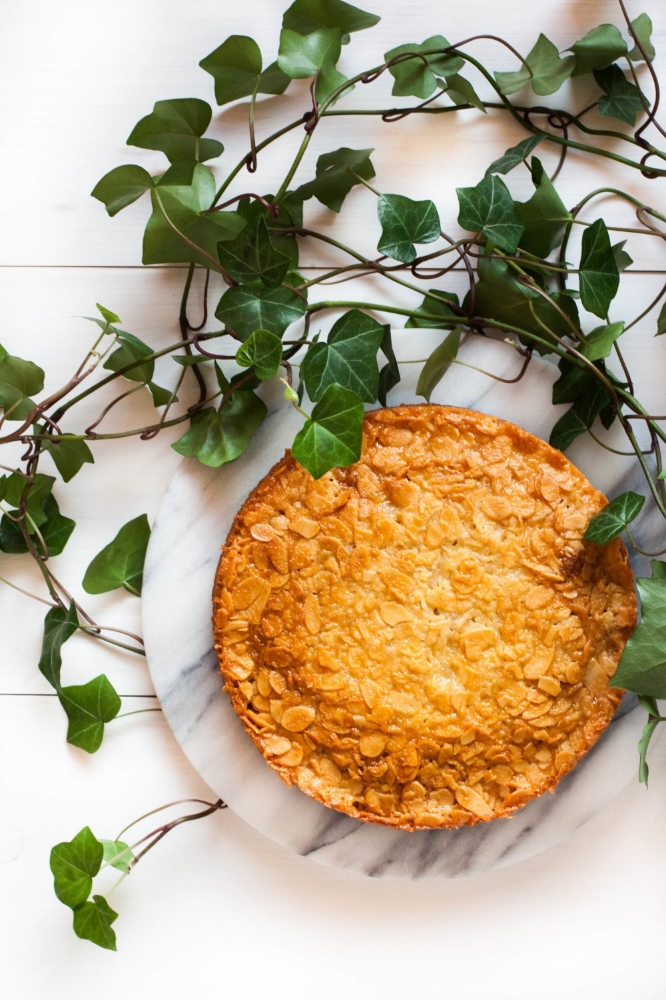
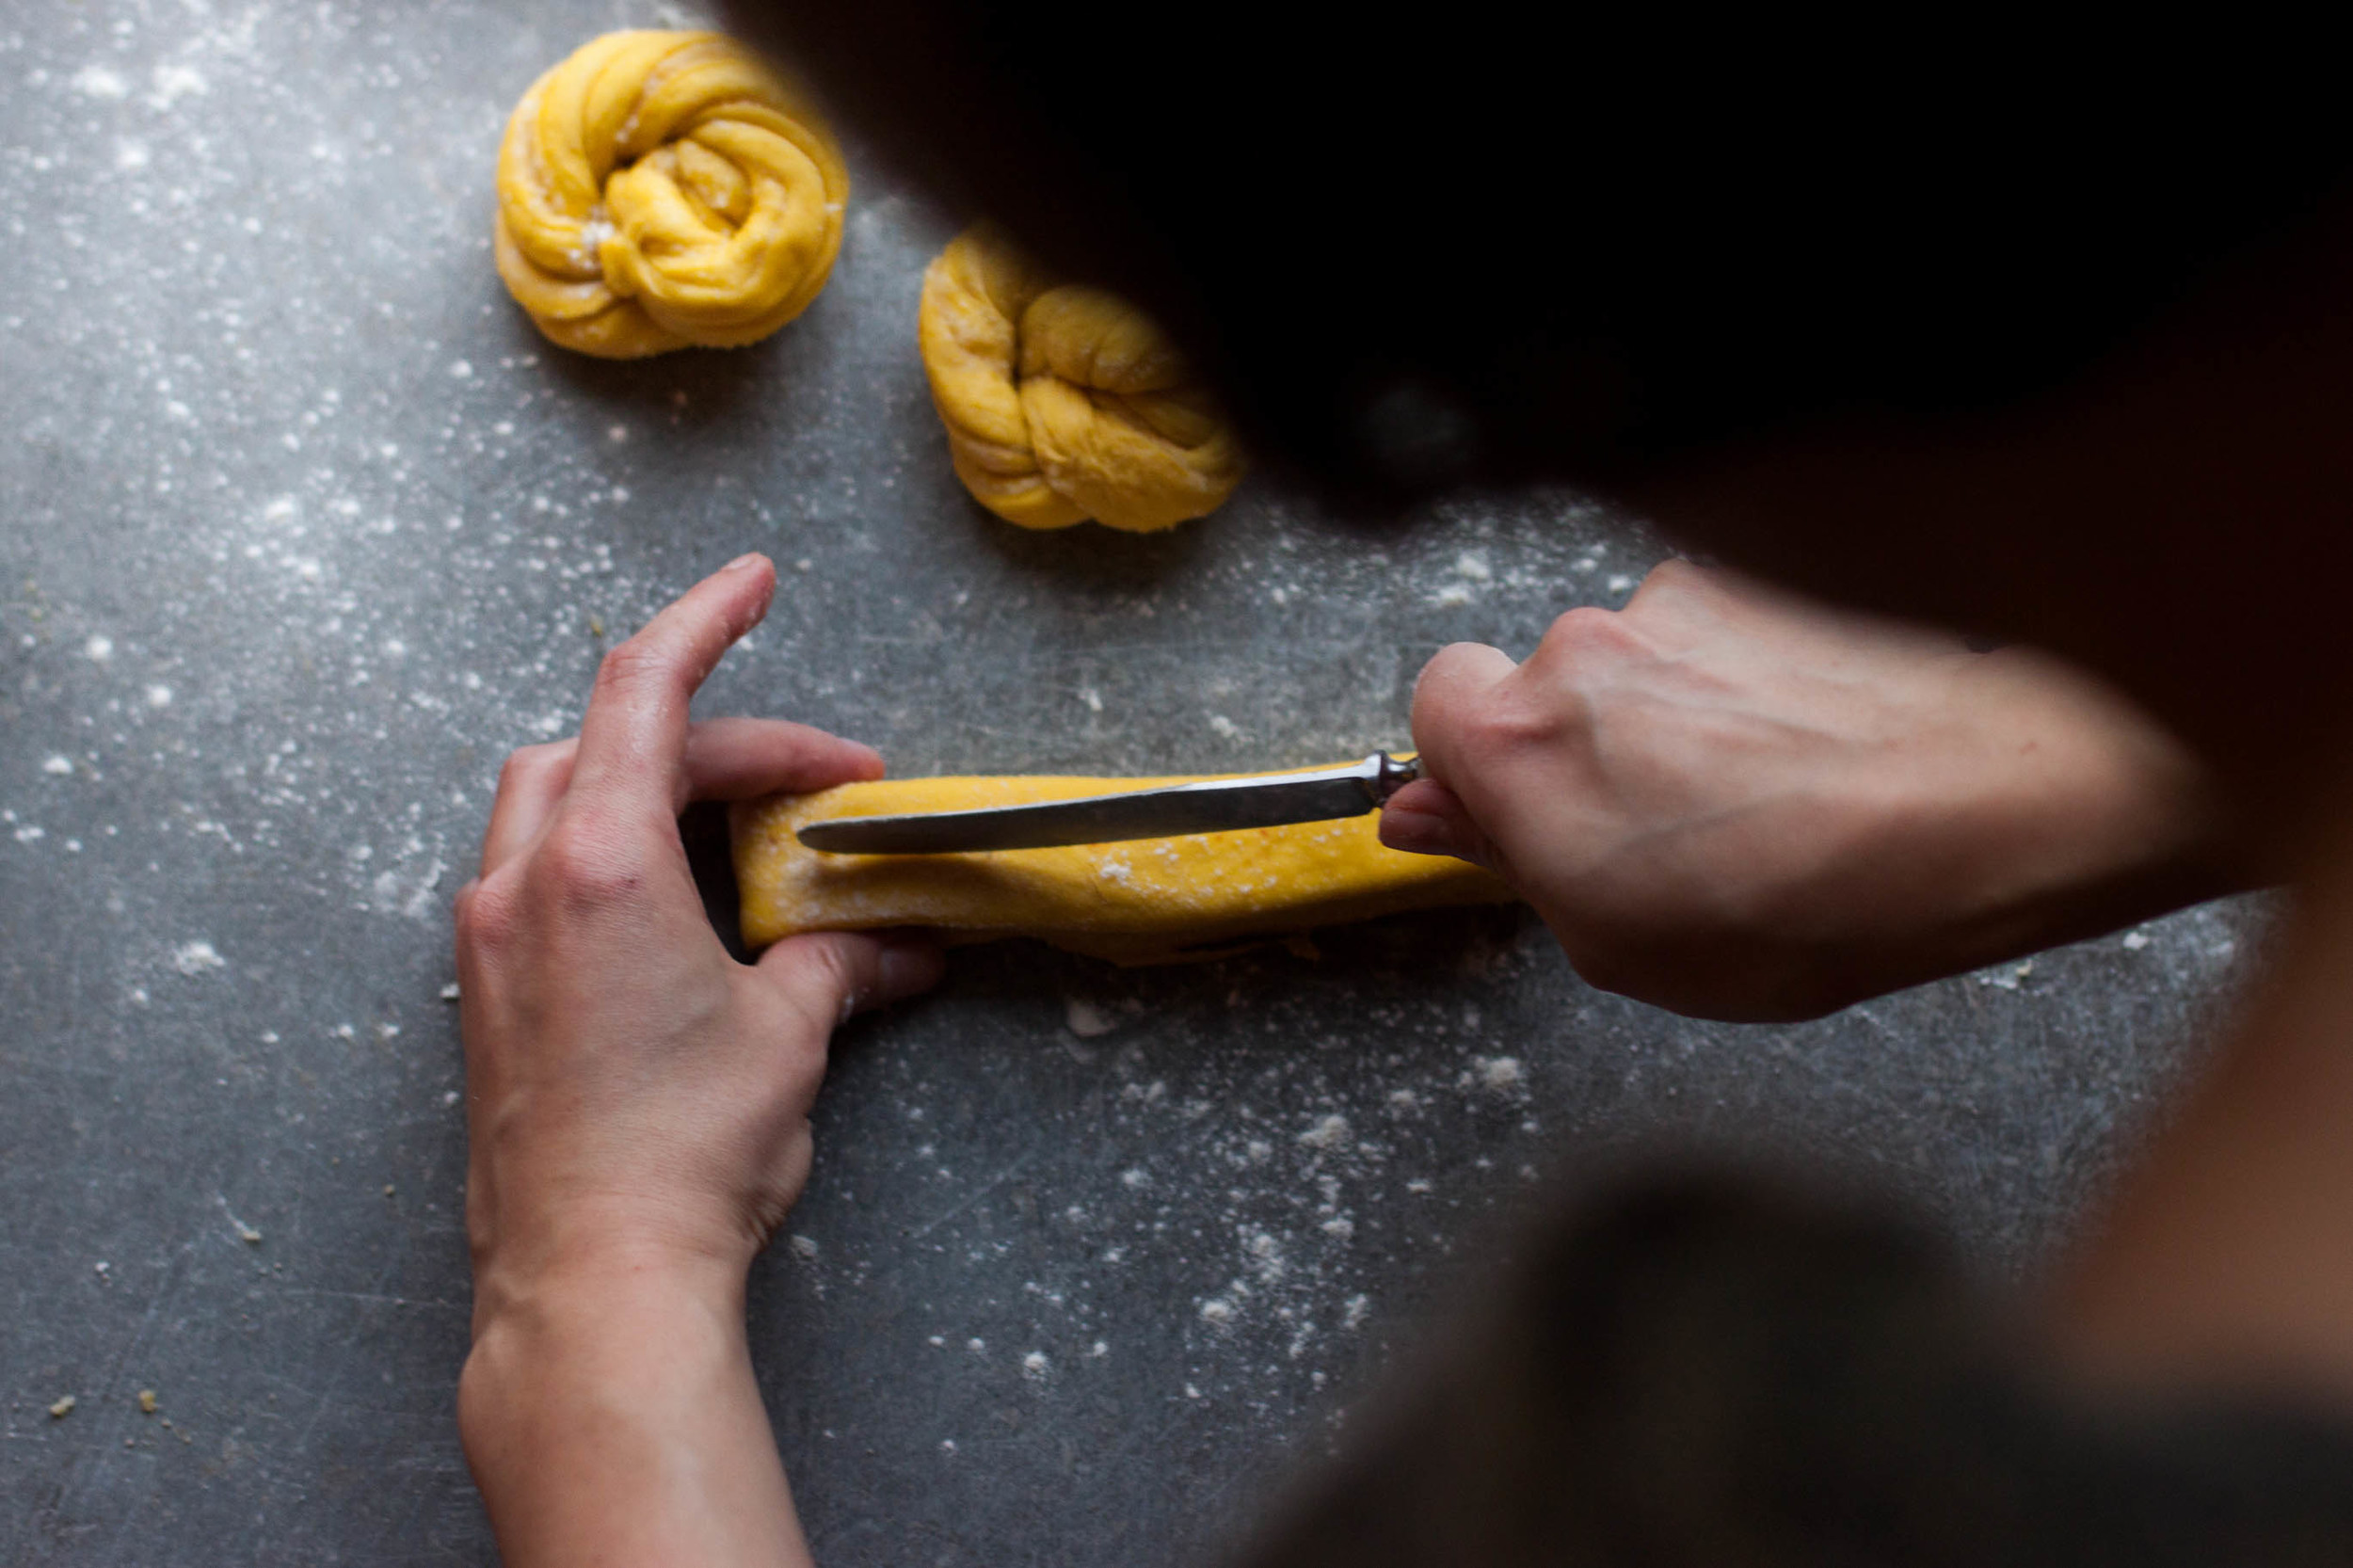
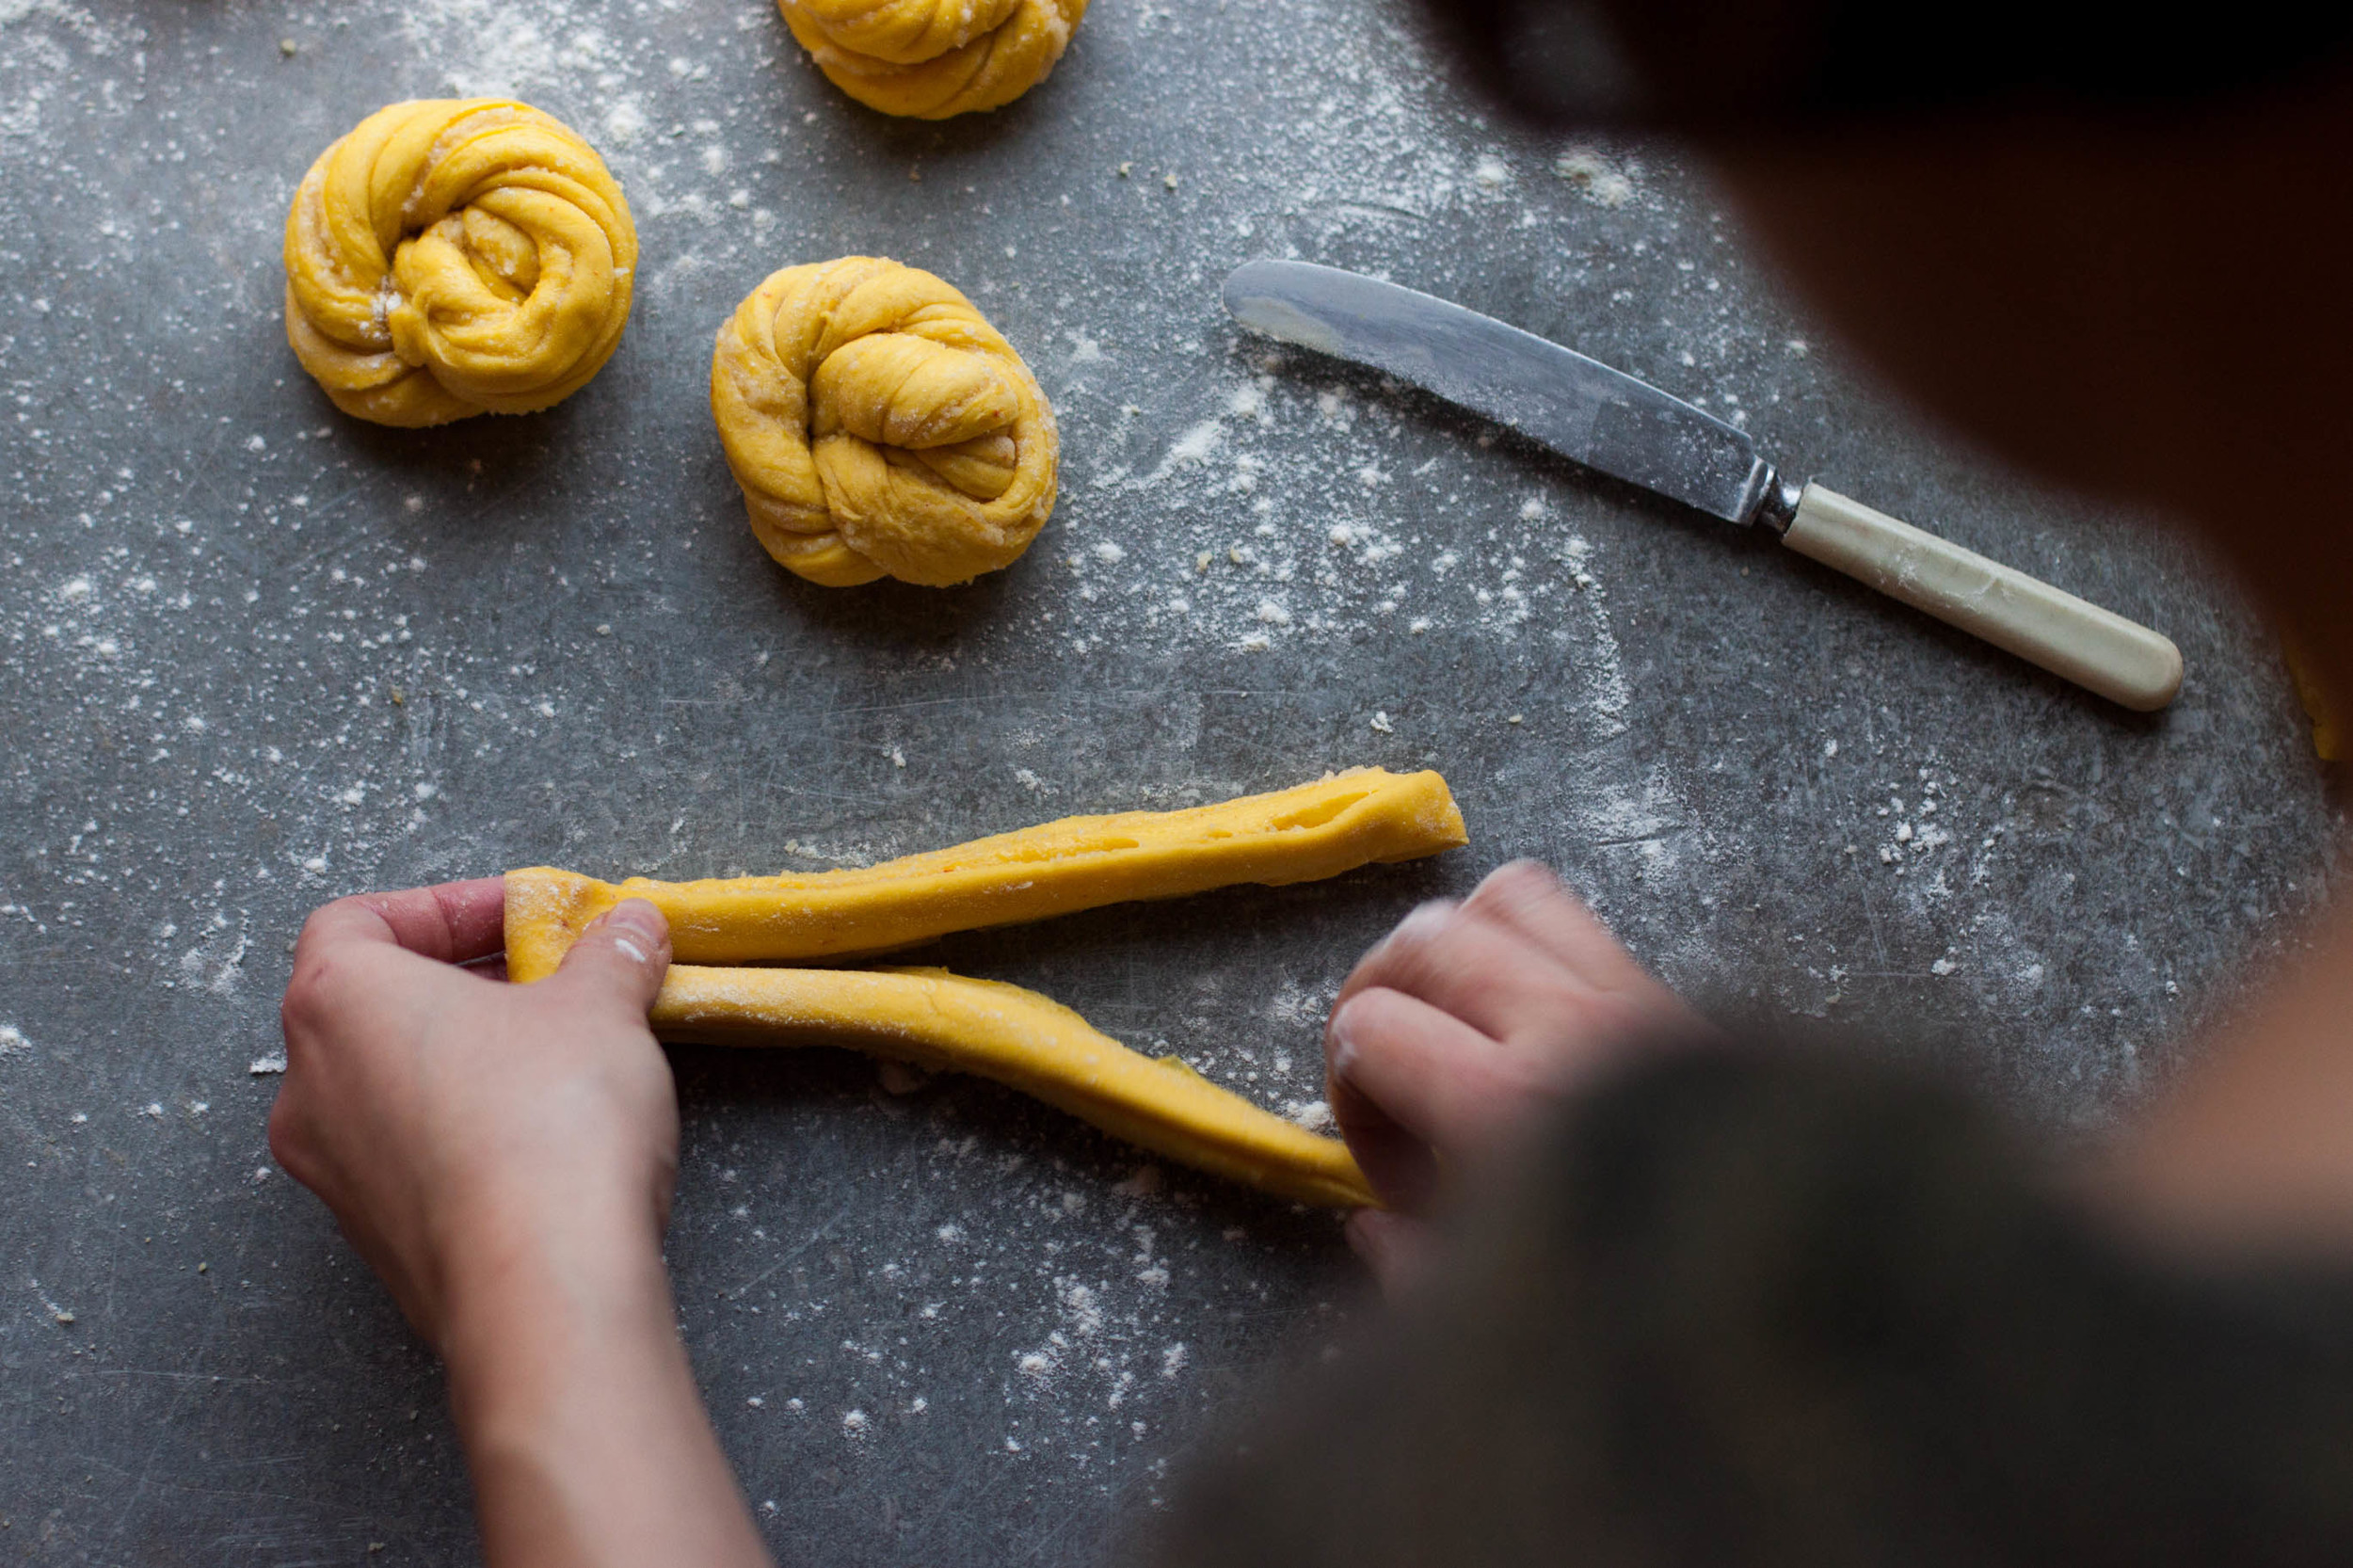
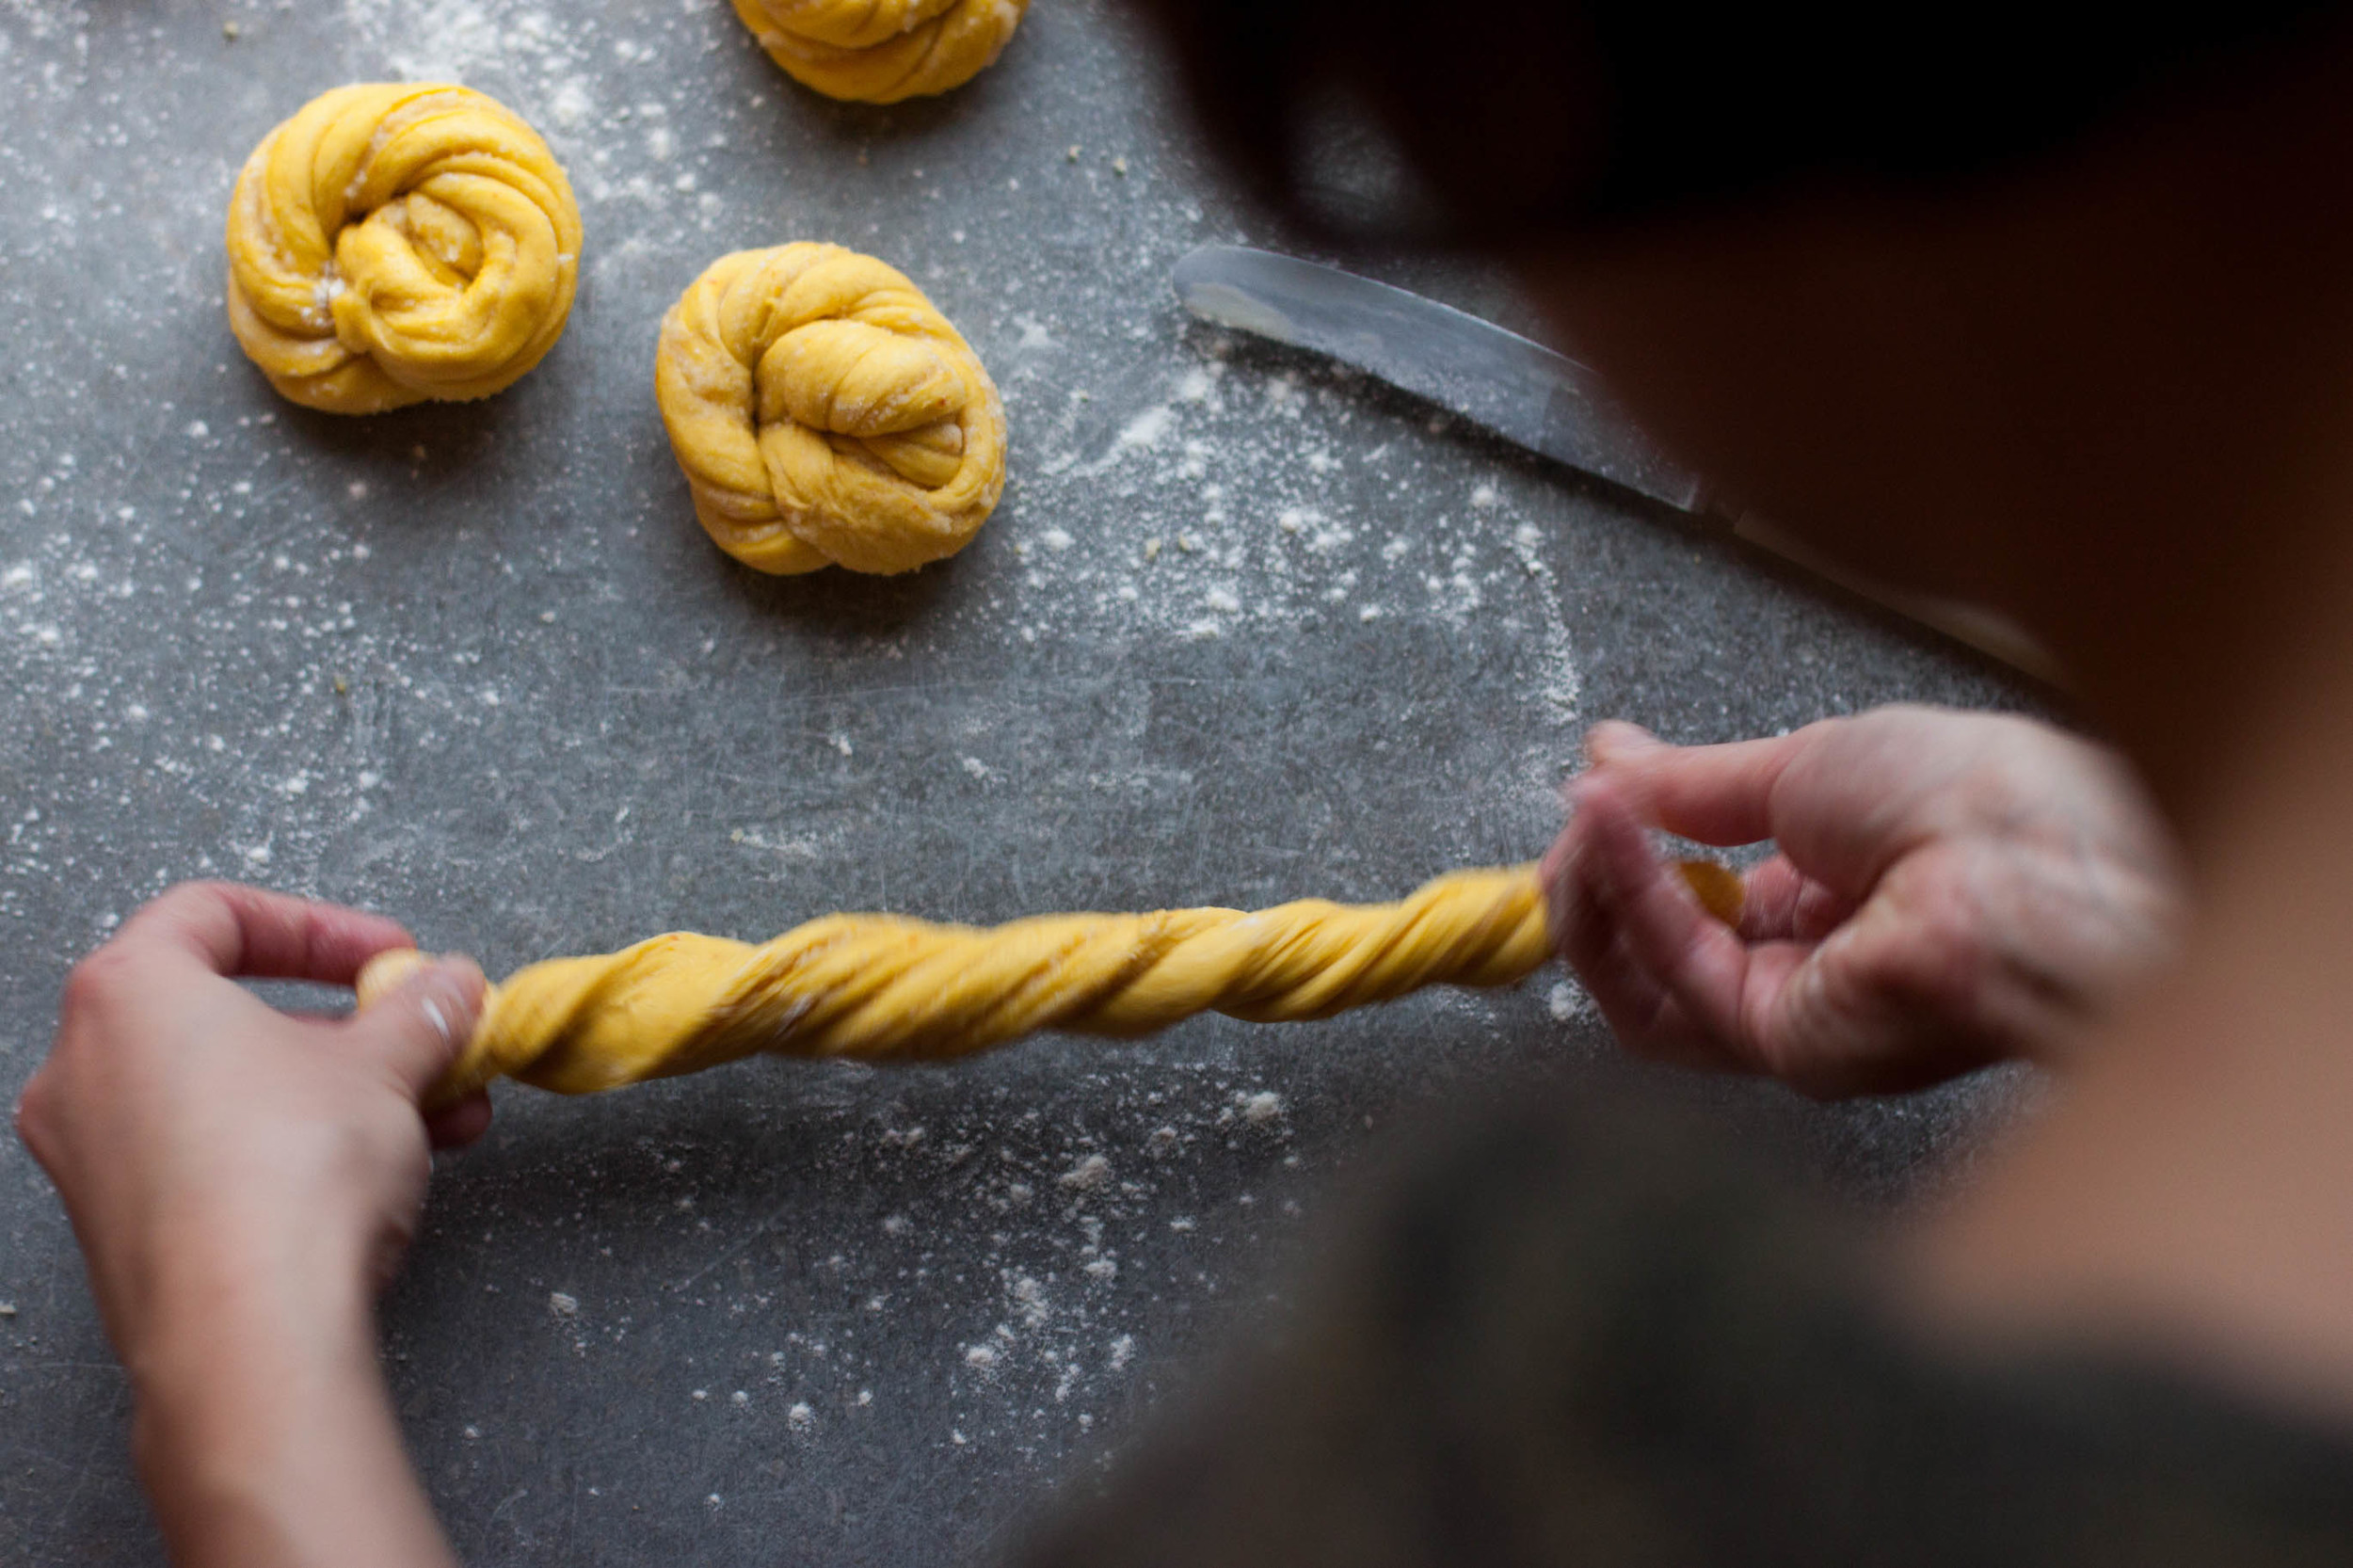
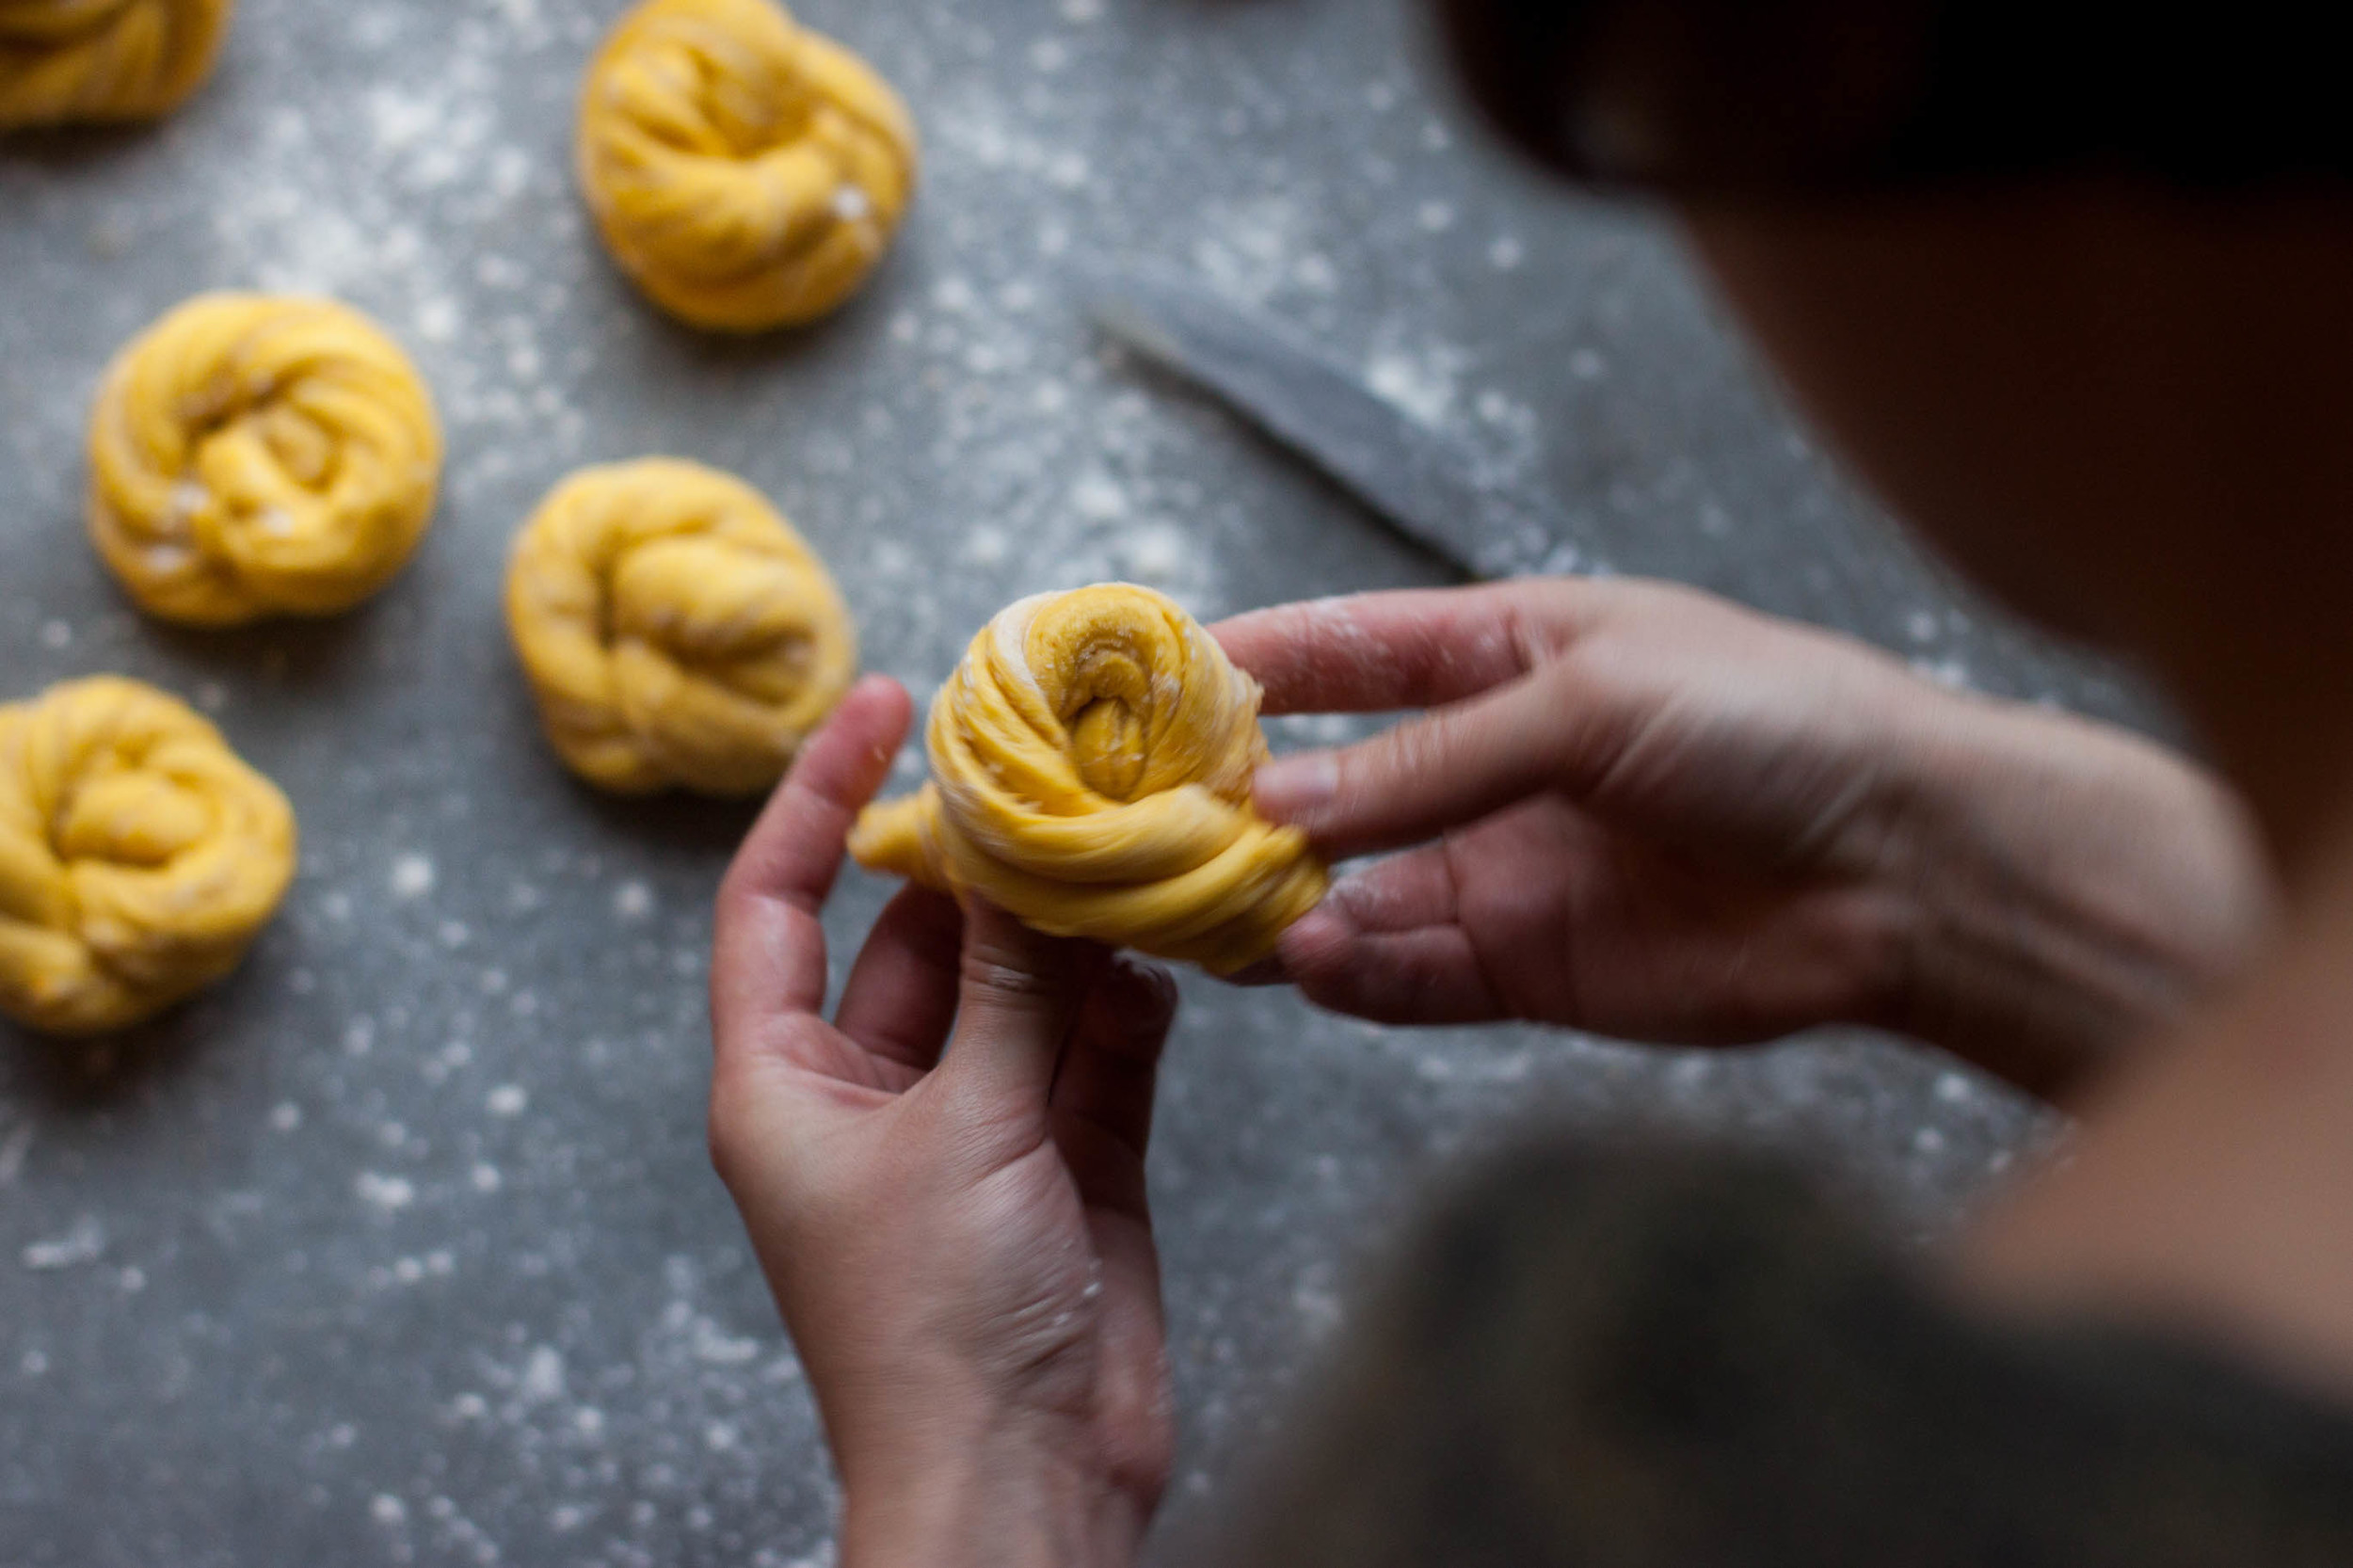
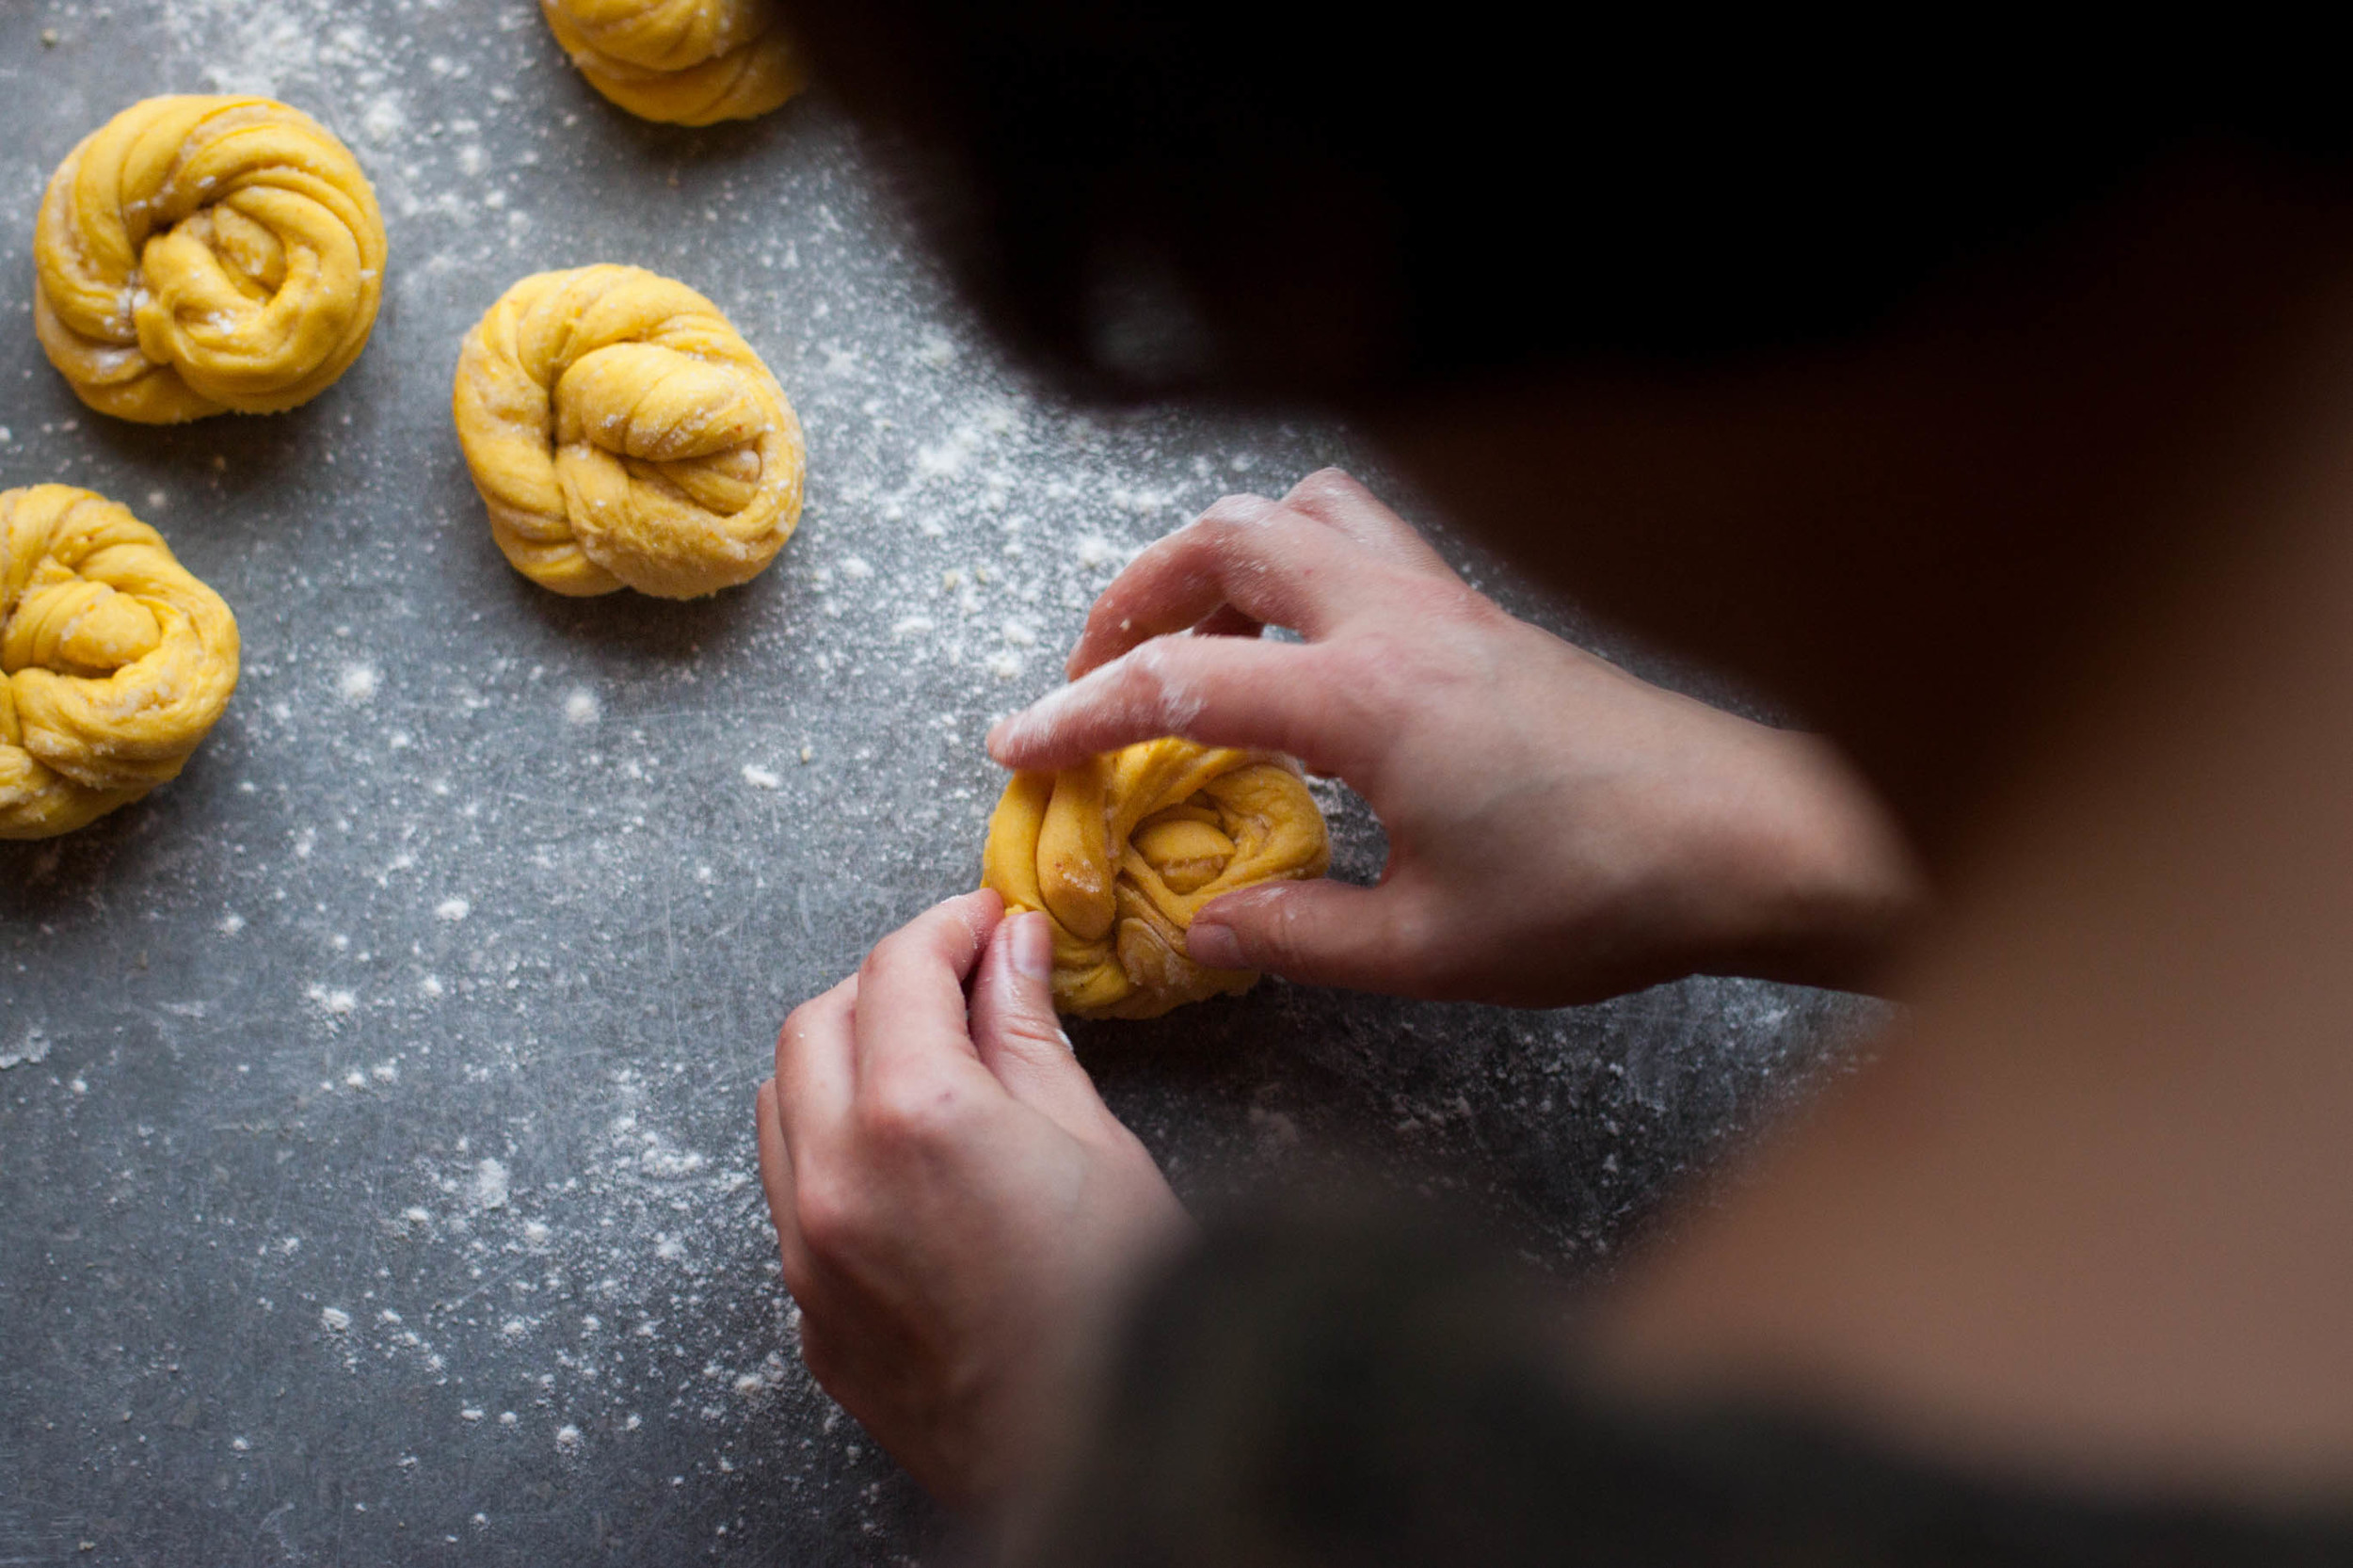
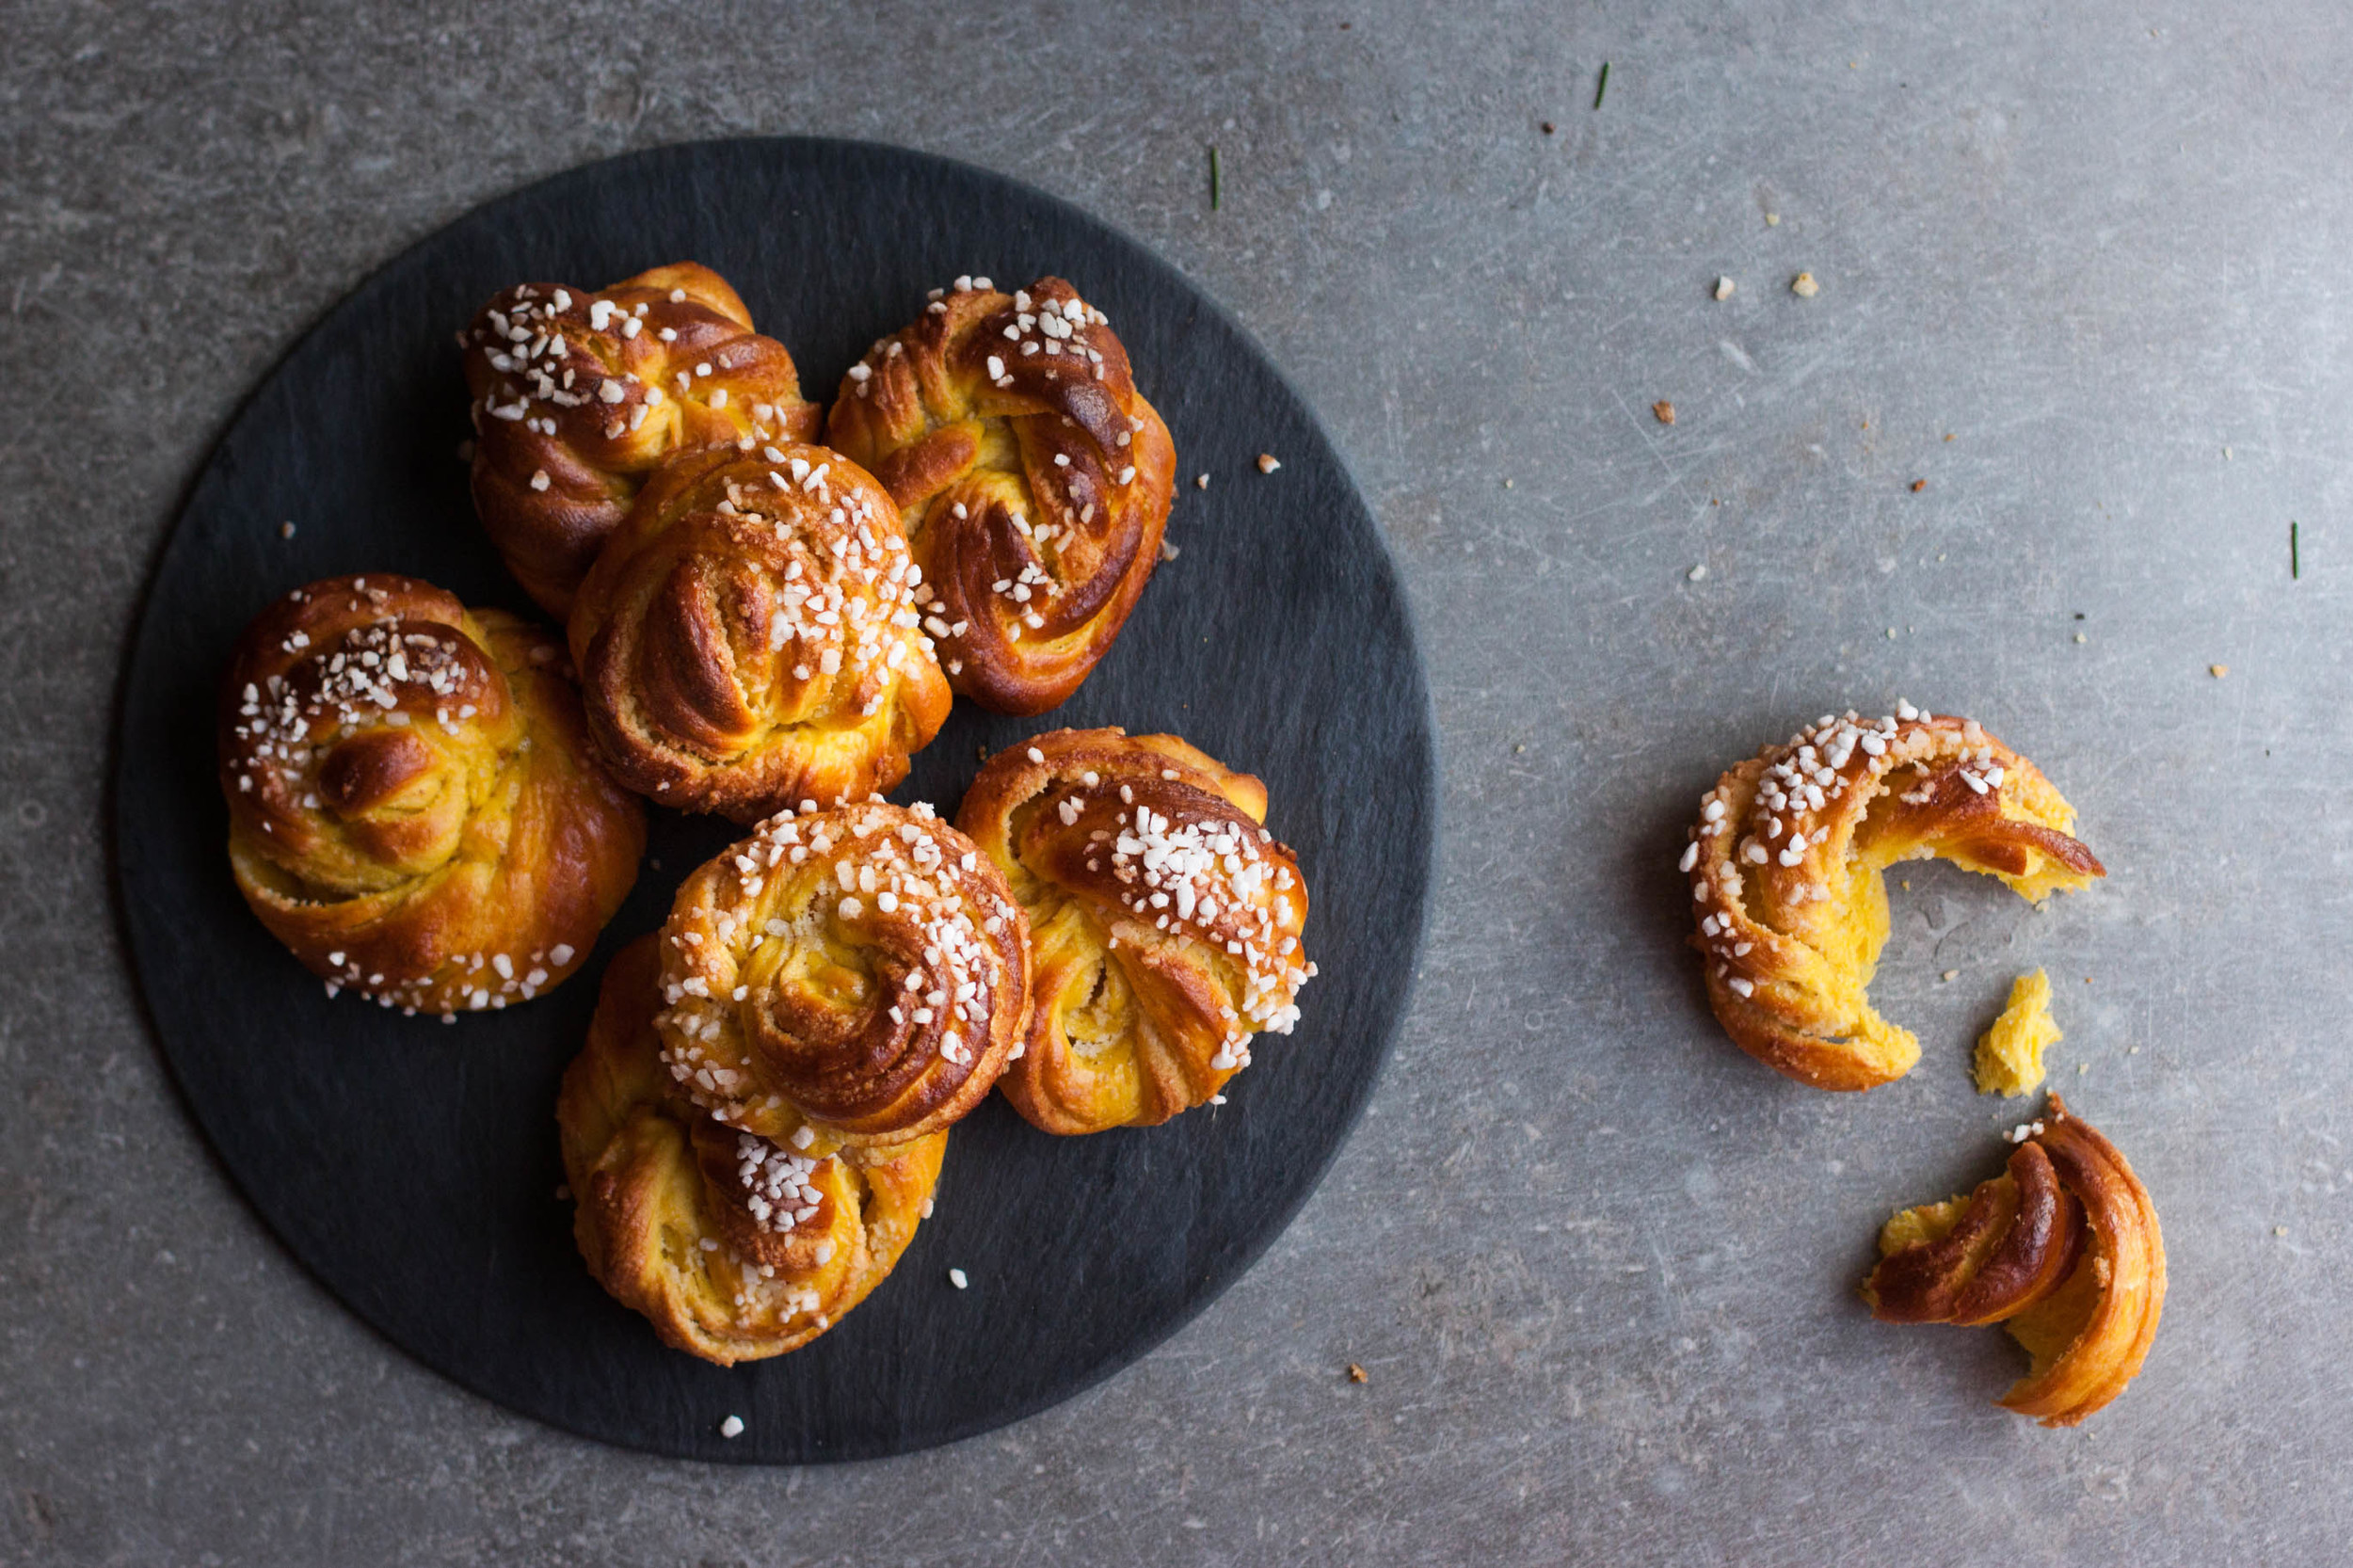
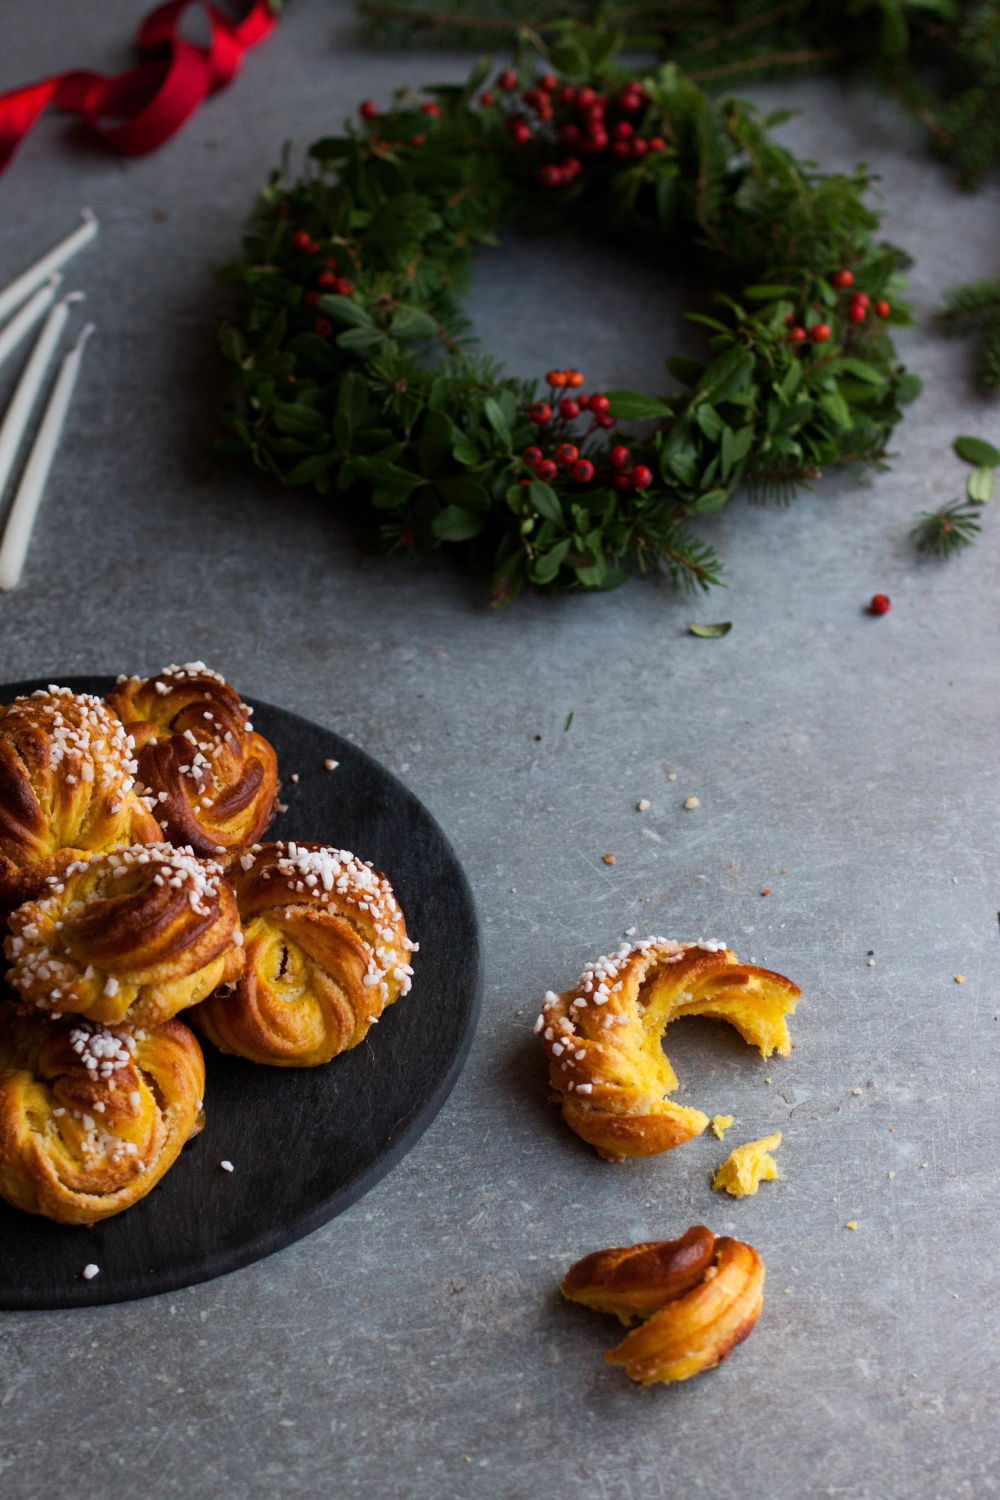
So when I was asked to contribute a holiday recipe to Life & Thyme, I knew I had to share a Saint Lucia's Day treat. As I already shared the traditional saffron buns last year, I decided to create a new version of the old classic. I used the basic Nordic cardamom-spiced bun dough but used saffron instead of cardamom. I decided to fill the saffron buns with a delicious orange almond filling and shape them into knots. The result was everything I could have asked for, or to be honest, it was even better. The orange flavor works wonderfully with the saffron and the filling makes these knots a treat made in the Nordic winter heaven.

You can read the recipe on Life & Thyme where I also share how I'm spending my Christmas. One word: unplug.

Should you be interested in Saint Lucia's Day and how it's celebrated here in the Nordic countries, I recommend watching the fun and informative video on the official sites of Sweden.

Happy baking!


Related Posts

Christmas Baking Kickoff – Almond Cookies with Amaretto

Almond Cookies with Amaretto | My Blue&White Kitchen

Today, I'm going to be a real European and ignore Thanksgiving altogether. Let's move right to Christmas and Christmas cookies, shall we? Because the truth is that after you've stuffed your face with turkey and pumpkin pie, you'll need to focus on Christmas. Next Sunday is Advent Sunday so one is officially allowed to be crazy excited about Christmas. [Okay, some of you may have started a bit earlier. Yeah, including yours truly.] For me, getting into Christmas mood means to drink glögg, Scandinavian mulled wine, on a daily basis, write Christmas cards, and bake Christmas cookies. Lots of cookies that is.

For several weeks each year, my kitchen turns into a kingdom of flour, butter, sugar, and nuts. I have a pretty long list of cookies I have to bake every. single. year., including numerous from delicious:days as well as old family favorites. For a cookie recipe to be included into my yearly repertoire, it has to be outstanding. One that you just can't get enough of. One that people fight over to get the last one from the tin box. Folks, I just found a new one.

These almond cookies are to die for. Seriously. I gave a bunch of them to people to see if it was just me who couldn't get enough of these treats (okay, just wanted to share the love). It's probably needless to say that these cookies got rave reviews. My favorite was from my dad stating in a matter-of-fact voice "You're going to bake more of these for Christmas, right?". Right.

The recipe is from Steph's debut cookbook, Easy Gourmet. Most of you probably know her. She's the creative soul behind i am a food blog. The one who puts miso in her mashed potatoes and makes ridiculously cute Totoro grilled cheese (that your friend sends you images of via WhatsApp and you reply with a Totoro cake pic). She also happened to be Saveur Magazine's 2014 Editor's Choice for Best Cooking Blog AND Blog of the Year. Oh and did I already mention that she's one of the sweetest persons I've made friends with on the internet? Yeah, that's Steph.

Easy Gourmet is like i am a food blog but on paper. Steph made an incredible job with this book; she not only developed, cooked, and shot all the recipes but also did the layout as well! 100% her; 100% real. The book is full of tasty and approachable recipes. You can find classics, such as Paella, Porchetta, and Pavlova, but also recipes with a modern, Steph-ish twist, such as Bone Marrow Pasta, French Onion Grilled Cheese, and Lemon Meringue S'Mores. A book for kitchen witches and wizards as well as for those ones who want to become one.

These cookies are full of almondy goodness; crisp on the outside and chewy on the inside. The original recipe calls for 1 tsp almond extract but because I didn't have any at hand and because booze in baked goods is always a good idea, I used amaretto instead. Also, I belong to the range of people who love their cookies topped with flaky sea salt, so I just couldn't resist sprinkling some on top of these ones as well. I also want to mention that if you are one of those people lucky enough to live in a region free of salmonella in eggs (me!) or just aren't afraid of salmonella, then be sure to grab a spoon and dig it deep into the dough before shaping any cookies. The dough tastes excellent (also an important criteria for any great cookie recipe). I may or may not have eaten a fair share of the dough before and during the process of shaping cookies. Call me cookie dough monster.

Enjoy.


Almond Cookies with Amaretto

slightly adapted from Easy Gourmet by Stephanie Le, p. 218
makes 18 cookies

140 g (1 cup) all-purpose flour 
½ tsp baking soda
¾ tsp baking powder
½ tsp fine sea salt
114 g (½ cup) unsalted butter, at room temperature
100 g (½ cup) granulated sugar
110 g (½ cup) light muscovado sugar
115 g (1 cup) almond flour
1 egg (European size M; U.S. size L)
1 tbsp amaretto liqueur
100 g (1 cup) almonds, roughly chopped
50 g (½ cup) sliced almonds
flaky sea salt, to sprinkle

powdered sugar, to decorate


Line two baking sheets with parchment paper. Set aside.

In a small bowl, combine the flour, baking soda, baking powder, and salt. Set aside. With a stand mixer, cream the butter, sugars, and almond flour until light and fluffy. Add the egg and mix until incorporated. Stir in the amaretto liqueur. Add the dry ingredients and mix until combined. Finally, add the chopped almonds. At this point, the dough will be quite soft but should be easy to work with.

Scoop up 2 tablespoons dough at a time, roll into balls, and flatten slightly. Sprinkle with sliced almonds and flaky sea salt. Refrigerate for at least 1 hour or overnight. Chilling the cookies before baking will keep them from spreading too much during baking.

Preheat the oven to 180°C (350°F).

Bake on the middle rack for about 12 minutes, or until the edges turn golden brown but the center still feels slightly soft to the touch. Cool on the sheet for 10 minutes, then transfer to a wire rack. To finish, dust with powdered sugar.


Related Posts

This Season's Last Wild Mushrooms – Funnel Chanterelle Tartlets with Herbed Crust

Funnel Chanterelle Tartlets | My Blue&White Kitchen

Guys, this is probably going to be this season's last mushroom post and recipe. At least when it comes to fresh wild mushrooms... To be honest, I'm already planning to make a risotto with the funnel chanterelles I dehydrated, so I'm not ready to give up on mushrooms for good. I hope you're okay with that.

Last week, I spent a couple of days at out summer cottage enjoying the silence, fresh air, and woods. I knitted (currently working on this project using this wonderful yarn), read (finally finished the heart-breaking The Fault in Our Stars), and sat by the fireplace; watching the burning logs and listening to the crackling fire. The weather was rather nasty: rainy, cold, and windy. Typical fall days one might say. Even stormy. On the first night I actually was terrified of trees falling down on our house which, of course, didn't happen. 

Thursday turned out to be a great day; the rain had stopped and the wind wasn't that fierce anymore. Perfect weather to go mushroom foraging. Most often, I do have a certain mushroom variety in my mind when I head into the woods. This is mostly because different varieties grow in different environments and during different times of the year. To know where and when to look, you have to know what you're looking for. Pretty logic, right?

Funnel chanterelles (Craterellus tubaeformis / yellowfoot) can be found in great numbers here in the Nordic woods until late fall; basically until they get buried under snow so that you're unable to spot them. It's one of my most favorite mushrooms to forage as one often gets rewarded with a phenomenal catch – we came home with around 15 liters / 4 US gallons. Did we spent much time in the woods you might ask. No, a bit more than two hours. That's it. 15 liters of mushrooms for 2 hours wandering in a forest isn't that bad a reward, don't you agree?

It's quite obvious that there's no way I could consume such an amount within a few days. Luckily, funnel chanterelles are perfect for dehydrating so that's what I've done with most of them. They'll keep well for years when fully dried and are wonderful in risottos and in soups. Actually, I prefer a mushroom risotto made with dried mushrooms as the mushroom aroma is more intense. That's also why I've decided to share a mushroom risotto recipe at another time.

But of course I also use some of them fresh, such as in these lovely tartlets. I made them not only once but twice, both on Saturday and Sunday; they make a great lunch when served with a simple, fresh green salad. Truth to be told, I already tried to photograph these tartlets on Saturday without much success. I'm still trying to get used to these short days. I stood there,  watched the sun beginning to set, my tartlets still in the oven...at 3pm! Yes, these are the downsides of living here in the north. On Sunday, I was better prepared, and caught the perfect light. It was a gray, rainy day, and the light was lovely and soft. Hope you like these pics as much as I do. It's like I got rewarded for all the frustration I experienced the day before.

A few notes on blind baking:

  • Blind baking is the process of pre-baking a crust without the filling. It prevents the crust from becoming soggy due to the (usually wet) filling. A recipe usually clearly states should a crust be blind baked. Don't skip this step! It's not as intimidating as it may sound but actually quite quick and easy to follow.
  • Always use pie-weights, such as ceramic baking beans, when blind baking your pie or pastry to prevent it from losing its shape. If you don't have ceramic baking beans in your pantry, you can use dried lentils, peas, beans, or rice instead. 
  • Refrigerating the lined molds will keep the crust from shrinking during the blind baking. Therefore, lined molds should be refrigerated for at least half an hour before you blind bake them. [Give these pics a close look and you'll notice that I didn't have the patience to chill the crusts for long enough – the sides have shrunk a little.]
  • Remember to prick the base of the crust with a fork before baking! It will prevent the crust from bubbling up and the slides to slouch.

A few notes on storing & preparing mushrooms:

  • Wild mushrooms should be cleaned directly in the woods as it's much more difficult to remove the dirt afterwards.
  • Foraged mushrooms will keep well in the fridge for 2 to 7 days, depending on the variety. Don't cover the mushrooms and avoid storing them in plastic as they need to breath. I usually store them in the refrigerator's veggie compartment that I line with newspaper. If the mushrooms are really moist, I make sure to change the newspaper every few days. A paper bag would be perfect as well!
  • Never ever wash your mushrooms! I see this all the time, but it's really the worst idea one can have. Mushrooms are like sponges, soaking up all the water. It's bad both for texture and taste. Don't spoil your gorgeous mushrooms!
  • Instead, simply brush the mushrooms or wipe with a damp cloth. That's really all you need to do.

Funnel Chanterelle Tartlets with Herbed Crust

makes eight 10 cm (4") tarts OR one 22 cm (9") tart

for the crust
300 g (5 ½ dl; 2 ⅓ cups) all-purpose flour
155 g (1 stick) cold, unsalted butter, cut into cubes
1 ½ tsp finely chopped rosemary
1 ½ tsp thyme leaves
½ tsp fine sea salt
4 – 6 tbsp ice cold water

for the filling
2 tbsp olive oil
15 cm piece of leek (white and light green parts only), finely sliced (you should end up with about 3 dl / 1 ⅓ cups sliced leek)
2 garlic cloves, thinly sliced
225 g funnel chanterelles or other (preferably wild) mushrooms
1 ½ tsp finely chopped rosemary
1 ½ tsp thyme leaves
¾ tsp fine sea salt
freshly ground black pepper
60 ml (¼ cup) dry white wine
1 tbsp finely chopped parsley

150 ml (⅔ cup) single cream
3 eggs (M)
40 g grated Västerbotten cheese or other flavorful, firm cheese, such as Comté or Gruyère


To make the crust
In a medium-sized bowl, combine the flour, butter, herbs, and salt. With your fingers, quickly rub the butter into the dry ingredients until well incorporated and crumbly. The dough should now resemble coarse bread crumbs with plenty of pea-sized pieces of butter remaining. Add water gradually just until the dough holds together when pinched. Try to work as fast as possible to avoid over-working the dough. Alternatively, you can use a pastry cutting tool or a food processor to make the dough. 

Form the dough into a disk and wrap in plastic. Refrigerate for half an hour or until ready to roll.

Grease the molds. Remove the dough from the refrigerator. Lightly dust a clean work surface with flour. Alternatively, you can roll out the dough between a piece of parchment paper. Roll out the dough into eight 3 mm (1/8") thick circles. Line the molds with the dough. Refrigerate for half an our.

Preheat the oven to 200°C (400°F).

Prick the crust bases with a fork. Place a piece of parchment paper into each mold and fill with ceramic baking beans (or alternative baking weights). Prebake for 15 minutes, remove the baking beans and parchment paper and bake for further 5–10 minutes, or until the crust is light brown in color. Reduce the temperature to 180°C (355°F).
 

To make the filling
While prebaking the crust, prepare the filling. In a medium-sized pan, heat the olive oil over medium heat. Add the leeks and cook for about 3 minutes, or until soft but not brown. Add the garlic, mushrooms, rosemary, thyme, salt, and pepper. Cook for 5 minutes, or until tender. Add the white wine and let cook for about 1 minute. Add the parsley. Set aside and let cool slightly.

In a medium-sized bowl, whisk together the single cream, eggs, and cheese until smooth. Set aside.
 

To arrange and bake the tartlets
Fill the prebaked tart shells with the mushroom filling. Pour the egg mixture over the filling making sure to spread it evenly. Bake the tartlets for 20–25 minutes, or until golden brown. Let the tartlets cool for around 10 minutes before serving. Enjoy!


Note: If you decide to make one 22 cm (9") tart, you need to adapt the recipe a little: Roll the dough to 4 mm (1/6") thickness. Blind bake the crust for 15 minutes, remove the baking beans, and bake for further 10–15 minutes, or until light brown. Bake the tart with the filling for 25–30 minutes, or until golden brown.


Funnel Chanterelle Tartlets | My Blue&White Kitchen

Related Posts

Korvapuusti – Finnish Cinnamon Rolls

My Blue&White Kitchen | Finnish Cinnamon Rolls

Last Saturday, I woke up realizing it was National Cinnamon Roll Day, and I didn't have anything planned. "Oh crap", I repeated to myself like some sort of mantra. As I had to go to work that day, I decided to devote the next day to baking those traditional sweet treats. They're the ultimate Nordic baked good, and our love for them is deep and true, endless like the Nordic winter nights. Or winters in general.

We all know that the days are getting colder now. First comes the rain, then the snow. Therefore, we all need some cinnamon rolls in our lives. They make it all so much more bearable.

I think cinnamon rolls are not without reason one of the most loved baked goods in the world. While they're topped with icing all over North America, here in Scandinavia we skip the icing and sprinkle pearl sugar on top. Lots of it. Furthermore, we use the traditional cardamom-spiced yeast dough that is also used to make pulla, as we call them in Finland, or bulle, as they're called in Sweden. Here in the north, cinnamon rolls are the ultimate baked good that can be found at every café. That's also how you're supposed to eat them; alongside a big cup of coffee. However, I think they're also great with a glass of cold milk, especially when they're still warm. You can, of course, also enjoy them with a cup of tea; after all, it's your choice, your moment of comfort.

Cinnamon rolls are actually called korvapuusti here in Finland which can be translated as slapped ears. I have no idea where this slightly violent name comes from; I tried to do some research on it but without success. However, the name has been around since the late 1800's. Very mysterious indeed. But I like it; I like food with funny names.

Although the dough and filling are the same in both Finland and Sweden, the shape is unique to Finland. For me, this is the one and only cinnamon roll shape. It's a bit like with pasta; theoretically they all should taste the same no matter the shape but in reality, well, they definitely don't.

I even made a GIF (my very first one!) to show you how to shape proper korvapuustis. See? Easy! And it's definitely lots of fun to poke once finger into dough. Truth.

My Blue&White Kitchen | Finnish Cinnamon Rolls

A few notes on the recipe: For the best result, make sure that all your ingredients are at room temperature. I recommend using bread flour, but this recipe will work with all-purpose flour as well. Just substitute the flour by weight, not volume (although, you'll notice when the dough is ready as it'll come clean off the sides of the bowl). Pearl sugar is obligatory; remember to be generous with it. You can certainly adapt the filling to your liking by adding more or less sugar. I like mine not overly sweet, but I've seen recipes that use up to 2 ½ dl / 1 cup of granulated sugar (basically almost three times as much as my recipe calls for) for the same amount of rolls. You can leave the egg out and, furthermore, substitute the milk with water should you follow a special diet. However, as you can imagine, the most delicious and flavorful result is made with eggs and milk.

So next time you plan to make cinnamon rolls, why not try this Nordic variety? I hope you do.


Korvapuusti – Finnish Cinnamon Rolls

makes around 30 rolls
 

5 dl (2 cups + 2 tbsp) lukewarm milk (preferably whole milk)
50 g fresh yeast (or alternatively 16 g / 1 tbsp + 2 tsp instant active dry yeast)
180 g (2 dl; ¾ cup + 2 tbsp) granulated sugar
1 ½ tsp fine sea salt
1 tbsp + 1 tsp ground cardamom (preferably freshly ground)
1 egg
about 1 kg (15 dl; 6 ½ cups) bread flour
170 g (1 ½ sticks) unsalted butter, at room temperature

for the filling
150 g (1  sticks) soft butter
6 tbsp granulated sugar
1 tbsp + 2 tsp cinnamon

for the egg wash
1 egg

pearl sugar, to sprinkle
 

To make the dough
In a large mixing bowl (you can make the dough by hand, like me, or in a stand mixer), combine the lukewarm milk and crumbled yeast. [If using instant active dry yeast, skip this step. Combine the yeast with some flour and add to the warm, 42°C / 108°F, milk mixture before adding the rest of the flour.] Stir with a spoon until the yeast is completely dissolved. Add sugar, salt, cardamom, and egg and mix until combined. Gradually add about two thirds of the flour and knead. Add butter and knead until well combined. Continue to knead the dough, and gradually add just enough flour so the dough comes clean off the sides of the bowl and doesn't stick to your hand.

Don't overwork the dough or you'll end up with hard rolls, not soft as we want them to be. Shape into a ball and cover with a clean kitchen towel. Let the dough rise in a warm, draft-free place for about 1 hour, or until double in size.

Meanwhile, mix together the butter, sugar, and cinnamon for the filling. Set aside.


To shape and bake the rolls
Line four baking sheets with parchment paper.

Punch down the dough and divide into two equally sized portions. Lightly dust a clean work surface with flour. Roll out the first portion of dough into a large, about 60-by-40-centimeter / 23-by-16-inch rectangle. Spread half of the filling evenly on top. Beginning with the long side, roll the dough into a tight tube shape, seam side down. Cut into 15 cylinders and press each point tightly into the center with your index finger. 

Place the shaped cinnamon rolls on the baking sheets, spacing them about 5 cm / 2" apart. Cover with a clean kitchen towel and let rise for further 30 minutes, or until they're double in size. Repeat with the second batch.

Meanwhile, preheat the oven to 225°C (435°F).

For the egg wash, lightly whisk the egg. Before baking, brush each roll with the egg wash and sprinkle generously with pearl sugar. Bake the rolls on the middle rack for 10 – 15 minutes, or until golden to dark brown in color. When the rolls are done, the bottoms will most probably be dark brown in color; this is totally normal and typical for Nordic cardamom-spiced sweetbread. Repeat with the other sheets of rolls.

The cinnamon rolls are best eaten while still slightly warm or on the same day. However, you can freeze them once baked and warm them up when ready to serve.


My Blue&White Kitchen | Finnish Cinnamon Rolls

Related Posts

Zwetschgendatschi – German Plum Sheet Cake

Zwetschgendatschi | My Blue&White Kitchen

+++
When I bake, my mind finds peace.
+++

There's something about baking that calms me down even when my mind tries vigorously to solve out things that aren't really ones it can solve. Maybe it has to do with the familiar ritual of measuring flour, butter, and sugar. Maybe it's the rhythmical pace of kneading dough. Baking calms me down like nothing else, gives me comfort, makes me feel whole again. Whether in moments of pure joy or of sadness, you can find me in the kitchen with a bowl in my hands and flour in my hair.

I'm back at my most favorite kitchen window, my favorite spot to bake and take pictures. I'm kneading dough and quartering plums while enjoying the beautiful scenery; alps and cows. The light is, again, magical. Soft, clean, and welcoming. Perfect.

Zwetschgendatschi | My Blue&White Kitchen

Prune plums, called Zwetschgen here, are in season from August to September. They are used to make one of my most favorite cakes, Zwetschgendatschi, a traditional plum sheet cake that is topped with lots of streusel or sliced almonds. I belong to that range of people who always choose a slice with streusel; maybe it's because my beloved late Oma made it that way. A generous dollop of whipped cream is almost mandatory, although, to be honest with you I was too lazy to whip cream this time, so I enjoyed the Zwetschgendatschi plain. And you know what? It was luscious.

This cake is basically the best thing you can do when you spot gorgeous prune plums at the farmers' market or have some sitting on your kitchen counter waiting for their destiny.


Zwetschgendatschi – German Plum Sheet Cake


The recipe yields one large sheet and is adapted from a handwritten note my Oma has given me years ago. It tastes just like hers did. This is not just a cake; it's an ode to her.

If you prefer a thinner crust, make the dough I used in this Rhubarb Strawberry Datschi – the result will be a more sophisticated, delicate Datschi with a higher fruit to crust ratio.

for the dough
250 ml (1 cup) lukewarm milk
21 g fresh yeast [or 7 g / 2 ¼ tsp (instant) active dry yeast, used according to packet instructions]
66 g (5 tbsp) granulated sugar
1 pinch of fine sea salt
1 tbsp vegetable oil, such as canola or olive oil
2 eggs (European size M; U.S. L) OR 1 egg (European size L; U.S. XL), at room temperature
500 g all-purpose flour

for the streusel
230 g all-purpose flour
125 g granulated sugar
pinch of fine sea salt
125 g unsalted butter

for the topping
1 kg (generous 2 lb) Zwetschgen (prune plums) or damson plums, quartered
2 tbsp granulated sugar
cinnamon

optional:
whipped cream, to serve


To make the dough
In a medium-sized bowl, combine milk and crumbled yeast. [If using instant active dry yeast, skip this step. Combine yeast with some flour and add to warm, about 42°C / 108°F, milk mixture just before adding the rest of the flour.] Stir until yeast is completely dissolved. Add sugar, salt, oil, and eggs. Whisk until combined. Gradually add flour and knead. Continue to knead and add flour until the dough comes clean off the sides of the bowl and doesn't stick to your hands. Note: You can make the dough in a stand mixer if you prefer.

Shape into a ball and cover with a clean kitchen towel. Let the dough rise in a warm place for about 1 hour, or until it's almost double in size.

Meanwhile, preheat the oven to 180°C / 355°F. Line a rimmed baking sheet with parchment paper.


To make the streusel
In a small bowl, combine flour, sugar, salt, and butter until you have a crumbly mixture. If not using immediately, put the bowl into the fridge until ready to use.


To assemble the Datschi
With a rolling pin, roll out the dough until roughly the size of the baking sheet. Spread out on the prepared baking sheet and pull into shape. Arrange the plum quarters in slightly overlapping rows (tightly and cut side up) over the dough. Leave a rim of about 1 cm / 0.5". Sprinkle with sugar and some cinnamon. Sprinkle the streusel over the fruit.

Bake for 25–30 minutes, or until the edges are dark brown. Let cool, cut into squares, and, if you like, serve with a generous dollop of whipped cream.

The Datschi will keep for up to 3 days and is, in my opinion, at its best on the second day when the flavors have developed.


Zwetschgendatschi | My Blue&White Kitchen

Related posts