Whipped Cranberry Porridge (The Prettiest Porridge Ever) & A Guest Post For A Cup Of Jo

Whipped Cranberry Porridge | My Blue&White Kitchen

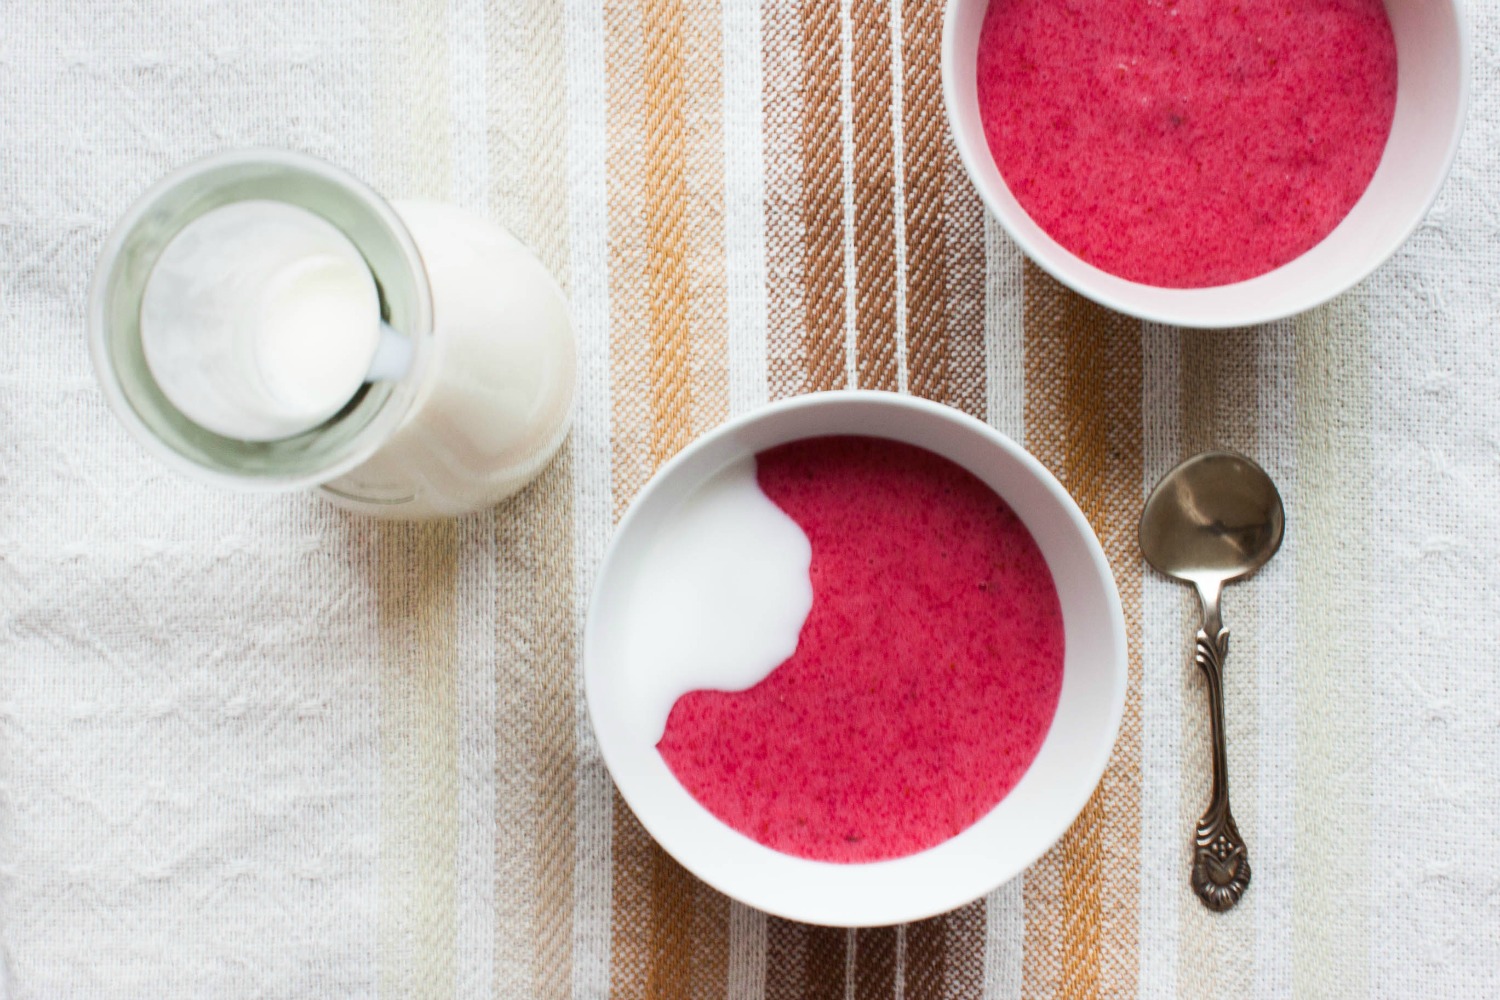
Maybe you have followed me for long enough that you remember my post about Whipped Lingonberry Porridge almost a year ago as a "this-is-not-a-Valentine's-Day-recipe-although-it's-pink" thing. This time, I'm following my traditions with not being into Valentine's Day and blaming coincidence (or faith?) for me sharing a pink dish only a week before that said lovers' day. But here I am. And here it is. Whipped berry porridge - one of my most favorite breakfasts/midday snacks/Nordic fairs/berry power bowls.

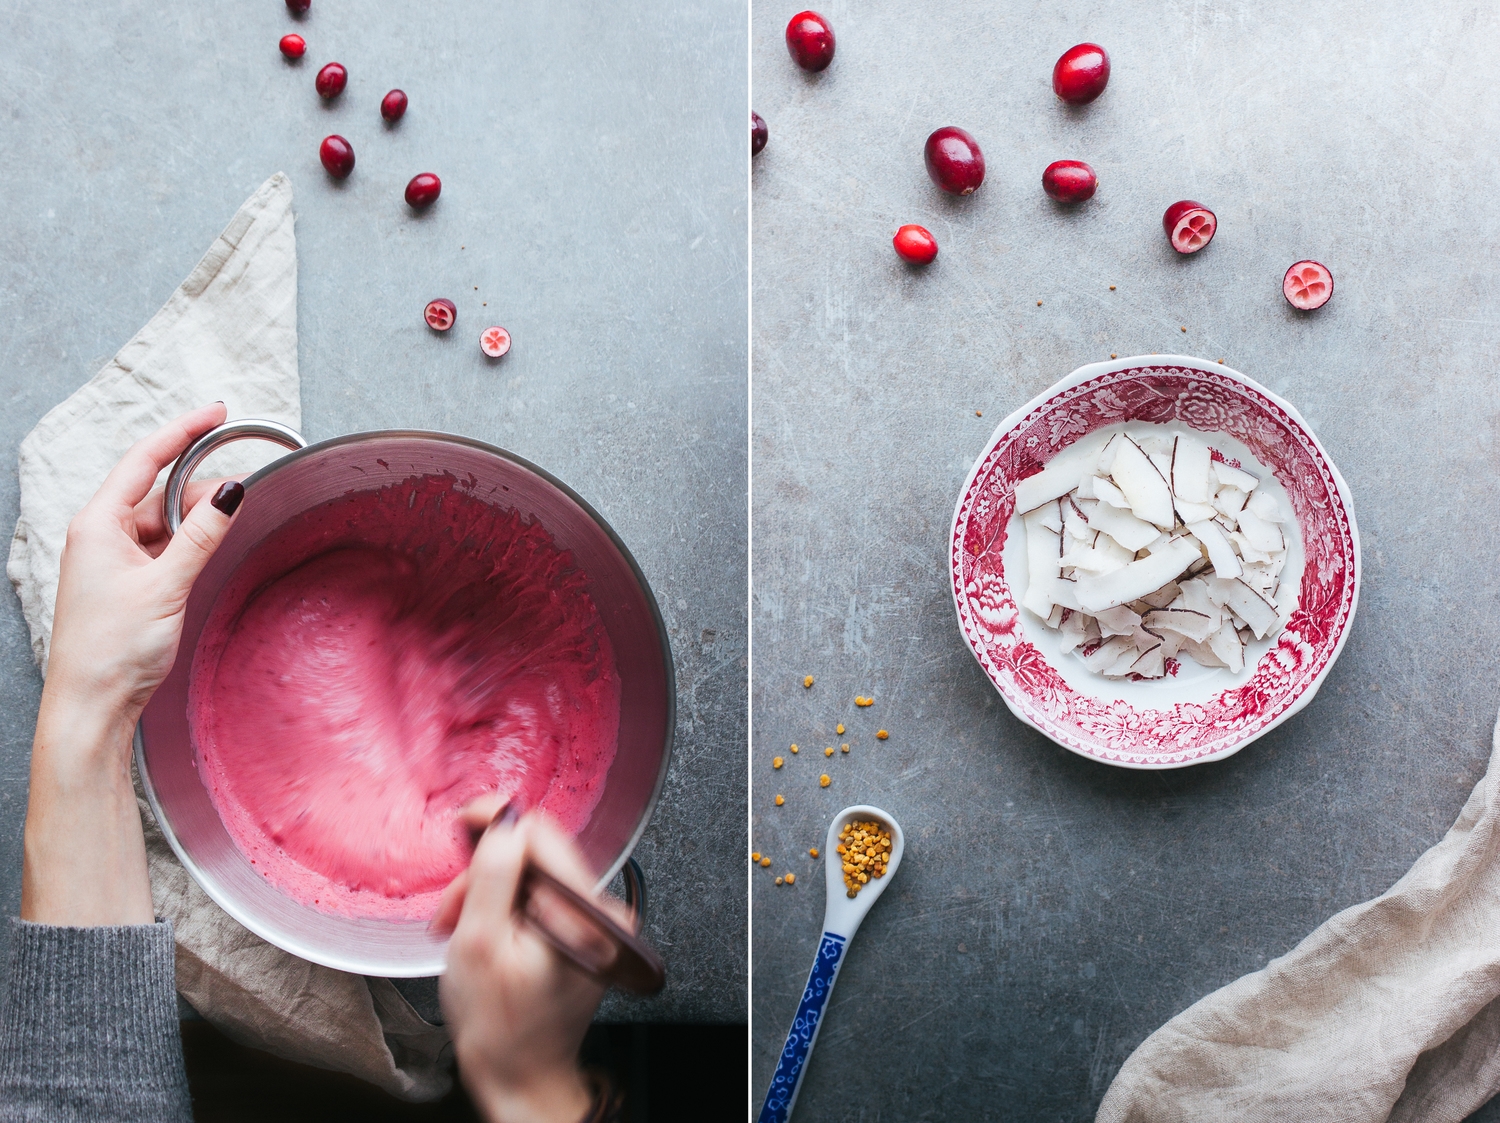
As I realize that lingonberries are a Nordic (hello there Ikea!) or at least European thing, I recreated this old favorite with cranberries. Both the taste and color are almost identical to the more traditional version, so this porridge could still be seen as being highly authentic. Well, at least sans the toppings. The toppings are a modern twist on the dish. I love toppings, so I really like to add some texture and flavor to this pink breakfast bowl.

I'm also on A Cup of Jo this week sharing this porridge as part of the weekly food series. I discovered Joanna's site a couple of years ago and have been a regular reader ever since. There are always so many exciting links and reads, and I always leave feeling inspired. I especially remember this hair tutorial post (when I still had long enough hair to do awesome things like that... now all I do is this), these cute faces, and how Molly's egg-in-a-hole was a life-changing discovery. So yeah, I'm pretty excited to contribute and maybe inspire others in the same way as I have been inspired.

Hop on over to A Cup of Jo to read more about the porridge!


Whipped Cranberry Porridge

serves 4 to 6

As I don't like to start my day with a breakfast loaded with sugar and as I want to keep some of that lovely tartness cranberries are known for, this porridge isn't very sweet. Feel free to add more sugar to taste. However, remember that the milk will balance out some of the tartness. Chilling the porridge is crucial – you won't be able to whip it probably if it's still warm. 

8 dl (3 ¼ cups) water
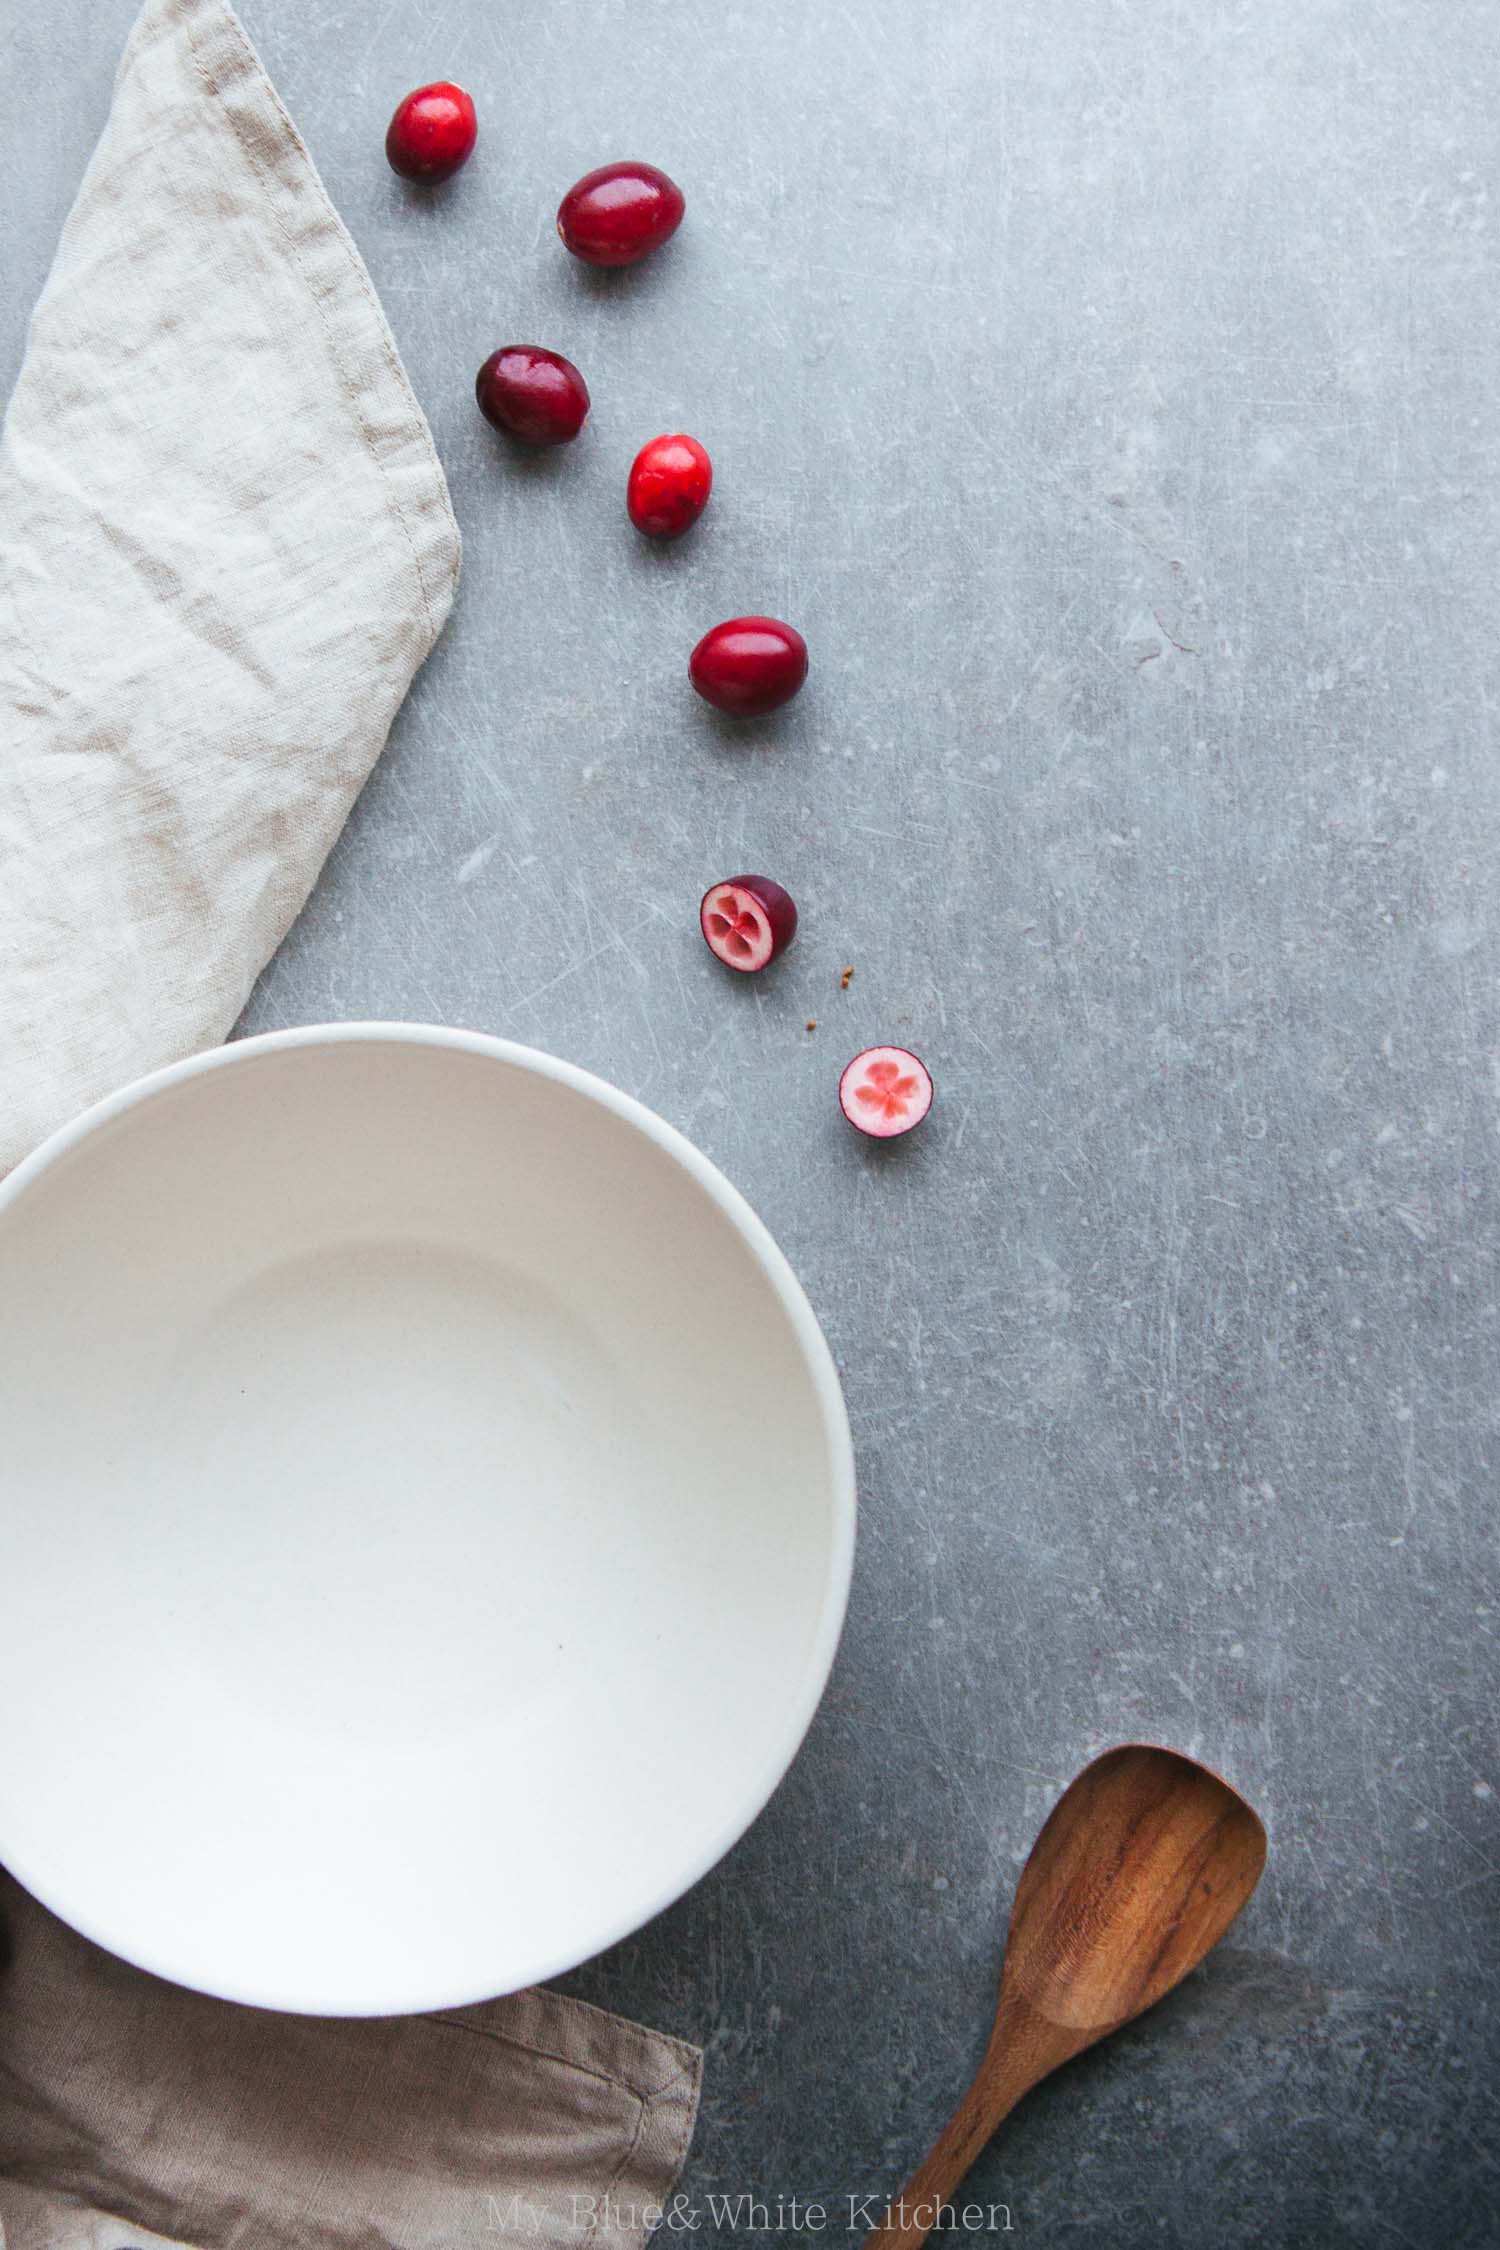
250 g (4 ½ dl; 2 cups) frozen (or fresh) cranberries
pinch of fine sea salt
100–150 g (1 ¼–1 ¾ dl; ½–¾ cup) granulated sugar, depending on your taste
120 g (1
½ dl; ⅔ cup) farina (Cream of Wheat)

milk of your choice, to serve
optional: toppings of your choice


In a medium pot, combine the water and cranberries. Bring to a boil and boil for 10 to 15 minutes.

Add the salt and sugar. Gradually whisk in the farina. Depending on how long your farina needs to be cooked, let simmer for 5 to 10 minutes stirring constantly. Taste and add more sugar if desired. Remove the pot from the heat and let the porridge cool to room temperature.

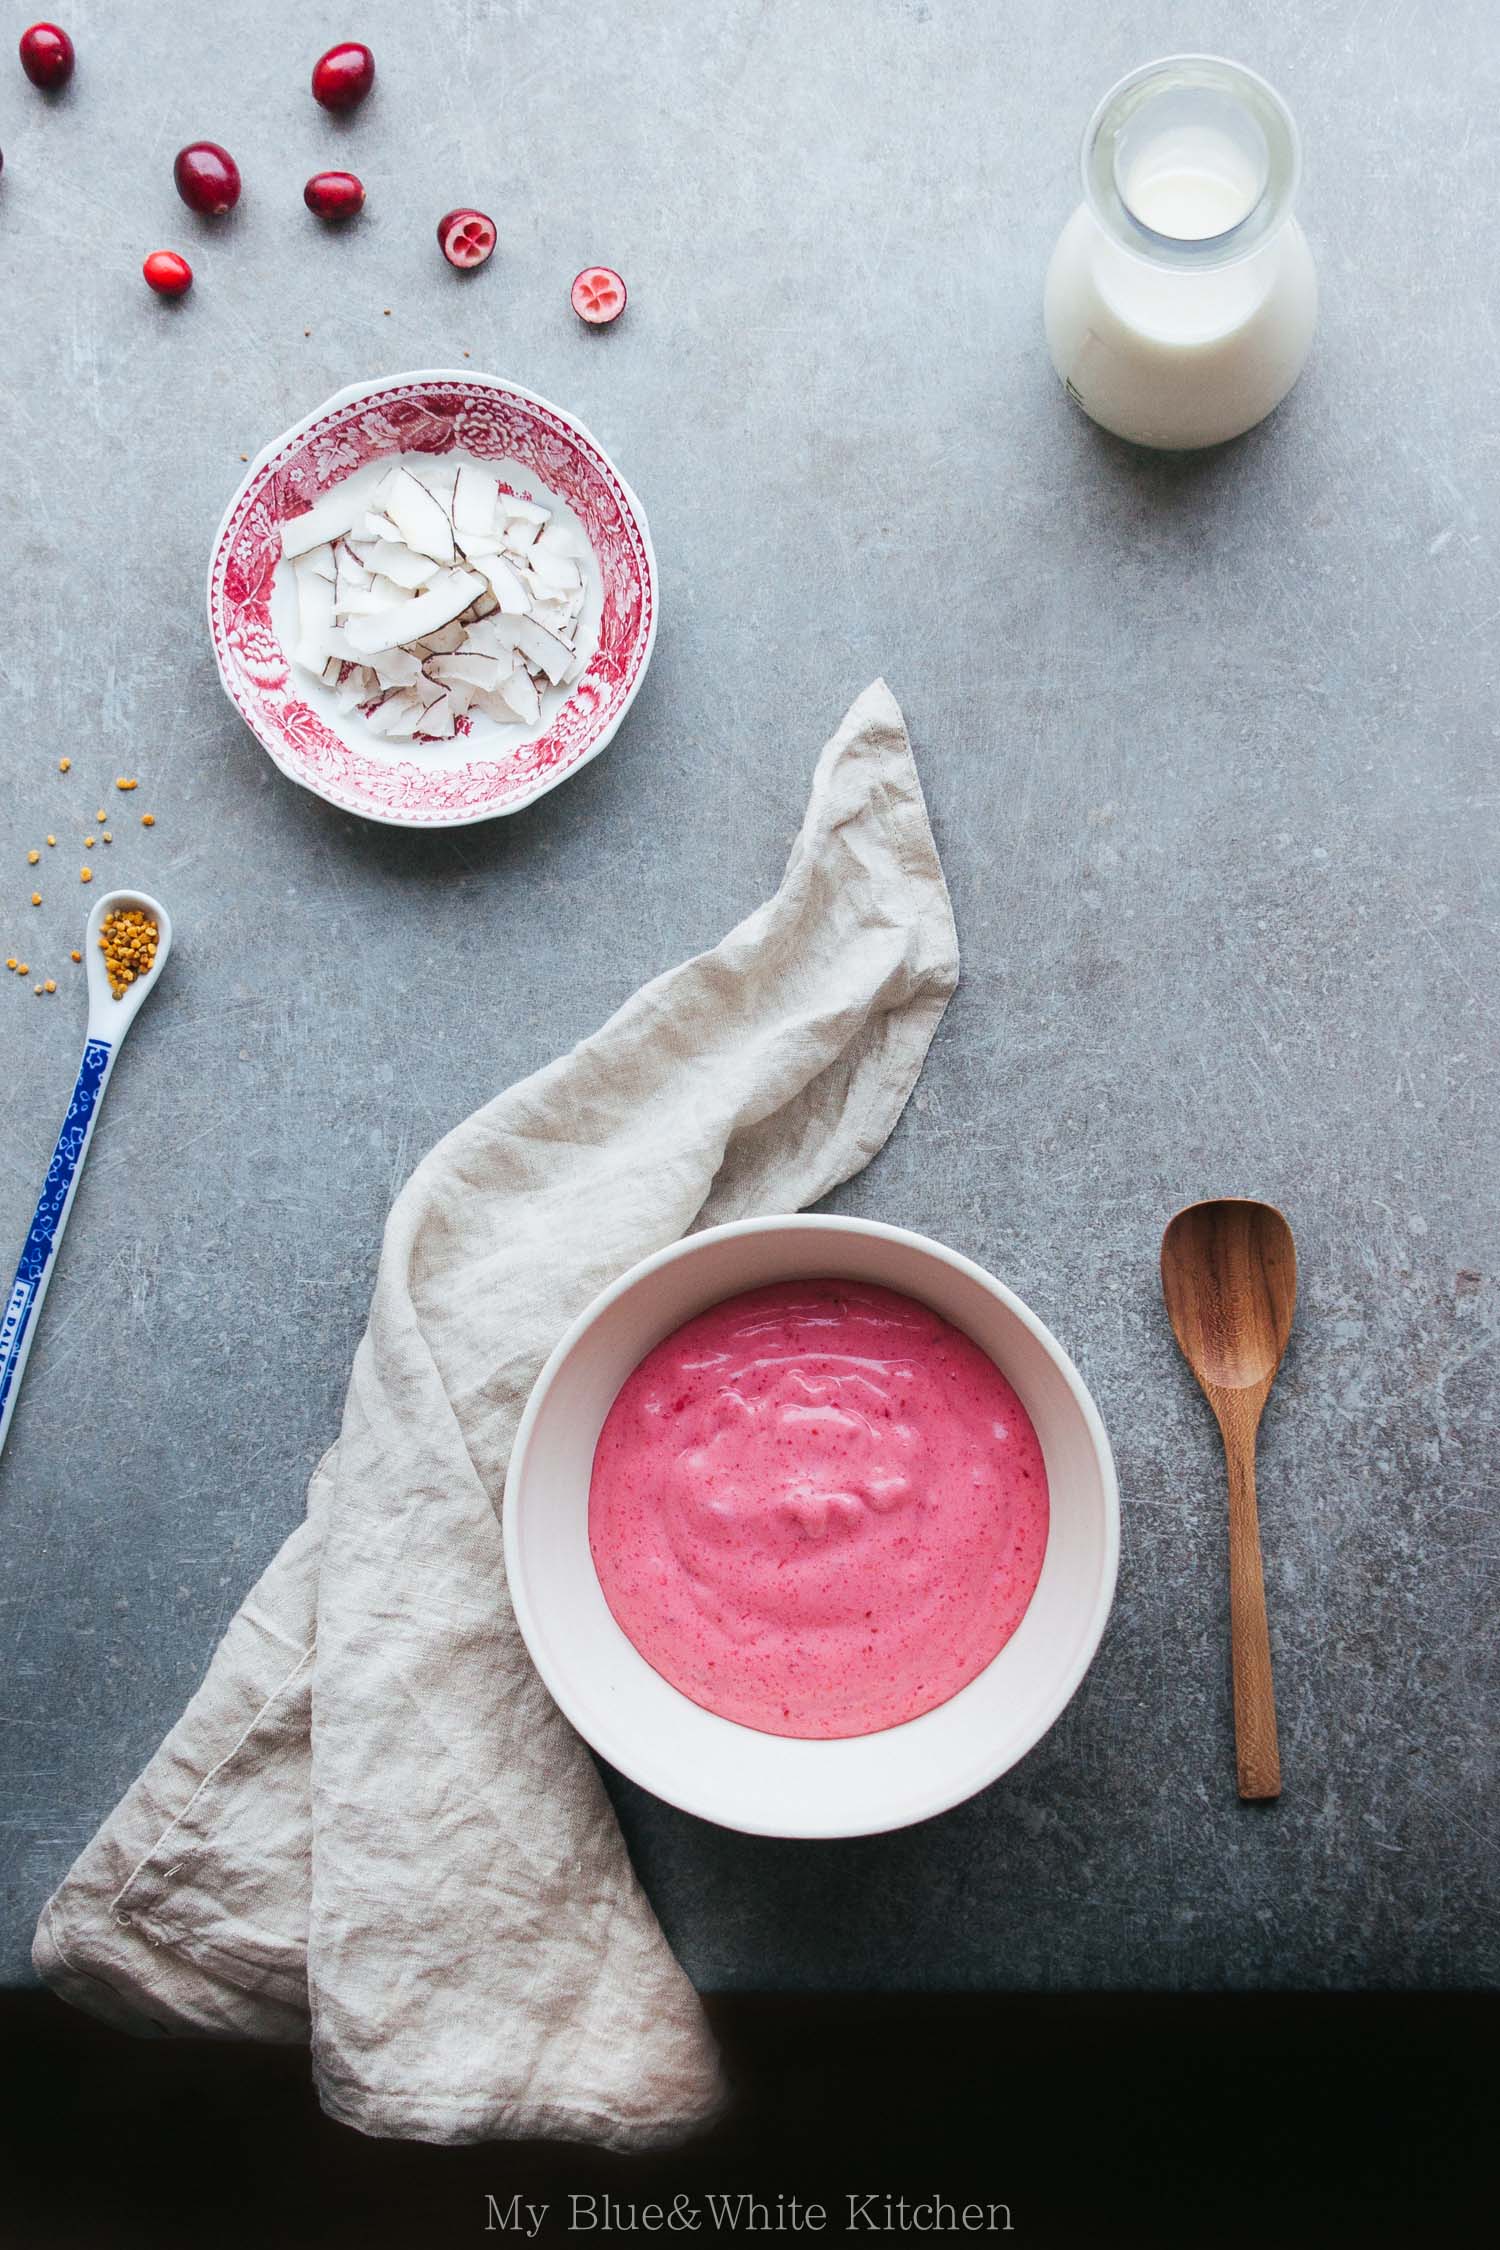
When the porridge has cooled to room temperature, whisk until light and fluffy. The color will turn from magenta to light pink.

Serve at room temperature or cold with milk and toppings of your choice.

The porridge can be stored in the fridge for a couple of days. For the perfect texture, whisk it again before serving.


Whipped Cranberry Porridge | My Blue&White Kitchen

Related posts

A Quarter of a Century – Mini Almond Pavlovas with Forest Berries

Almond Pavlova with Forest Berries | my blue&white kitchen

In elementary school, we had to write an essay about how we pictured our lives as twentysomethings. I've tried to find that essay without any success but I'm pretty sure I know what that piece of paper contains. I probably dreamed of a life in a red cottage (so Scandinavian!) with a gorgeous husband and lovely children (so cliché!), as well as a cat, dog, and horse (cause I wasn't able to decide which one was cuter). Little did that brown eyed, open-minded, stubborn, and self-confident girl, who was born 200 years after 'Liberté, Égalité, Fraternité ou la Mort!' echoed inside the Bastille, know about where life would take her to in the coming years; that life doesn't always look like the ones in Astrid Lindgren's stories. But does it make it disappointing? Not at all. I've traveled the world and realized both how wonderful and cruel it is at the same time. I may have missed opportunities but I've also said 'yes' and 'no' at just the right moments. I am loved. I'm able to create a career path of my dreams. I can be creative and share it with others; with you. My life may not be perfect but it's good. It's more than good. And that I'm tremendously grateful for.

My life is a bit like these mini pavlovas  maybe not as perfect looking as a layer cake with buttercream frosting but definitely enjoyable and lovable. Pavlova is probably my favorite summer cake and that's why I make it (almost) every year for my birthday. Of course, you can top a pavlova with any fruit of your choice but those winter pavlovas with kiwis and citrus fruit have never really grown on me. I like mine topped with lots of seasonal berries, such as blueberries, bilberries, strawberries, and raspberries. If you're living outside Europe, you may wonder about bilberries. Are they the same as blueberries? Well, not quite but they're closely related. They’re the European wild growing counterpart (and to make it a bit more confusing, we call them 'blueberries' as well). Bilberries are smaller and darker than blueberries but have a fuller, more flavorful taste which is why I most of the time prefer bilberries over blueberries. They’re also a bit messier as their skin and flesh stain everything blue from your fingers and lips to your tongue. As our summer cottage is surrounded by bilberry bushes (I literally have to walk two meters to pick a berry), they’re a heavily consumed summertime favorite. For these pavlovas I used bilberries and wild strawberries which I foraged earlier that day. However, feel free to use whatever berries you have around. I also won't judge you should you prefer to use kiwis and mandarines.

A few notes on meringue. There basically are three different types of meringue which all have distinct characteristics: French, Swiss, and Italian meringue. French meringue is the simplest one and especially popular among home cooks. Egg whites are whipped until stiff peaks start to form, sugar is gradually added, and the mixture is whipped until glossy. Quick and easy, right? Swiss meringue is made by warming egg whites and sugar over a water bath until sugar crystals dissolve completely. The mixture is then whisked until it has cooled to room temperature. Swiss meringue is more stable than French meringue and is ideal if you want meringue that’s crisp on the outside and marshmallow-like on the inside. Personally, I prefer Swiss meringue when making pavlovas because I want to achieve that chewy inside. Furthermore, the heating process makes the egg whites edible without having to bake them. Salmonella isn’t a problem here in Finland (it basically is non-existent), but Swiss meringue may be your top choice especially if living in a country where you have to be careful when consuming raw eggs. The third meringue type is Italian meringue that is made with boiling sugar syrup. It’s the most stable of these three and is, like Swiss meringue, safe to consume without baking. Of course, there are other techniques as well, such as Ottolenghi’s method that I can’t wait to try, but these are the three classic ones.

Now that we’ve covered the three different types, let’s talk about what ensures a perfect meringue. There are a few simple yet important things to keep in mind when making meringue:

  • Make sure that your equipment is absolutely dry, clean, and grease-free. Any small amount of fat will keep your egg whites from getting fluffy. Egg yolks are fat as well so be careful when separating the eggs! Furthermore, it may be a good idea to rub your bowl with half a lemon before starting to make meringue to eliminate any grease.
  • Prefer stainless-steel, glass, or copper bowls when making meringue as plastic bowls can hold onto grease.
  • While eggs are easier to separate when cold, make sure your egg whites are at room temperature when you start making your meringue. However, this isn’t crucial if making Swiss meringue as the egg whites are warmed anyway.
  • Think twice before making meringue on a very humid day. The sugar will absorb moisture from the air keeping your meringue from getting stiff.
  • You often see vinegar or cream of tartar as well as cornstarch added to meringue. Vinegar and cream of tartar mainly stabilize while cornstarch helps to achieve a crisp outside and a chewy inside. These are optional, not necessary to make a successful meringue. In this recipe, I use lemon juice instead of vinegar or cream of tartar and omit cornstarch completely.
  • My meringue formula is really simple and easy to remember: 1 part egg whites to 2 parts sugar (by weight). In addition, lemon juice, vinegar, cream of tartar, or cornstarch as well as any kind of flavoring may be added.
  • Meringue is versatile! You can mix in cocoa powder, berry sauce, different extracts, etc.

Mini Almond Pavlovas with Forest Berries

makes 6 small or 1 big (about 23 cm / 9")
 

For the meringue
4 egg whites (M)
290 g (3 dl + 2 tbsp; 1 cups + 1 tbsp) granulated sugar
1 tbsp lemon juice
about 30 g (½ heaping dl; ¼ cup) sliced almonds

For the topping
200 g (2 dl; 1 scanted cup) heavy cream
200 g (2 dl; 1 scanted cup) Greek or Turkish yogurt
2 tbsp powdered sugar

about 500 g (1 l; 4 cups) berries


To make the meringue
Preheat oven to 125°C (260°F). Line a baking sheet with parchment paper.

Combine the egg whites, sugar, and lemon juice in an absolutely dry, clean, and grease-free medium-sized bowl, pot, or bain-marie. Place over a water bath. While constantly whipping, heat until the mixture has reached 60°C (140°F). At this point the sugar should have dissolved and the mixture starts to get thicker and glossier. Take off the heat. With the help of a standing mixer or electric hand mixer, whisk on high speed until the mixture is cool and stiff peaks form. (You can of course whisk it by hand if you fancy a nice workout. Been there, done that.) This usually takes 6 to 10 minutes. Carefully fold in the almonds.

Spoon the meringue into six equal rounds. Make sure that the meringue is slightly higher at the rims so that the meringue later holds the topping better. Lower the oven temperature to 100°C (200°F). Bake for 55 to 60 minutes. At this point, the outside should be crisp while the inside still has a marshmallow-like consistency (you can lift a meringue round and poke a hole in the bottom; no one will notice). If you decide to make one big pavlova, you'll need to bake the meringue for further 10 or so minutes. Let cool completely.

Unless you're living in a very humid area, you can bake the meringues one day in advance. Store them uncovered at room temperature until ready to assemble.
 

To assemble
To make the topping, whip the heavy cream until very stiff. Gently fold in the yogurt and sugar.

Just before serving, top each meringue with the cream yogurt mixture. Generously top with berries. Serve immediately.