Nordic Winter Mornings – Nordic Rice Porridge with Caramelized Cinnamon Plums

Rice Porridge with Caramelized Cinnamon Plums | My Blue&White Kitchen

It's cold. And by cold I mean temperatures as low as -25°C during the day. Add some wind and it feels more like -40°C. The last two weeks or so have been challenging. For example, keeping your face (and especially your nose!) warm is the no. 1 problem when it comes to leaving the house. Your eyelashes will basically freeze. That may even look cute but it doesn't feel very nice. You'll also find yourself entering a fancy department store in not-so-approriate clothes but end up thinking "Oh whatever! It's freakin' cold outside. Deal with it." Busses and trains won't work as they're supposed to (I'm talking about calcelled trains and bus doors that won't open unless the driver gives them a good kick). You can't use your mobile phone either because it just stops working in a matter of minutes and finally the battery dies. Oh, and let's not forget that your fingers will fall off if you try to use your touch screen. On the other hand, it's never as gorgeous outside as on bitter cold winter days when the sky is blue, the sun shines, and snow covered trees turn the forests into magical winter wonderlands.

Rice Porridge with Caramelized Cinnamon Plums | My Blue&White Kitchen

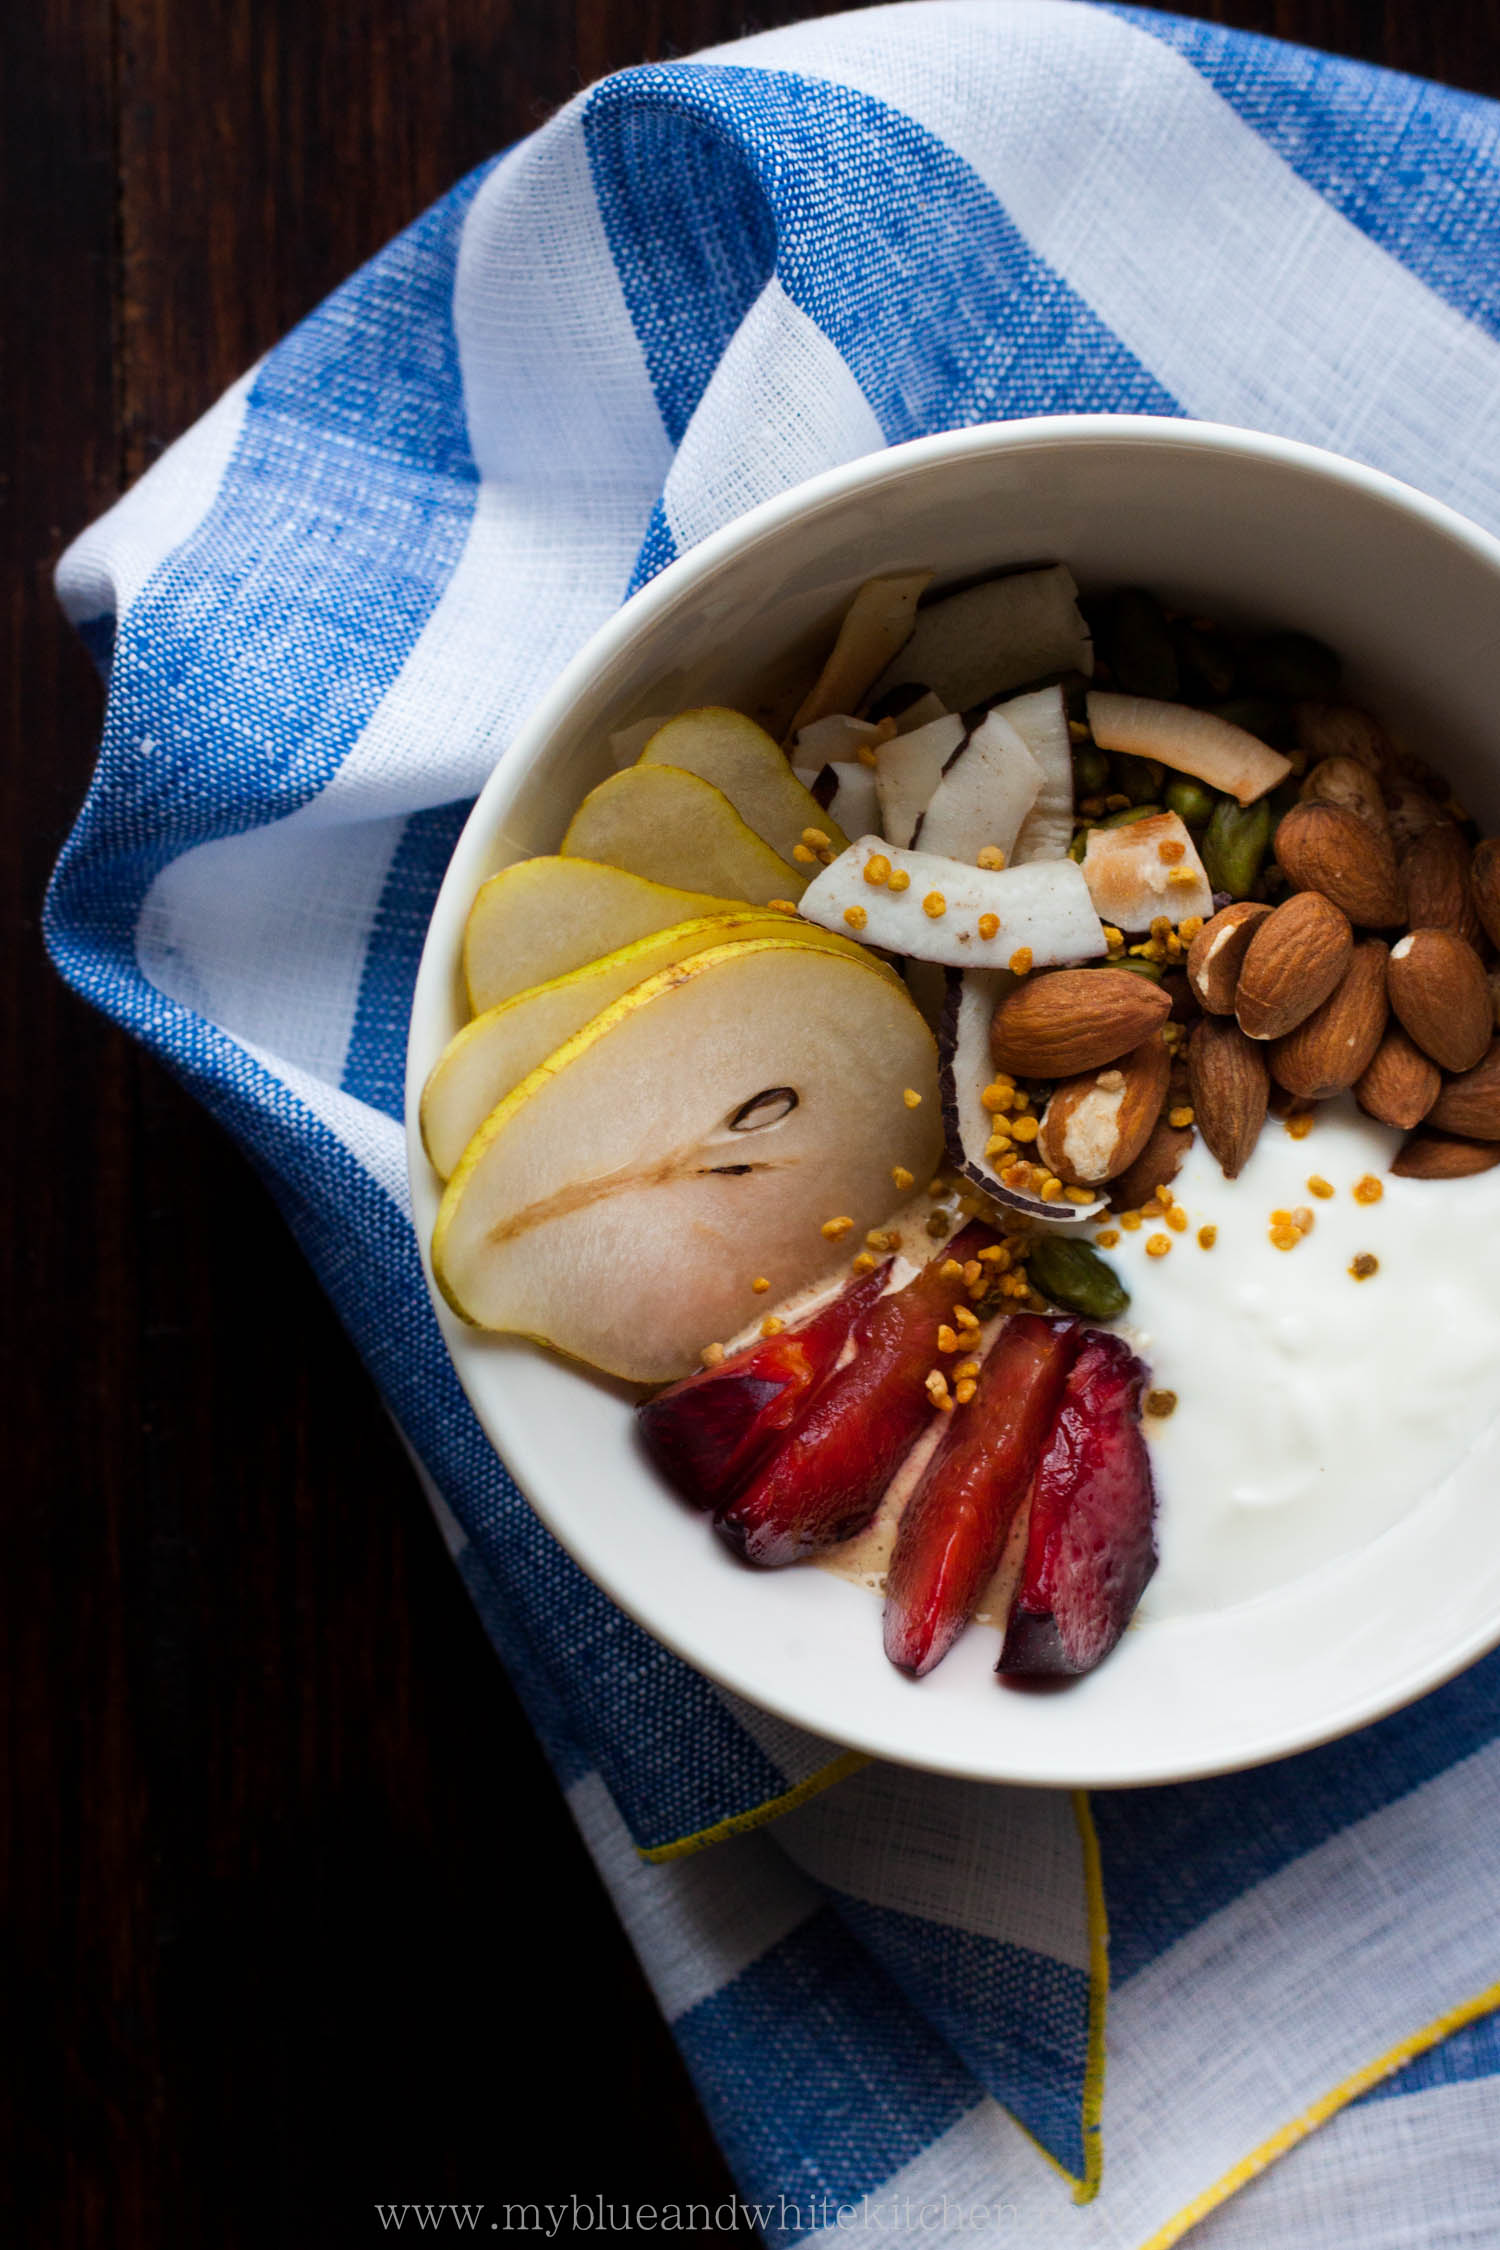
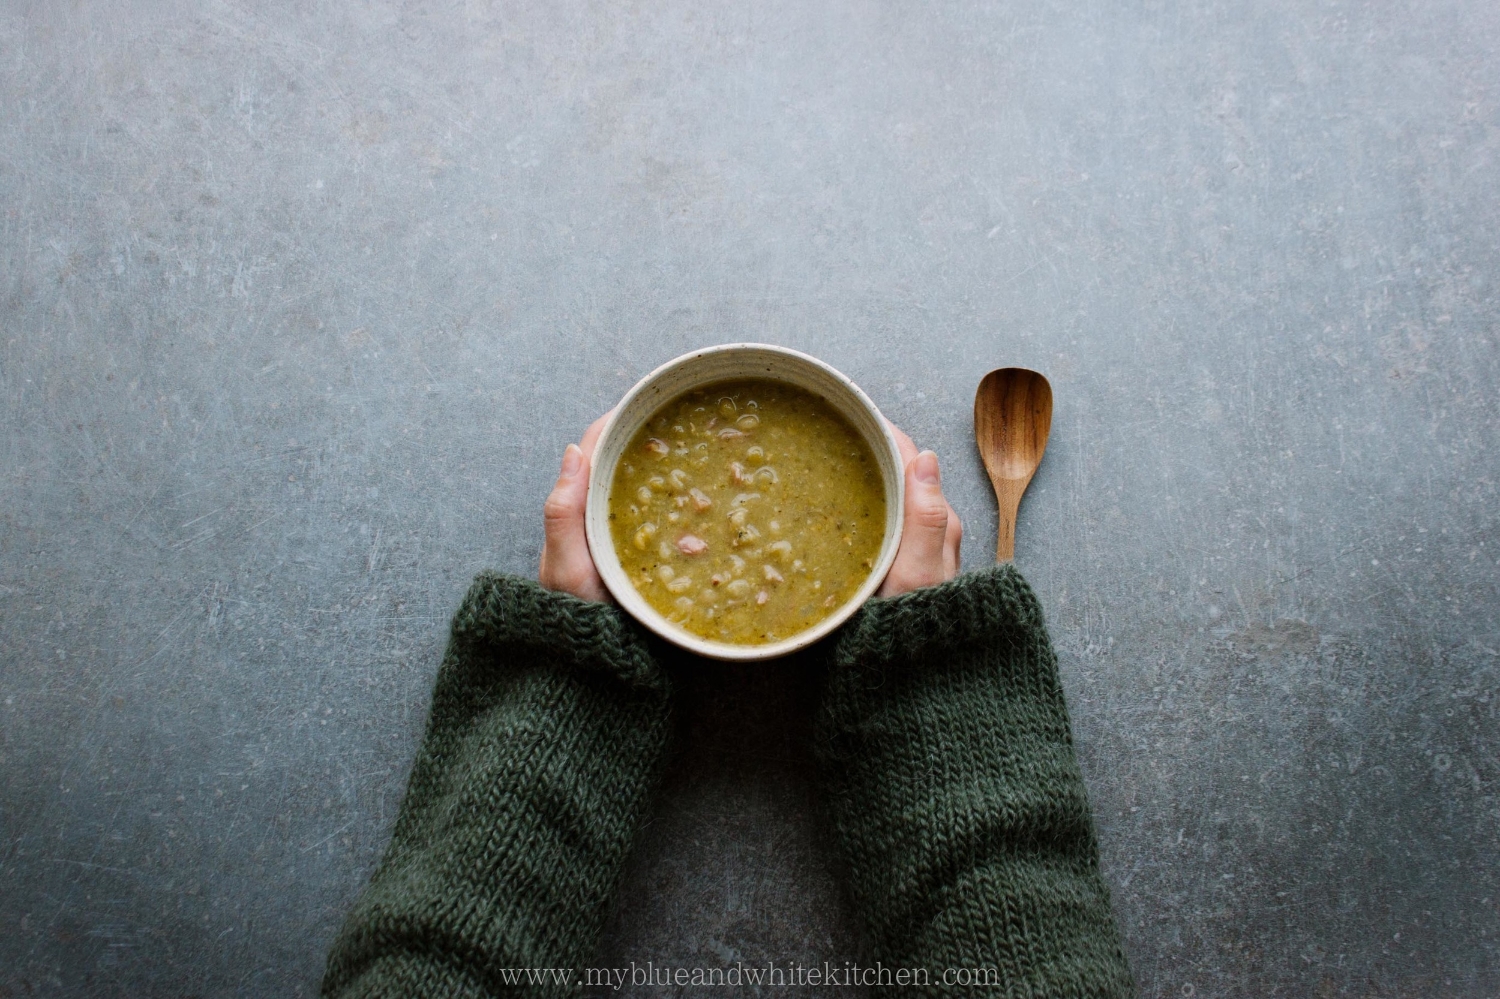
I guess many of you agree that there's a special kind of comfortness in bowl foods. Maybe it's because they're so easy to eat on the sofa, wrapped up in a huge woolen blanket. Or maybe because they're often pretty flavorful yet simple dishes.

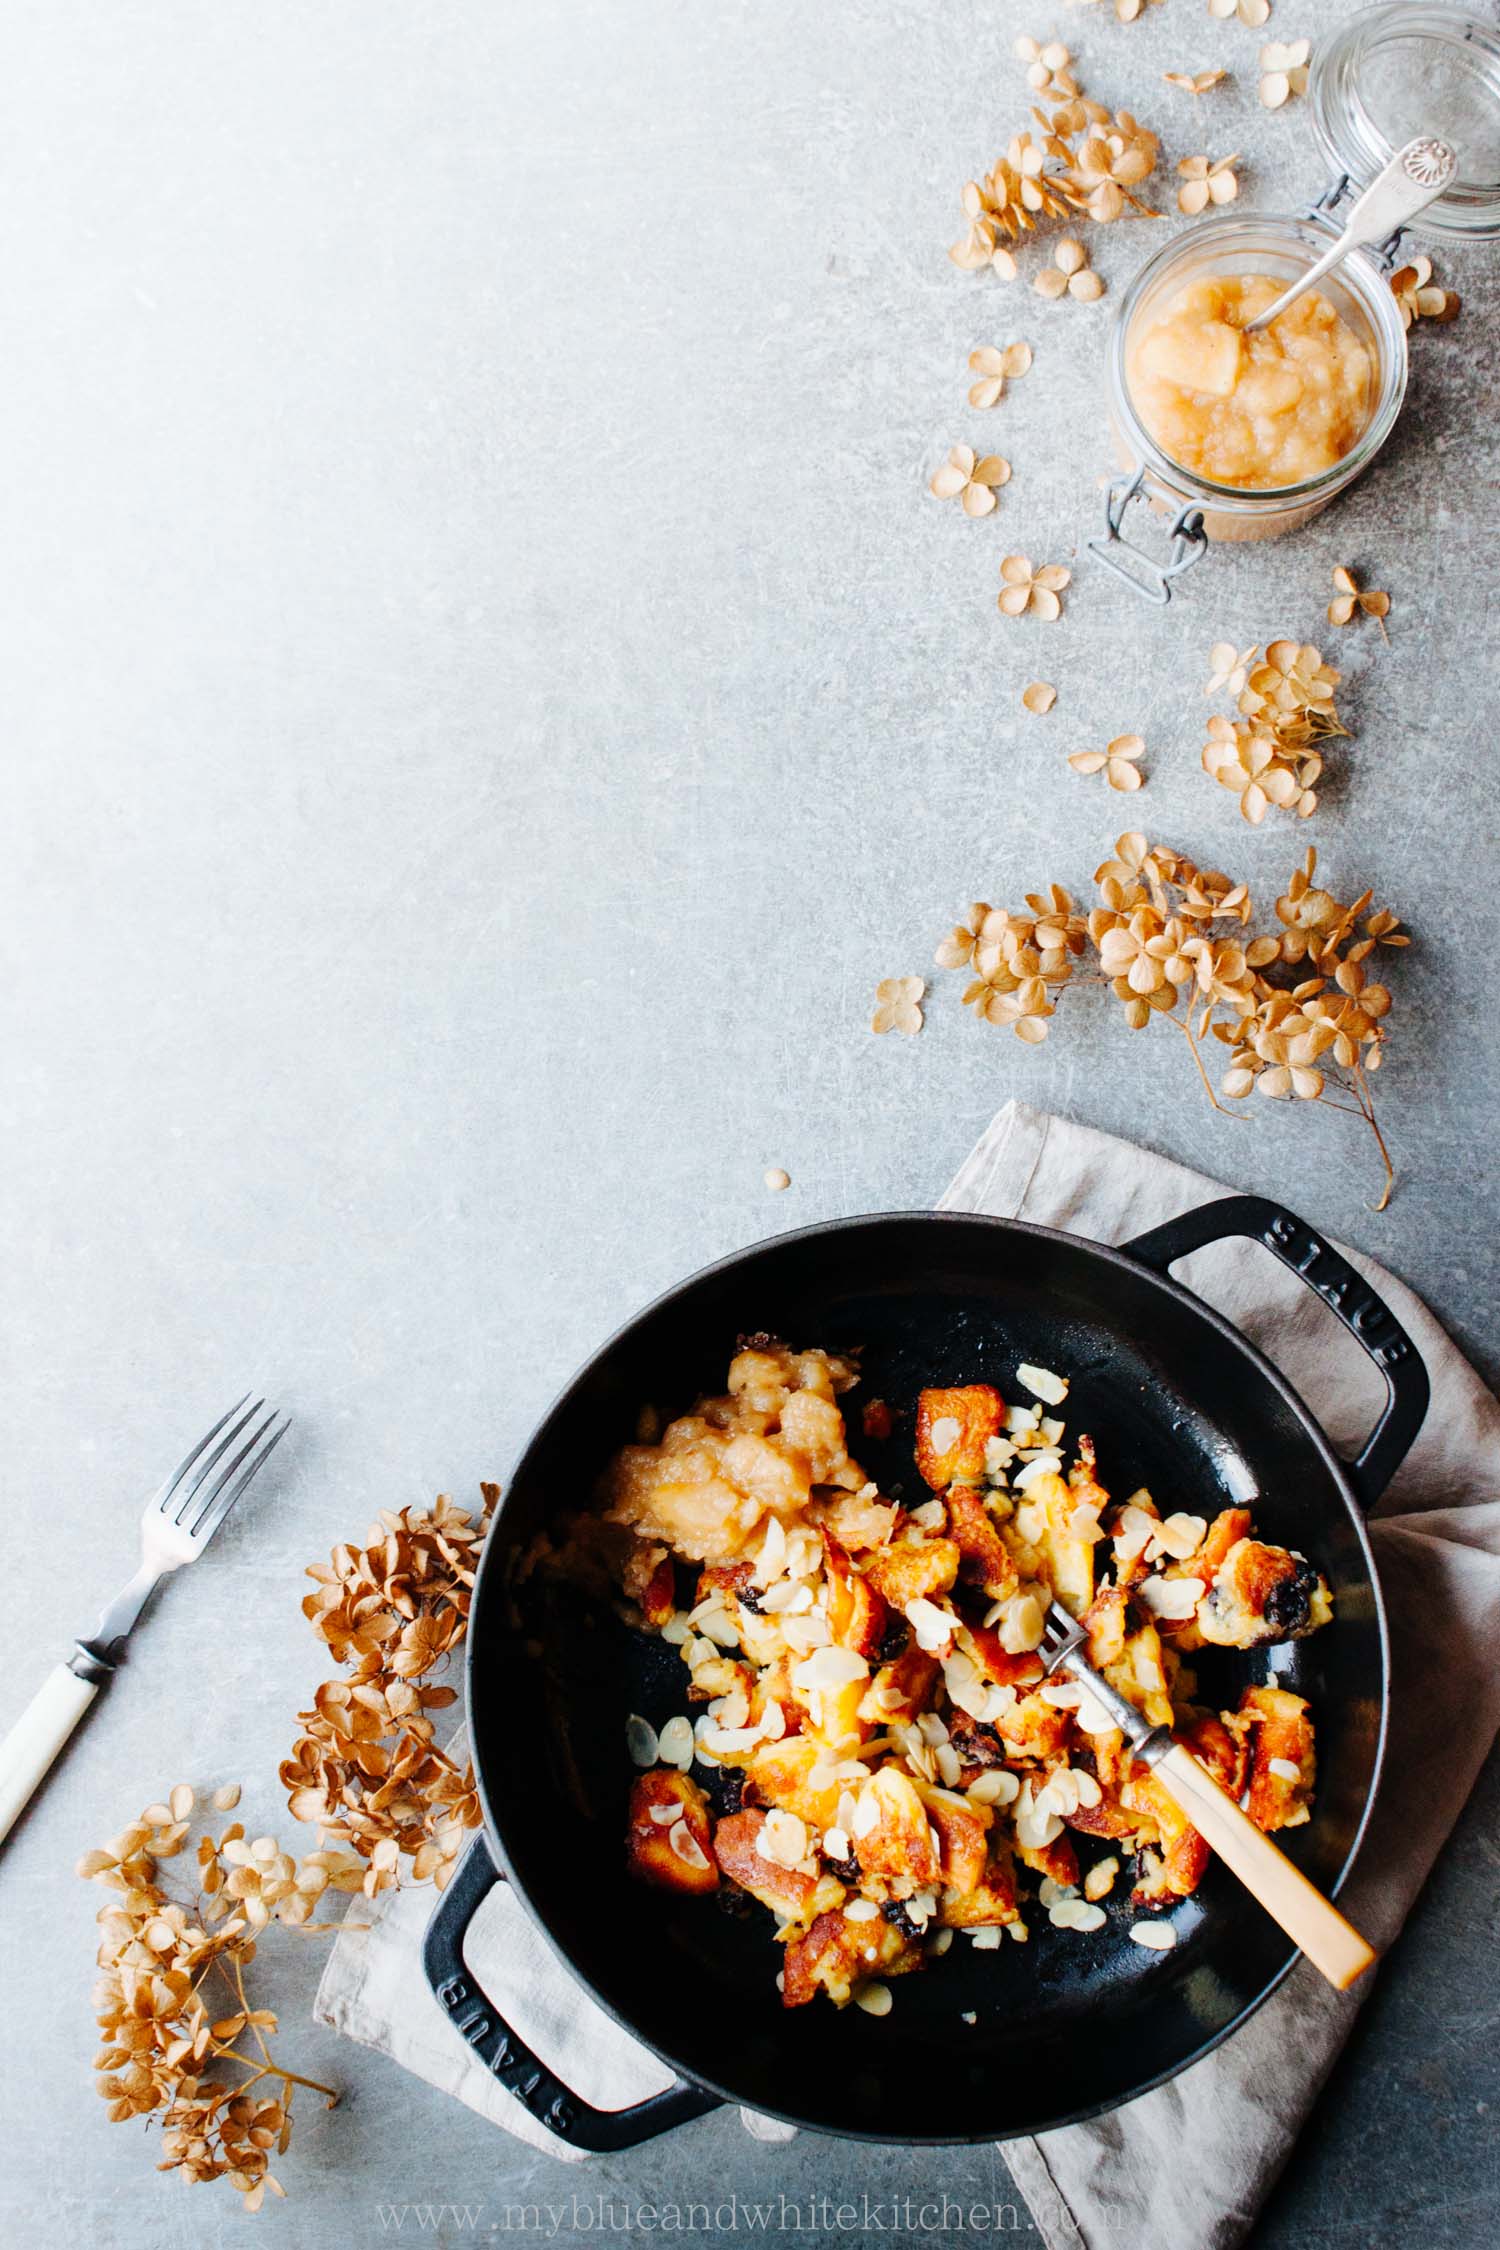
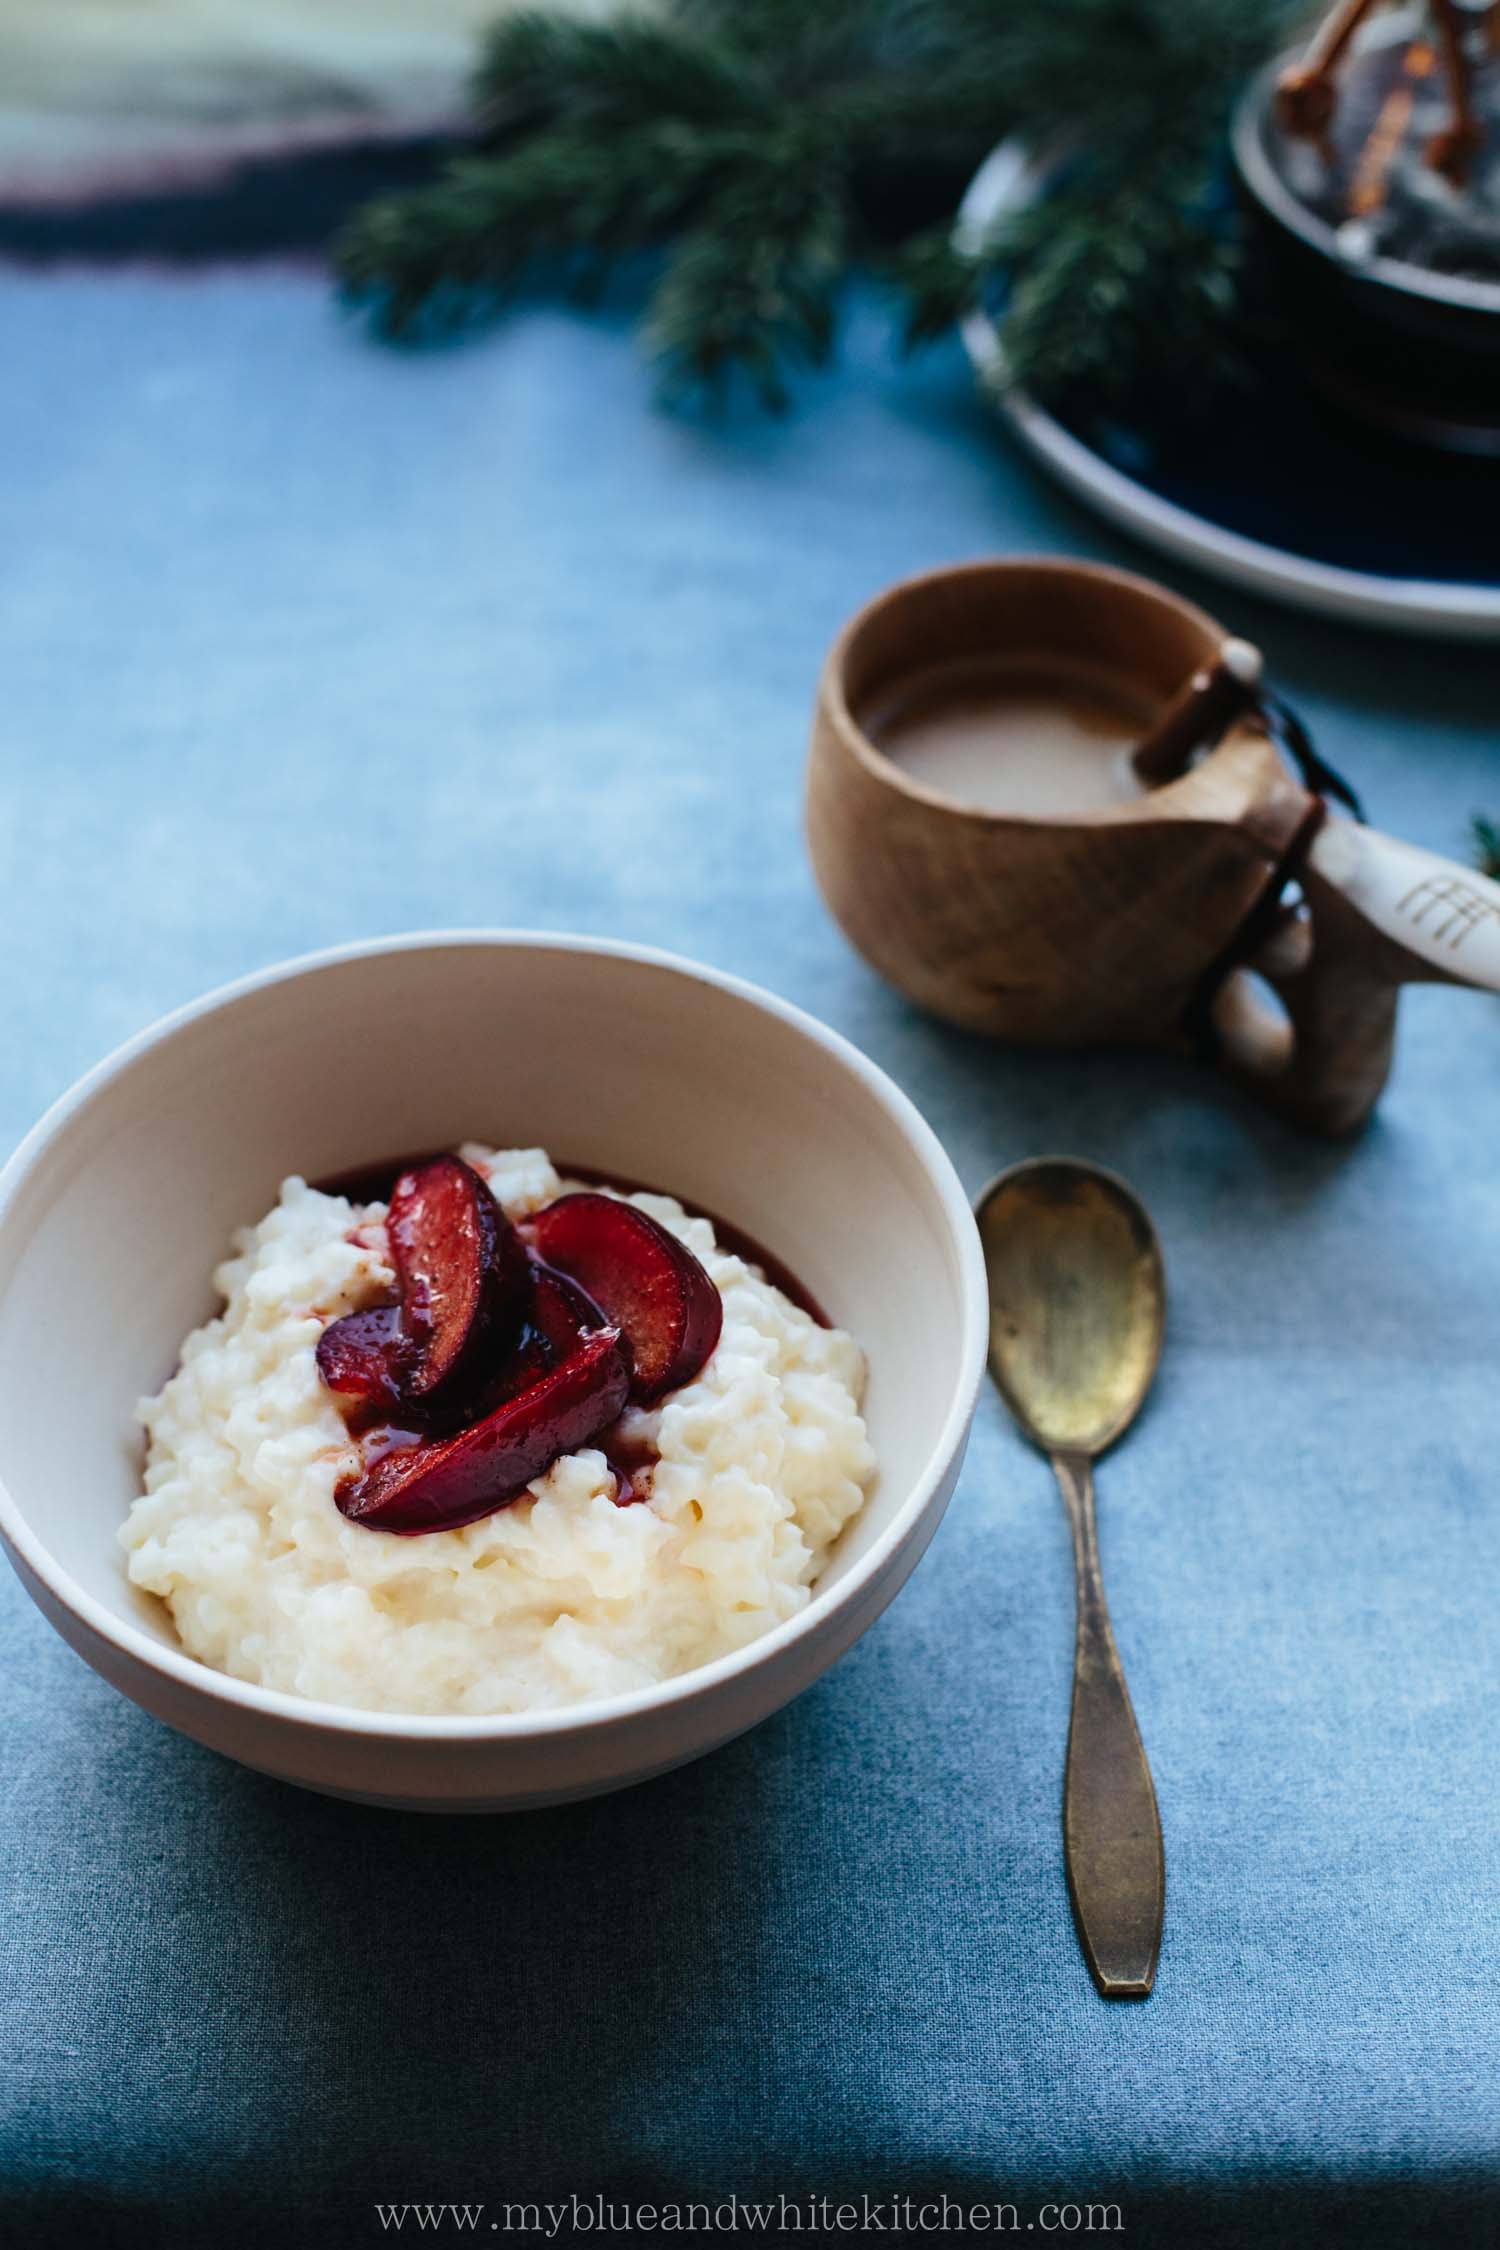
When winter hits hard, it's nice to enjoy a warm breakfast. Porridge is a popular breakfast item in the Nordic countries and many of us enjoy a bowl of oatmeal every single morning. I'm not that kind of a person but I still enjoy having porridge for breakfast every now and then. I especially love rice porridge. Sometimes I serve it with sugar, cinnamon, and milk only but sometimes I top it with caramelized fruit. In today's recipe I've made caramelized cinnamon plums but you could substitute the plums with whatever fruit you like the most, such as apples, pears, or peaches.

Comfort in a bowl. I hope you like it.

Rice Porridge with Caramelized Cinnamon Plums | My Blue&White Kitchen

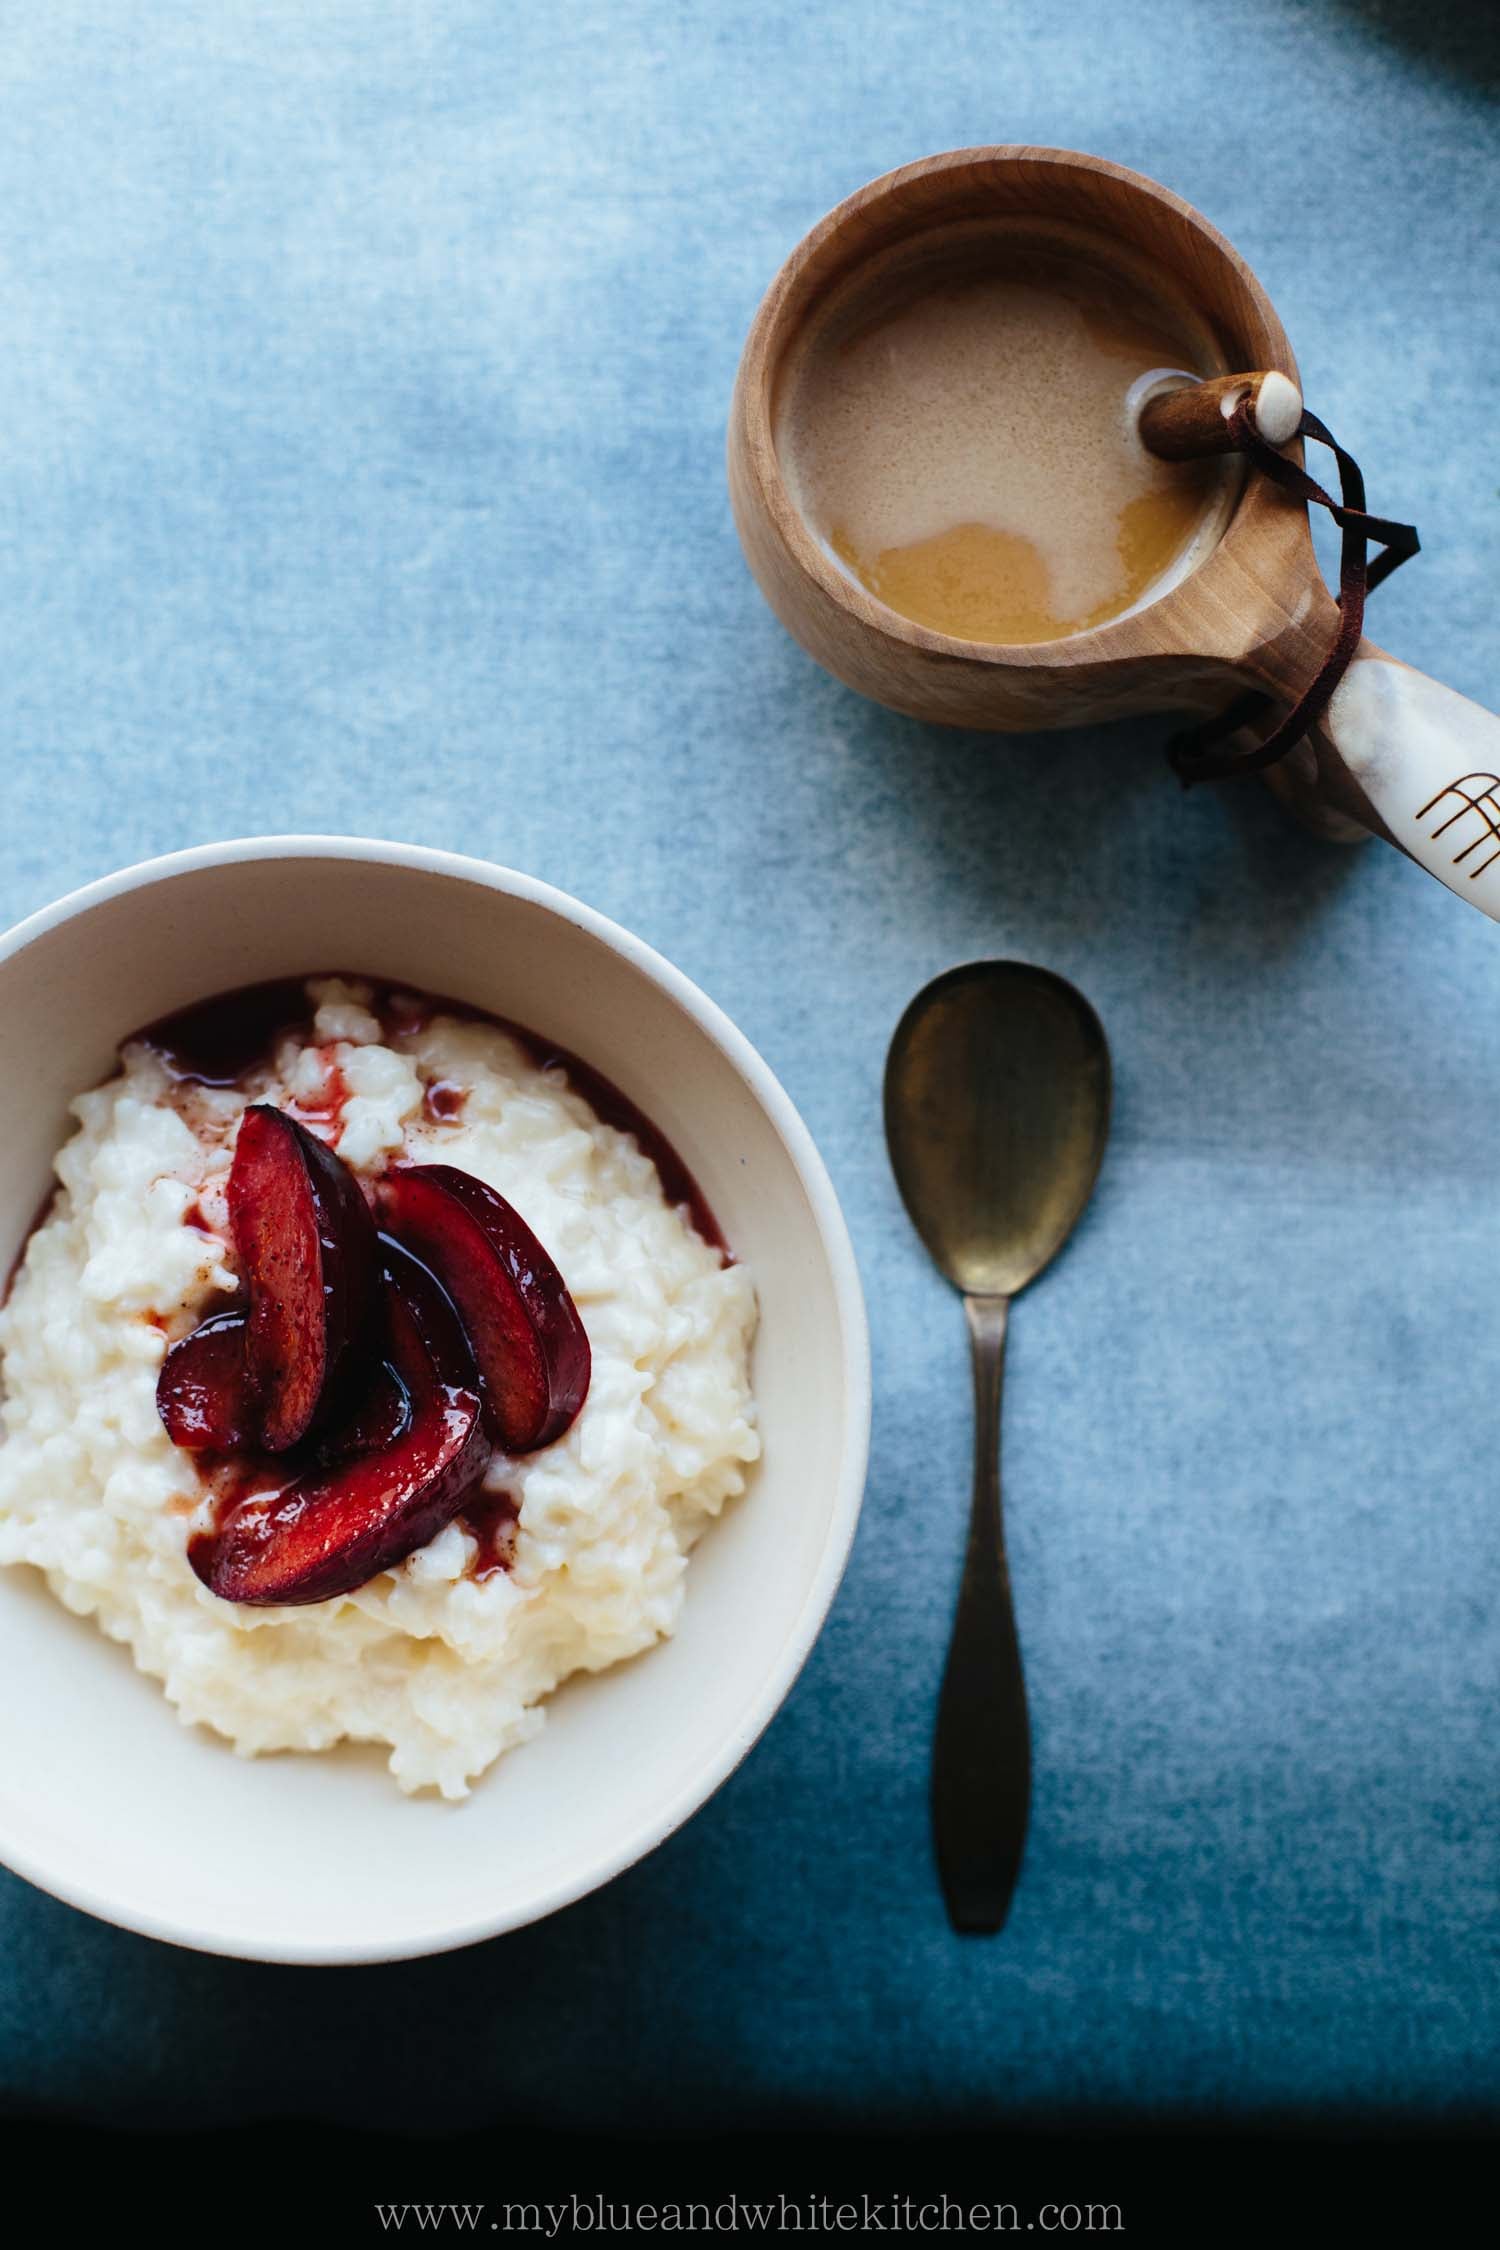
Nordic Rice Porridge with Caramelized Plums

serves 2

As I mentioned above, you can substitute the plums with whatever fruit fits your taste or the season the best. The porridge itself isn't sweetened at all but you can of course add some sugar if you want to.


for the porridge:
a knob of butter
1 dl (½ cup) water
85 g (1 dl; ½ cup) short-grain white rice
500 ml (2 ¼ cups) whole milk
¼ tsp fine sea salt

for the plums:
2 tbsp butter
2 plums, pitted & sliced into wedges
2 tbsp (demerera) sugar
¼ tsp cinnamon

to serve:
sugar & cinnamon
milk, optional


In a small heavy-bottomed pot, melt the knob of butter. Add the water and bring to a boil. Add the rice. Boil for a couple of minutes, or until the water is completely absorbed. Stir every now and then. Add the milk and cook over low heat for about 40 minutes, or until the rice grains are tender and the porridge is creamy. Remember to stir the porridge regularly to avoid burning and sticking to the bottom.

While the porridge is cooking, make the caramelized cinnamon plums. In a medium-sized frying pan, melt the butter over medium heat. Add the plum wedges, sugar, and cinnamon. Cook for around 2 minutes on each side, or until soft and caramelized. Set aside.

When the porridge is ready, add the salt. If you like your porridge sweet, you can add sugar to taste. Serve with the caramelized cinnamon plums.


Rice Porridge with Caramelized Cinnamon Plums | My Blue&White Kitchen

Related Posts

Hello Winter, old friend – Kaiserschmarrn

Kaiserschmarrn | My Blue&White Kitchen

Well hello winter, old friend! Seriously folks, can you believe it's already December? This fall has gone by so incredibly fast with a new job and exciting projects. I'm usually one of the first ones to begin with Christmas baking (so many favorite cookies plus new ones to explore) but I haven't baked a single batch yet. I will definitely change that this week - maybe with some Florentines dipped in dark chocolate? Or with a batch of last year's rose pistachio shortbread?

If you're looking for a great blog for the holiday season, you should definitely visit the Munich-based blog delicious:days – there isn't a single recipe I haven't loved and Nicky is as nuts as me when it comes to holiday baking (or food in general).

Kaiserschmarrn | My Blue&White Kitchen

I'm so excited to share this recipe with you today. I've been dying to share it since last winter and now I finally am. Kaiserschmarrn is a kind of caramelized, fluffy Dutch baby that's torn into pieces, sprinkled with sliced almonds, dusted with powdered sugar, and served with fruit compote. It's especially popular in Austria, Southern Germany, and Switzerland, but it's apparently enjoyed in Eastern Europe as well. Kaiserschmarrn is one of the most delicious things I can imagine on cold winter days, especially after a day in the snow, and it's simply meant to be enjoyed in good company.

I experimented a lot to develop my favorite version and am more than happy with the result. According to my dad, it's the best Kaiserschmarrn he has ever eaten and I, although less experienced, can only say the same. It's a winner, a crowd-pleaser, a winter favorite. It's so delicious that I didn't even notice that I missed the final touch, a generous dust of powdered sugar, when frantically trying to photograph this babe in daylight; yeah, the days are getting ridiculously short up here and it's driving me crazy. But hey, maybe it would just be a shame to hide all that gorgeous golden brown under a layer of white sweetness.

Kaiserschmarrn is typically served with apple, plum, or apricot compote. To make a simple apple compote, core and peel a couple of apples and cut them into pieces. Melt a knob of butter and a couple of tablespoons of sugar in a pot over low heat. Add apple pieces, spices (such as cinnamon and clove), and 1 to 2 tablespoons of Calvados, apple juice, or water. Cover and cook over low heat, until apples are tender.

Kaiserschmarrn | My Blue&White Kitchen

Kaiserschmarrn

serves 3 to 4

Please read the recipe carefully before starting. Once the batter is in the pan and you turn it, there isn't much time to look at the recipe anymore. I like to serve it in a single, large pan, but you can make individual portions as well. You can definitely double the recipe. If you do, make it in a larger frying pan. Also, it won't be easy to turn a larger pancake in one piece but that doesn't really matter, as it will be torn into pieces anyway. So just do it.
 

3 tbsp rum
30 g (½ dl; ¼ cup) raisins

2 eggs (European size M; U.S. L), separated
1 ½ tbsp granulated sugar
½ tsp vanilla paste OR ½ vanilla bean, split lengthwise & seeds scraped out
pinch of fine sea salt
1,5 dl (⅔ cup) whole milk
55 g (1 dl; ½ cup minus 1 tbsp) all-purpose flour
15 g (1 tbsp) butter, for frying
15 g + 15 g (1 + 1 tbsp) butter, to caramelize
about ½ dl (¼ cup) sliced almonds
1 ½ tbsp powdered sugar, to caramelize

to serve:
powdered sugar, to finish
apple or plum compote
vanilla ice cream, if desired


Warm up the rum and soak the raisins for about 30 minutes. Drain and set aside.

In a small to medium-sized bowl, beat the egg whites until stiff. Tipp: the egg whites are done when you can turn the bowl upside down without making a mess in your kitchen ;)

In another bowl, cream the egg yolks, sugar, vanilla, and salt. Add milk and whisk until incorporated. Gradually, add the flour while whisking. Carefully fold in the egg whites with a silicone spatula. Don't mix the batter too much or it won't stay fluffy and light!

Heat a 26 cm (10") nonstick frying pan over medium heat and add 15 g/1 tbsp butter. Pour the batter into the frying pan and sprinkle soaked raisins on top. Fry for 10 to 18 minutes, or until the bottom is golden brown. You'll notice that the batter will rise, somewhat like a soufflé. When ready to turn, the batter is solid on the bottom.

Now comes the tricky part. With a good, flexible spatula, turn over the whole thing. If it breaks, don't worry; we'll soon tear it into pieces anyway. Fry it for 1–2 minutes, then start to break it into about 2,5 cm/1" pieces. Increase the heat to medium-high, add 15 g/1 tbsp butter, and fry for a couple of minutes turning the pieces every now and then, or until the pieces are golden brown all over. Add the remaining 15 g/1 tbsp butter and sliced almonds, and sprinkle with powdered sugar. Fry for about 1 minute, or until it's all nicely caramelized.

Dust with powdered sugar and serve warm with fruit compote of your choice.
...and vanilla ice cream cetainly isn't a bad idea either.


Kaiserschmarrn | My Blue&White Kitchen

Related Posts

Virtual Pumpkin Party – Roasted Pumpkin Risotto with Crispy Prosciutto

Roasted Pumpkin Risotto with Crispy Prosciutto | My Blue&White Kitchen

I'm always fascinated by different food cultures around the world. How an ingredient that is so common in one corner of the world can be almost unknown or hard to come by in another. For me, fresh forest berries are no luxury, dill is a widely used and available herb, and baked goods are spiced with cinnamon and cardamom. However, I was probably a teenager when I had mung beans for the first time, I actually had my first oyster last weekend at The Cock (so good!), and I've never had grits. 

For many years, pumpkin was a rather unfamiliar vegetable for me. I don't remember ever having it at home. Pickled pumpkin was served at school lunch every now and then but I don't know anyone who liked it... It was always a challenge to identify whether those orange cubes at the salad bar were pickled pumpkin or canned peach (that would have been a lucky day). Because of my very limited experiences (except that horrible pickled kind) with this fall veggie, I didn't like it. Like at all.

Roasted Pumpkin Risotto with Crispy Prosciutto | My Blue&White Kitchen

Nowadays, I make sure to never say that I don't like an ingredient. I rather prefer to say that I haven't found it prepared in a way that suits my taste. So when I traveled around eastern Canada and the U.S. for a couple of months some years ago, I thought that all these people can't be wrong about pumpkins. I just need to continue to try different dishes and preparation methods. So I started my own "give pumpkin a chance"-campaign which included ordering a pumpkin dish whenever I saw it on a menu. And what should I say, it worked and turned me into a pumpkin lover.

Roasted Pumpkin Risotto with Crispy Prosciutto | My Blue&White Kitchen

Today, we are having a virtual pumpkin party around the blogosphere. Countless food bloggers are sharing delicious pumpkin recipes - my mouth waters when I read through all those recipe titles! To keep up with all this awesomeness, follow us with the hastag #virtualpumpkinparty. Also, a huge thank you to Sara of Cake Over Steak for organizing this event!

Some of my favorite #virtualpumpkinparty recipes include:

A Couple Cooks – Pumpkin Spice Almond Butter
Two Red Bowls – Pumpkin & Caramelized Onion Galette
I am a Food Blog – Roasted Pumpkin & Pork Stuffed Shells
Warm Vanilla Sugar – Dulce de Leche Pumpkin Ice Cream + Affogato
The Bojon Gourmet – Pumpkin Flatbread with Gruyère & Crispy Sage
le ju's d'orange – Lentil Stuffed Acorn Squash & Crispy King Oyster Bacon
Girl Versus Dough – Pumpkin Challah

Roasted Pumpkin Risotto with Crispy Prosciutto | My Blue&White Kitchen

I decided to make a bowl of comforting, lovely fall risotto. This right here is comfort food at its very best. It's like a warm hug. Oh and before one of you guys shouts "Hey, she's using butternut SQUASH instead of pumpkin!", I have to tell you that it was only when I did some research for this post that I learned that the word pumpkin means those round squash plants, like the ones you see around Halloween. So let's just pretend I'm Australian and that by "pumpkin" I mean all types of winter squash. Okay? Okay.

As the days are crisp, I find myself preparing risotto almost every week. For some reason this Italian classic seems to scare many home cooks, although there really is no reason to be scared. Risotto is easy to prepare as long as you follow a few important guidelines:

  • use specific risotto rice, such as Carnaroli or Arborio
  • always use warm stock, as cold stock will stop the cooking process, one ladleful at a time
  • stir it every now and then to get that creamy texture everybody looks for – however, there's no reason to stir it constantly


When you learn how to prepare a basic risotto, you'll have a whole world of delicious, comforting Italian goodness ahead of you! As Valentina of Hortus has done a great job in listing and explaining the main steps of any successful risotto, I'll not gonna list them here as well. I hope that you'll find the confidence to make risotto that suits the season and your personal preferences at any day of the week.

Roasted Pumpkin Risotto with Crispy Prosciutto | My Blue&White Kitchen

Roasted Pumpkin Risotto with Crispy Prosciutto

serves 4–6

You can use basically any winter squash. Personally, I like to use butternut squash or acorn squash. I prefer to use chicken stock, as I feel that it adds more flavor, but feel free to use vegetable stock instead. The butter at the very end is optional but makes this risotto feel extra special.


about 450 g (1 lb) winter squash, peeled, seeds and pulp removed, & cut into 1,5 cm/0,6" cubes
olive oil
fine sea salt & pepper
a small handful of thyme sprigs

2 tbsp olive oil
1 large shallot, chopped
300 g risotto rice, such as Carnaroli or Arborio
120 ml (½ cup) dry white wine
1,5 l (6 ⅓ cups) chicken stock
zest of 1 organic lemon
40 g finely grated parmesan, plus more to serve
50 g butter, cubed

5 slices prosciutto, cut in about 1 cm/0,4" pieces


Preheat the oven to 200°C (400°F). In a baking pan, toss the squash cubes with just enough olive oil to coat the pieces completely. Salt and pepper and add thyme. Spread in a single layer. Roast for 30 to 40 minutes, or until cooked through and edges start to caramelize. Discard thyme stalks.

In a medium-sized frying pan, fry the prosciutto until crispy. Place on a sheet of kitchen paper to drain.

In a pot, bring the stock to a small simmer. Keep it warm over low heat.

Heat a medium-sized pot over low heat and cook the shallot in olive oil until soft and transluscent. Turn the heat to medium and add the rice. Toast for about 2 minutes, or until it turns translucent, stirring constantly. Add wine and stir until absorbed. Turn the heat back to low.

Add a ladleful of warm stock, stir, and wait until it's completely absorbed before adding the next ladleful. Repeat to add stock one ladleful at a time while stirring every now and then. Continue until the rice is al dente and the risotto is oozy. This will usually take 15 to 18 minutes. Should you run out of stock, continue with hot water.

Take the pot off the heat. Add the roasted pumpkin cubes. Stir in the lemon zest, parmesan and butter. Taste and add more salt if necessary. Pop the lid on and let rest for 2 minutes before serving. You should now be rewarded with a creamy, oozy risotto.

Serve topped with crispy prosciutto and grated parmesan.


Related Posts

Fall Vibes – Plum Galettes

Plum Galettes | My Blue&White Kitchen

Fall is the time for new beginnings. Kids go back to school and their parents go back to work; thousands of students start at colleges and at universities eager to get to know new people, to learn, and to dream big. As nature is getting ready to face winter, we're getting back to the everyday routines or are just creating new ones. 

For me, this fall started with a new full-time job. I've really enjoyed my first weeks, although I've often feeled rather exhausted when getting back home. It's been a challenge to manage both work, the blog, and my free-time. It has meant to be kinder to myself, to endure unfinished projects, and the fact that I can't be at more than one place at a time. As much as I've liked my new work and getting to know my colleagues, I've also got into decorating my office (it's one of the most fun parts, right?). I'm still looking for a picture to hang on the wall and am dreaming of a succulent terrarium, one of RK design's gorgeous wall hangings, and/or a minimalistic swag wreath. But still, I think that already a pot or two of something green really makes the whole room feel cozy and welcoming. They fill the space with life.

Plum Galettes | My Blue&White Kitchen

Weekends are more important than ever. They're spend loading up batteries and forgetting about work stuff. I've spent as much time as possible in the woods and in the kitchen, as those are the places where I find peace. Those are the places where I feel connected to myself and to my surroundings. When I'm in the woods, the words of Terry Tempest Williams come to my mind: "To be whole. To be complete. Wildness reminds us what it means to be human, what we are connected to rather than what we are separated from." That women. If you haven't read her work, you should.

Plum Galettes | My Blue&White Kitchen

I've enjoyed roaming in the woods but sadly fall harvest doesn't look that good. Lingonberries are plenty and there are still wild blueberries to be picked. However, although chanterelles were plenty in summer, the woods are now short of mushrooms. I really hope that this will change soon! Maybe the weather will be more favorable in September and October; there are so many wild mushroom recipes that I'm eager to test and possibly share with you guys. Well, it's raining today, so I still have hope ;) Mushroom foraging trips are one of the best parts of fall.

At least there are plums (not in the woods but anyway)! Those juicy, delicious fellas are always worth waiting for; Zwetschgendatschi, plums with portwine, Kaiserschmarrn with plum compote (I hope to share the recipe with you this fall/early winter), rice porridge with caramelized, cinnamon-spiced plums... Gosh, how I cherish this season! So today, I want to share a recipe that's close to my heart. This galette is a long-time favorite; I've baked it every year for at least a decade. I still remember how I used to come back home from school only to find leftovers on the kitchen counter. I would reheat a slice and enjoy it with a dollop of whipped cream. It's a simple galette with a short ingredient list and easy to follow steps. The taste, however, is decadent. It's the kind of recipe I come back to again and again, that I share with family and friends, and that will surely be handed down through generations.

Please feel free to share your favorite plum recipes in the comment section below! One can never have too many.

Plum Galettes | My Blue&White Kitchen

P.S. I did a fun interview with the German Food & Travel magazine Speisen + Reisen this summer. I feel honoured to be featured in a 4-page-long (!) article as well as being able to share 5 recipes. The issue is out now, so be sure to get your copy! *crazyhappy*


Plum Galettes

makes 6 small or 1 large galette

for the crust
220 g (4 dl; 1  cups) all-purpose flour + more to dust
1 large pinch of fine sea salt
2 tbsp granulated sugar
150 g cold, unsalted butter, cut into cubes
4 tbsp ice cold water

for the filling
400 g plums, cut into 6-8 wedges
45 g (½ dl; 3  tbsp) granulated sugar

powdered sugar, to finish
whipped cream or vanilla ice cream, to serve


To make the crust
In a medium-sized bowl, combine the flour, salt, and sugar. With your fingers, quickly rub the butter into the dry ingredients until well incorporated and crumbly. The dough should now resemble coarse bread crumbs with plenty of pea-sized pieces of butter remaining. Add water gradually just until the dough holds together when pinched. Work as fast as possible to avoid over-working the dough. Alternatively, you can make the dough with a pastry cutting tool or in a food processor.

Form the dough into a disk and wrap in plastic. Refrigerate for at least an hour.


To assemble and bake
Preheat the oven to 180°C (355°F). Line a baking sheet with parchment paper. Set aside.

Lightly dust the chilled dough with flour. If you're making small galettes, cut the dough into 6 equally-sized portions. Roll the dough out on a well-floured work surface into about 3 mm (0.1") thick circles. If the dough cracks, don't worry; just pinch it back together. Transfer to the prepared baking sheet. Arrange the plum wedges in the centre and be sure to leave a 4–5cm (1.5–2") border. Fold up the edges.

Bake on the middle rack for about 40 minutes, or until edges are golden brown and the filling bubbles.

Dust with powdered sugar and serve warm or at room temperature with whipped cream or vanilla ice cream. I always reheat any leftovers; the flavors are so much better and the galette seems to simply melt in your mouth.


Plum Galettes | My Blue&White Kitchen

Related Posts

Nordic Oven Pancake with Wild Blueberries

Nordic Oven Pancake | My Blue&White Kitchen

The last couple of weeks have been busy. To be more exact, I've been busy with life trying to spend as much time outdoors and with friends as possible (now that the weather finally turned as it's supposed to be in summer) and avoiding spending time on the computer or the phone. Summer is prescious and short here, so it always feels like one must make the most of these long days - we'll all miss them once darkness returns.

Nordic Oven Pancake | My Blue&White Kitchen

Picking a highlight of my summer isn't easy, but as some of you may have seen on Instagram, I spent a week in Finnish Lapland and Norway in the end of July. We had planned to hike the 55-km-long Hetta-Pallas trail but the weather was forecasted to be extremely rainy, so that we changed our plans on the very last minute and decided to head further north. Yeah, if there's one thing that I (once again) learned from this trip, it's that things don't always go as planned. But why should they? Often unplanned stops in life are the very best ones. And let me tell you, this trip was no exception. So after spending a day in the Pallas' fells, we drove to Saana, a glorious fell located only a couple of kilometres from the Norwegian border. The hike to the top of the Saana fell wasn't an easy one but definitely worth it. And oh Norwegia - it left us speechless and thankful for all the moments we had there. I've been traveling the world for quite a lot and feel absolutely confident saying that the scenery in Norway is one of the most stunning I've ever seen. I can't wait to discover this country even more.

Nordic Oven Pancake | My Blue&White Kitchen

Another highlight of this summer (every summer to be more exact) have been the countless hours spent picking Nordic berries in the forest. Especially wild blueberries, called bilberries, have grown in abundance this year. I've freezed some for later use, made jam, used them in baked goods, and enjoyed them both plain and as toppings for yogurt, ice cream, etc. These blue fellas are full of flavor and one can get quite addicted to them.

Today, I want to share a true childhood favorite with you: Nordic Oven Pancake. It's basically our version of a Dutch baby, baked on a baking sheet instead of a pan. I like when the center is barely set and still custardy making it an unresistable treat. Oven pancake is perfect when you're too lazy to make crêpes that require much more effort and time; the oven pancake batter is super easy and quick to make and your oven does most of the work. As the pancake itself isn't very sweet, the toppings are what truly makes this dish shine. You can top your slice with whatever you like - fresh berries and/or homemade jam are always a good choice but I also love to enjoy a slice with nothing more than granulated sugar. If you want to get wild and deliscious, add some whipped cream or an ice cream scoop or two.

Wishing you all wonderful late summer days! Enjoy.


Nordic Oven Pancake

makes 1 sheet (size: 39x32,5cm / 15,4"x12,8", measured from the bottom of the pan, excluding rims)

This is a true summer favorite with a custardy center. Be super careful when placing the sheet in the oven making sure not to splash any batter!

1 liter (4 ¼ cups) whole milk
3 tbsp granulated sugar
¾ tsp fine sea salt
4 eggs (European M; U.S. L)
30 g (2 tbsp) butter, melted
250 g (4 ½ dl; 2 cups minus 1 ⅔ tbsp) all-purpose flour


Preheat oven to 200°C (400°F). Line a rimmed baking sheet (at least 2 cm / ¾" deep) with parchment paper.

In a medium-sized bowl, mix together the milk, sugar, salt, eggs, and melted butter until well combined. Gradually add flour and mix until smooth. Let rest for about 30 minutes.

Pour batter into prepared baking sheet. The sheet will be filled to the rim with batter, so be extra careful when placing the sheet in the oven. Bake on the middle rack for 30 to 40 minutes, or until the top is golden brown with darker spots here and there and the bottom is golden brown. The batter will rise in the oven (and look like the Ural Mountains) but falls quickly after being removed from the oven.

Let cool down before serving, so that the center sets proberly. Serve cold or at room temperature with toppings of your choice.


Nordic Oven Pancake | My Blue&White Kitchen

Related Posts