Now, Now, Now – Lavender Cookies

my blue&white kitchen

for how many years have you gone through the house
shutting the windows,
while the rain was still five miles away

and veering, o plum-colored clouds, to the north
away from you

and you did not even know enough
to be sorry,

you were glad
those silver sheets, with the occasional golden staple,

were sweeping on, elsewhere,
violent and electric and uncontrollable--

and will you find yourself finally wanting to forget
all enclosures, including

the enclosure of yourself, o lonely leaf, and will you
dash finally, frantically,

to the windows and haul them open and lean out
to the dark, silvered sky, to everything

that is beyond capture, shouting
i'm here, i'm here! now, now, now, now, now.
 

– Mary Oliver, "From The Book of Time"  in The Leaf and The Cloud: A Poem
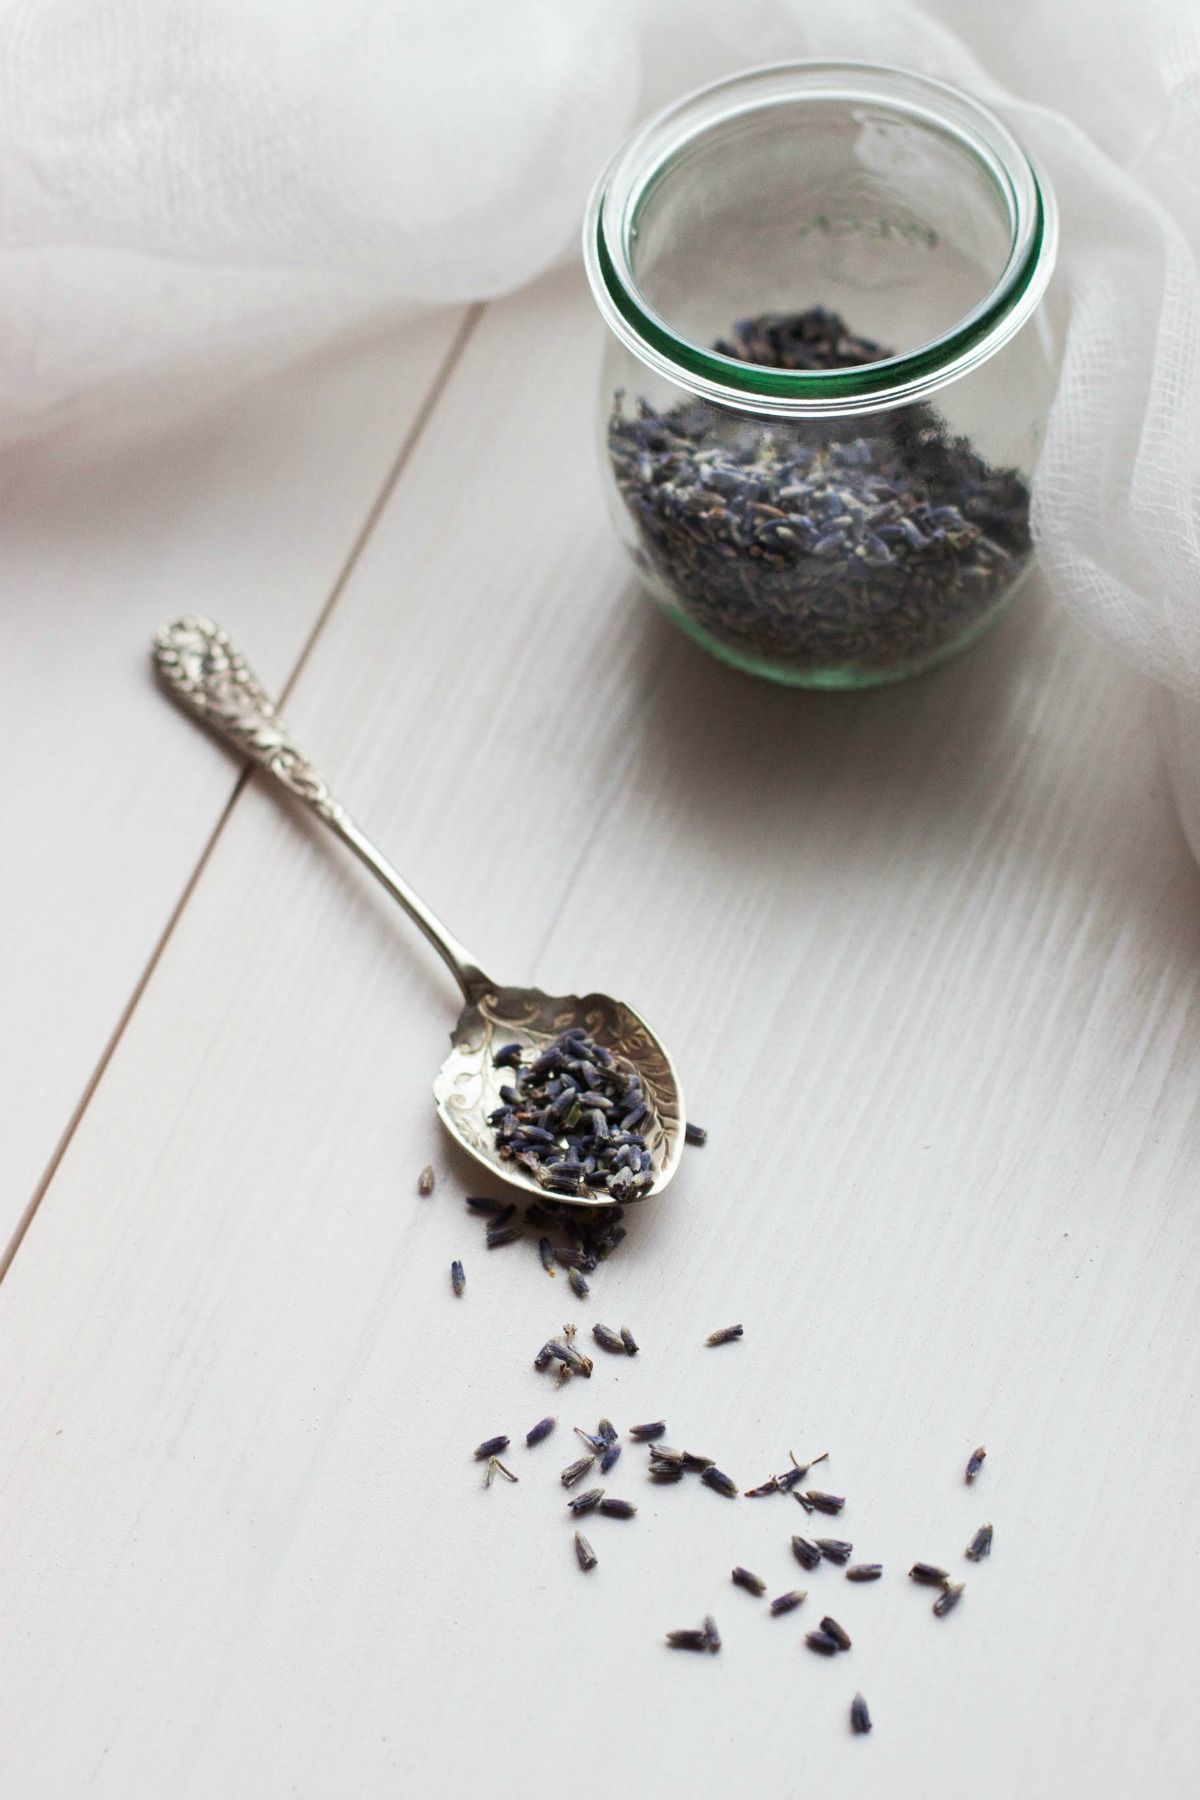
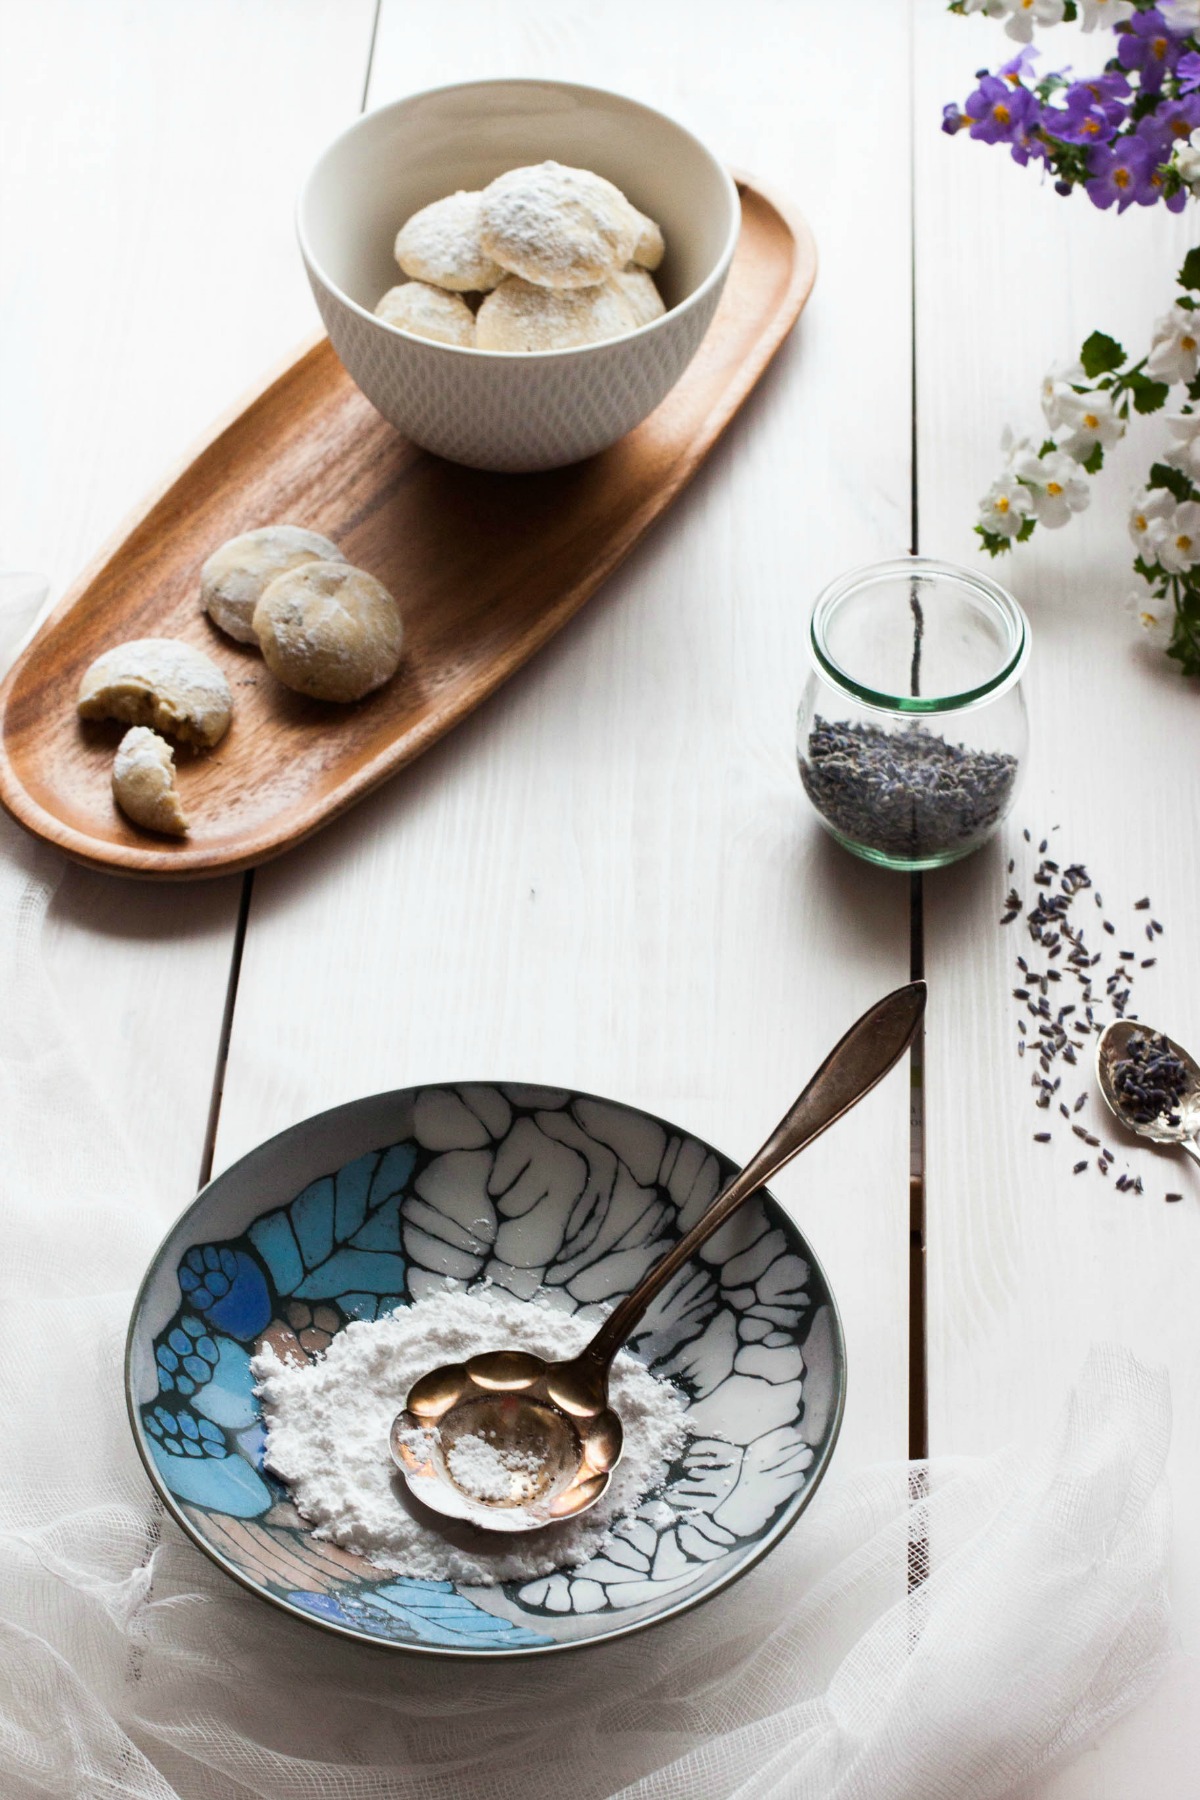
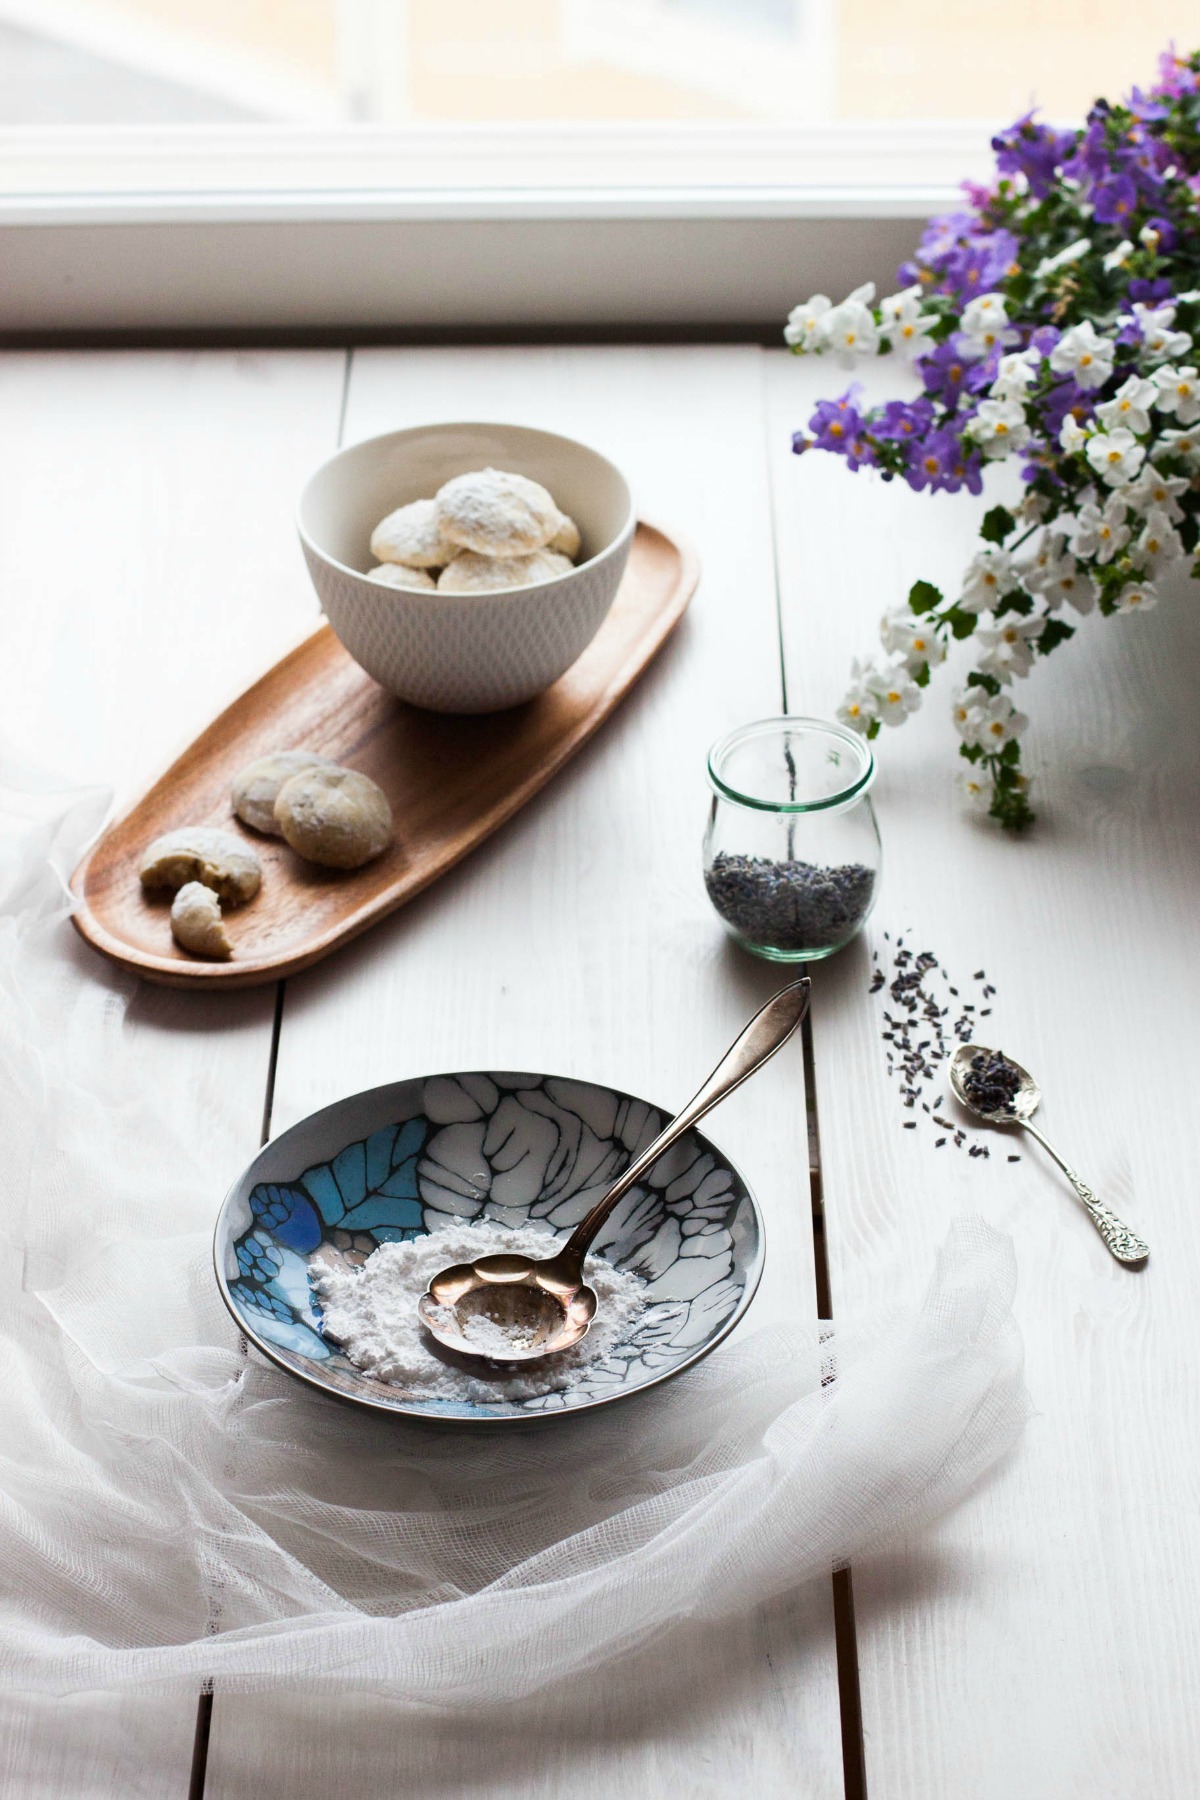
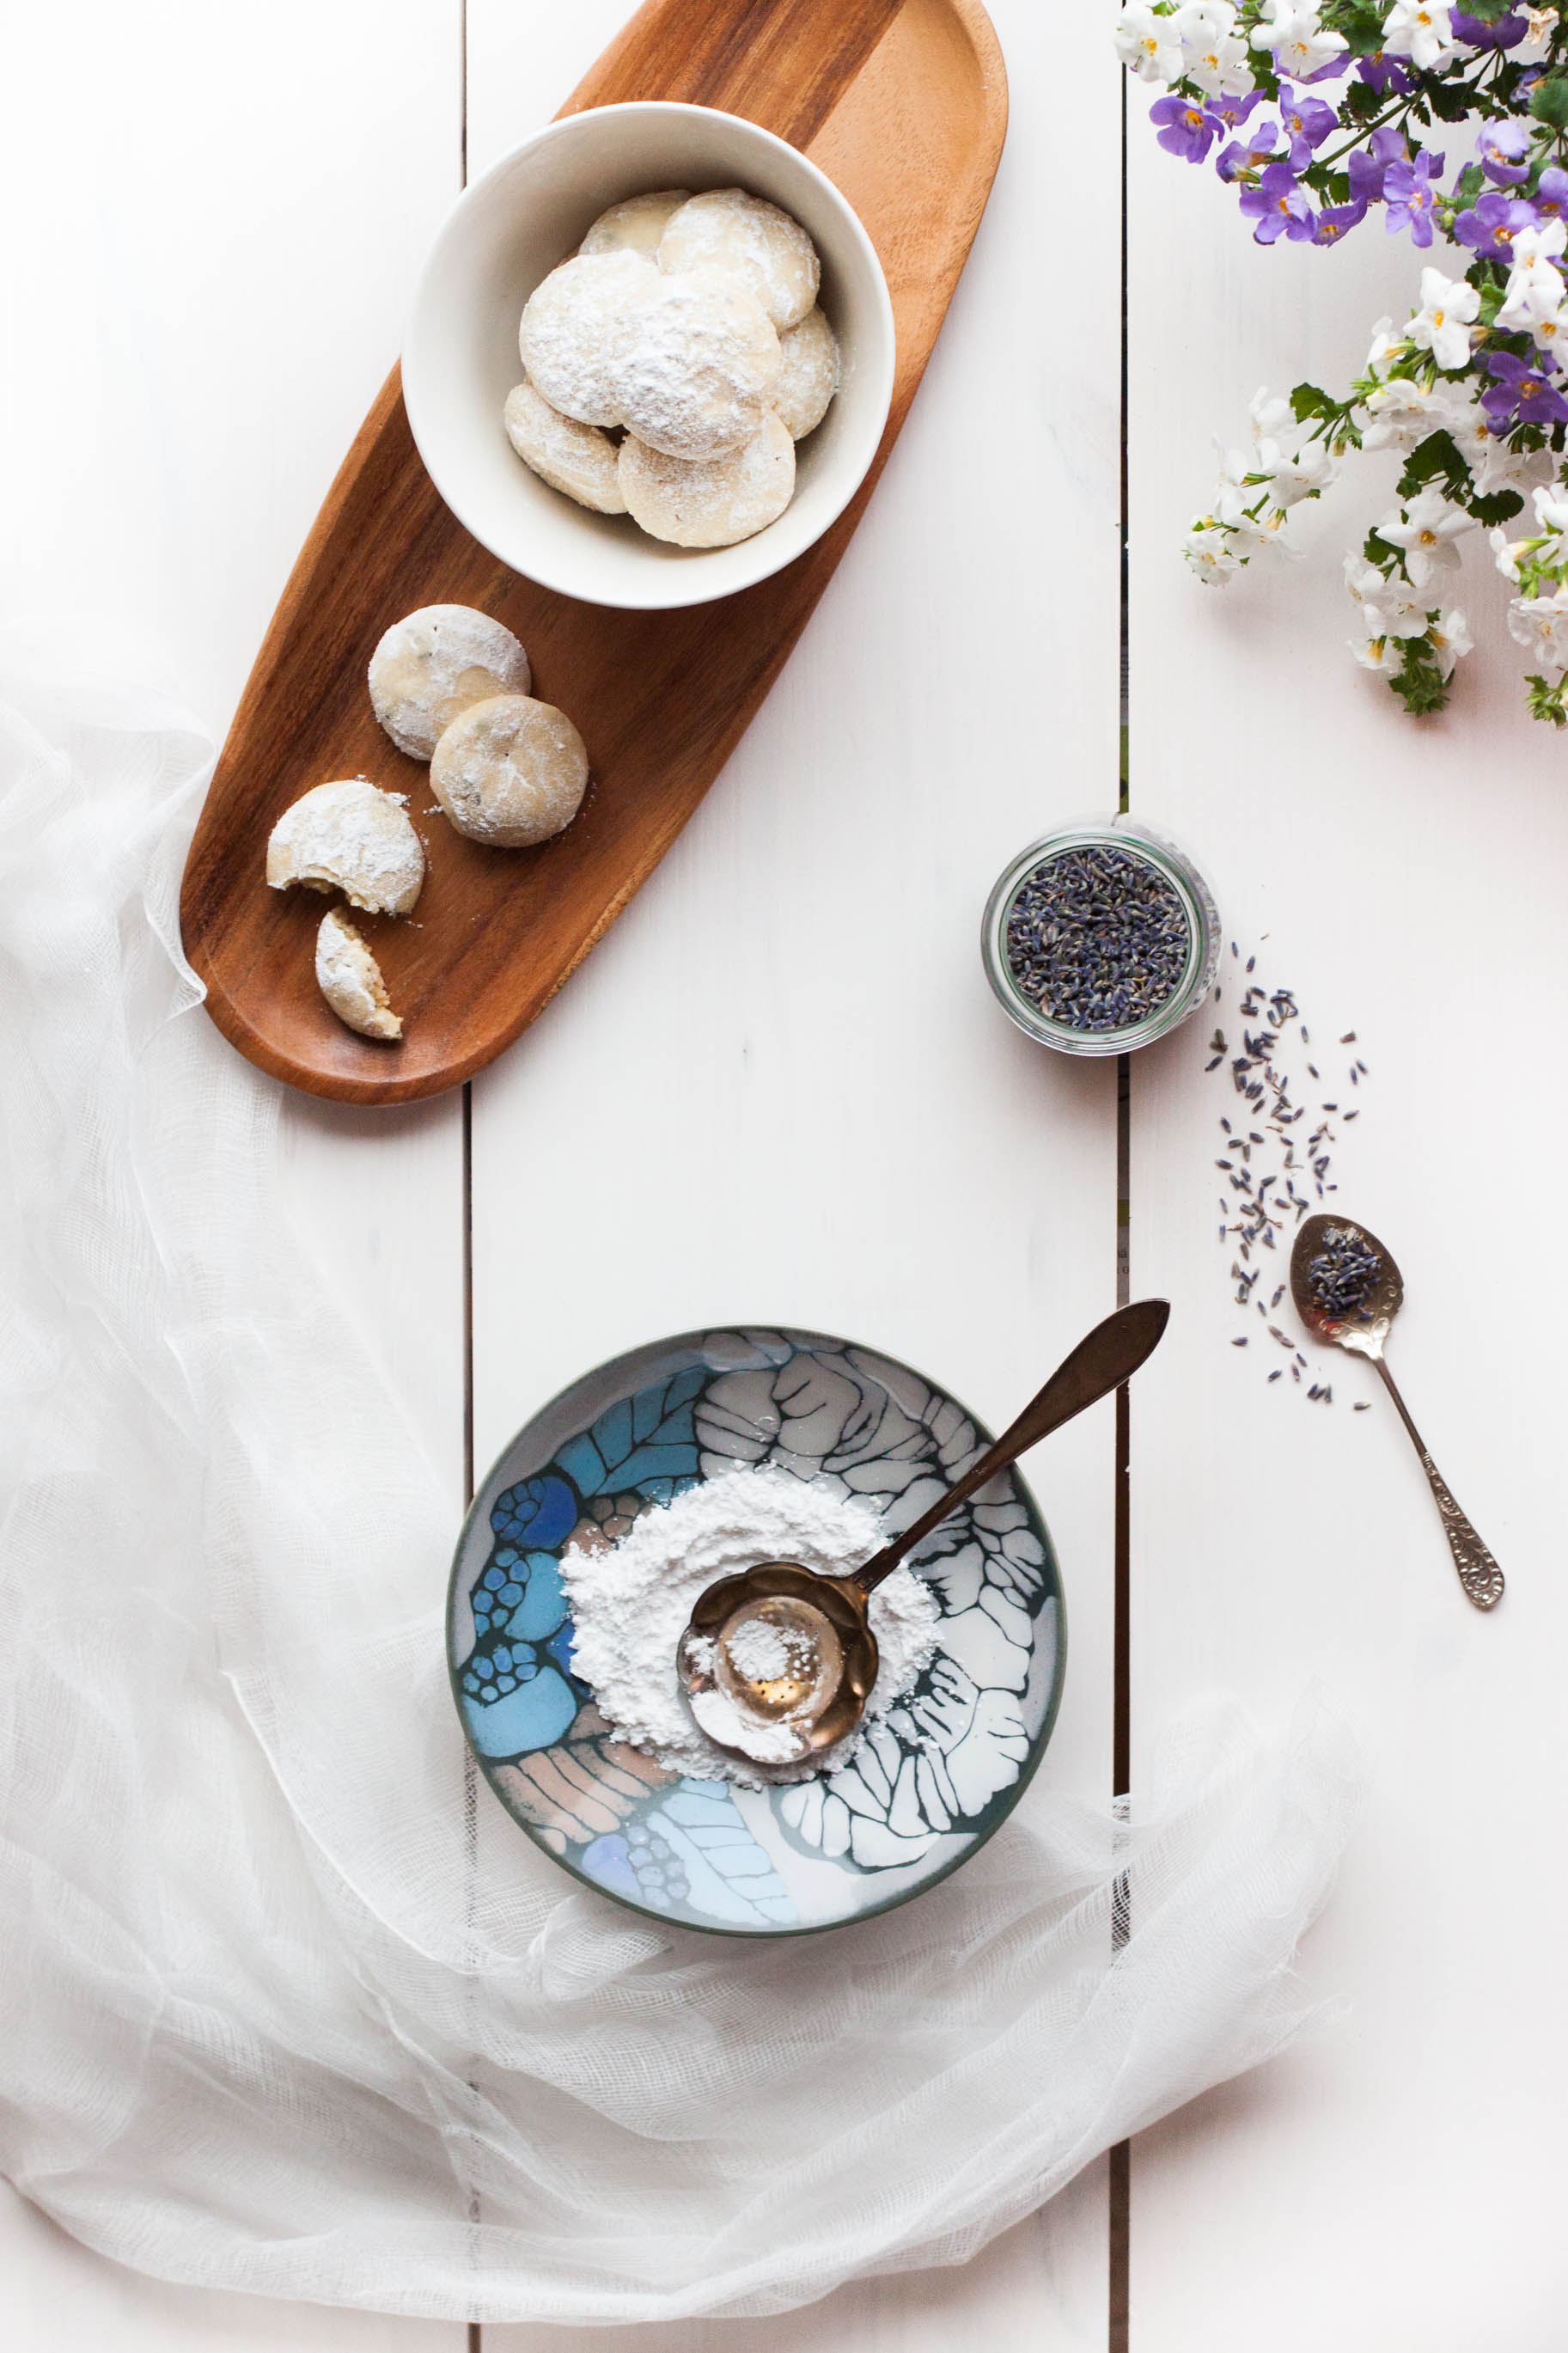
Lavender Cookies | my blue&white kitchen

Lavender Cookies

adapted from A Piece of Cake by Leila Lindholm, p. 26
makes about 20 cookies

The original recipe calls for hartshorn salt, a leavening agent that has formerly been made from ground-up antlers of a hart, a male deer. A long time ago, it was widely used as a medicine to treat diarrhea, fevers, insect bites, and such. But it is more than just a medicine. In the 17th and 18th century, it was the forerunner of baking powder, used especially in German and Scandinavian baking, mostly in cookie recipes. Today, it's rarely used and, unlike it the early days, chemically produced. I've made this recipe numerous times using hartshorn salt which can still be purchased at the pharmacy. It lends a special crispness and lightness to cookies without leaving any unpleasant alkaline off-flavor. However, it doesn't have a long shelf life and it may be hard or even impossible to come by where you live, so I've substituted it with baking powder here. It can, however, be substituted with half the amount of hartshorn salt. In other words, 1 teaspoon of baking powder equals ½ teaspoon of hartshorn salt.

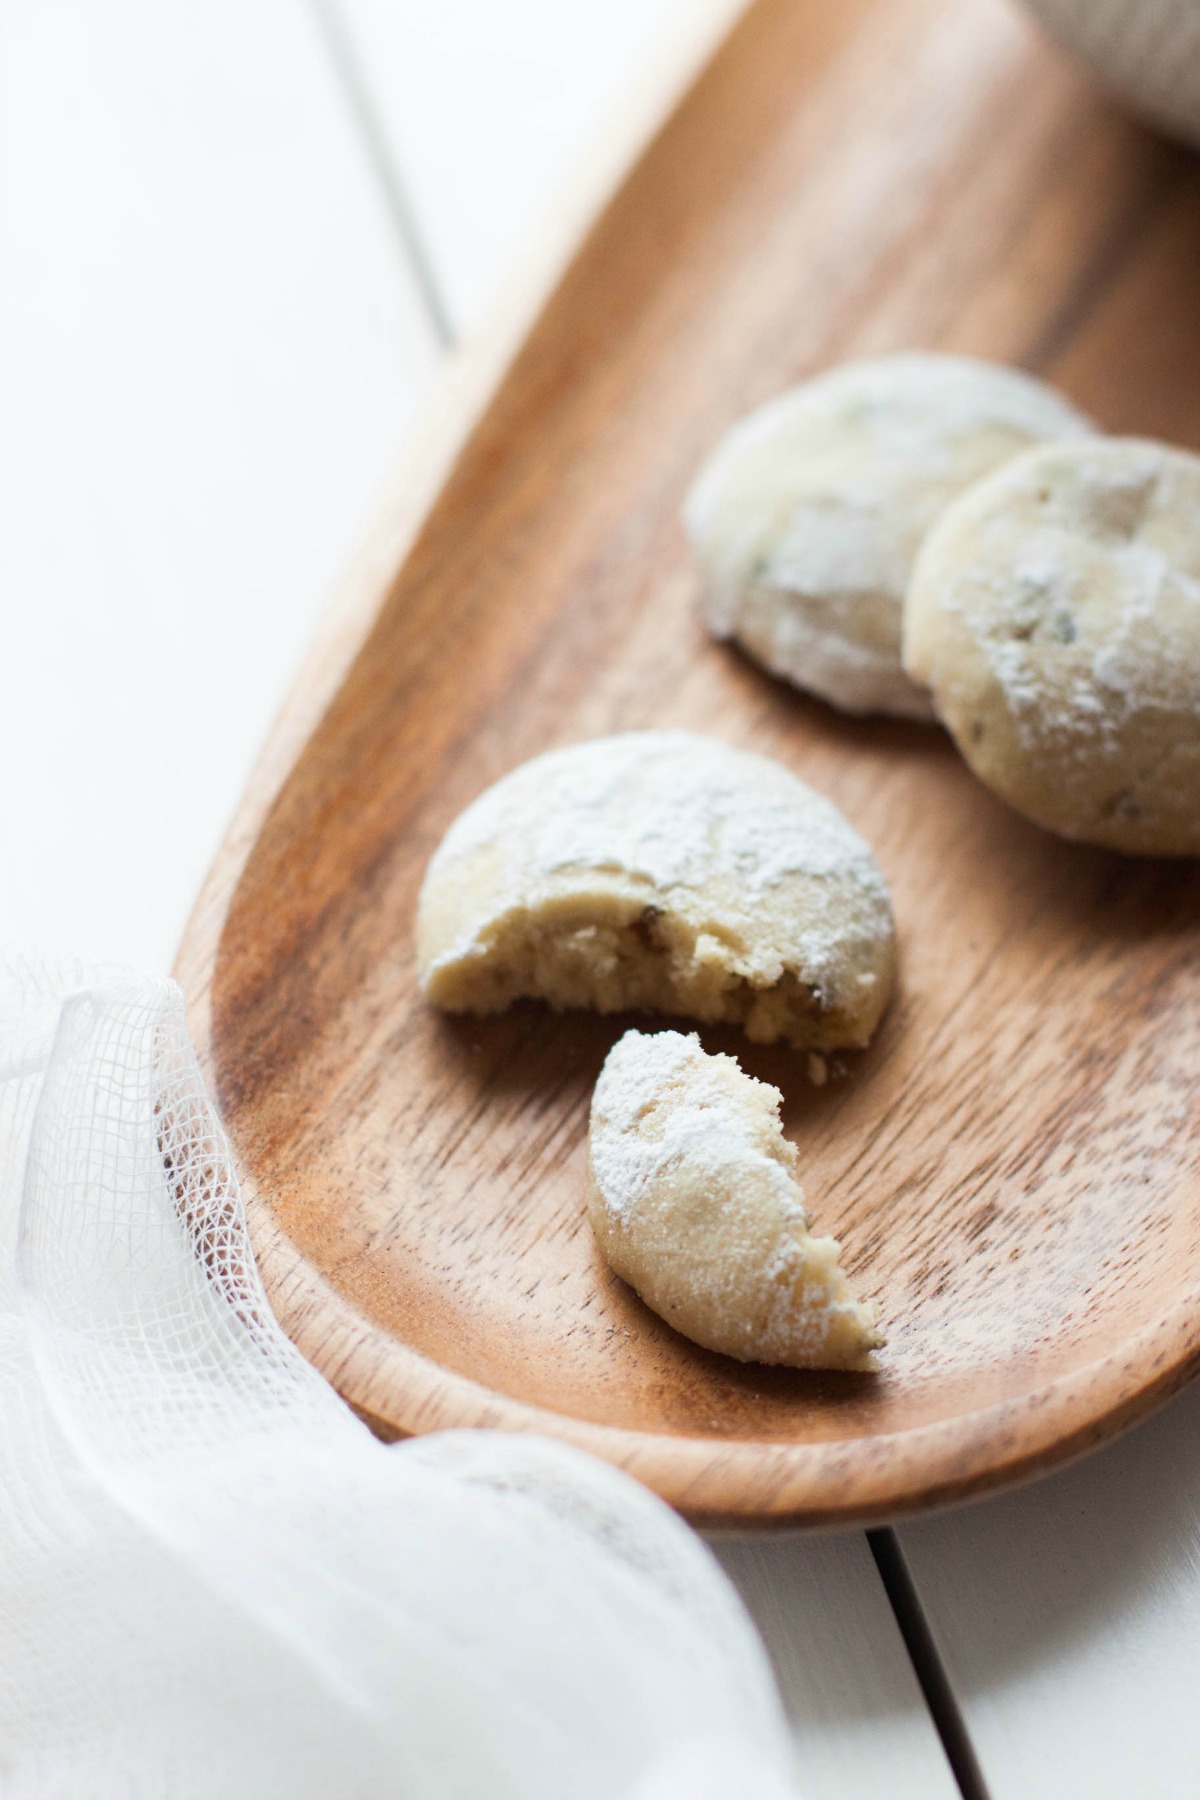
The flavor of these cookies will develop over time. Right after baking, the lavender aroma is rather aggressive, almost overwhelming. On the next day you will, however, have wonderfully fragrant cookies which are perfect served with a cup of coffee. They are like luscious pralines; you eat one at a time enjoying every bite.
 

100 g soft unsalted butter
90 g (3.2 oz; 1 dl; ⅓ cup + 1 ½ tbsp) granulated sugar
½ tsp vanilla paste [or ½ vanilla bean, split open and seeds scraped out]
140 g (4.9 oz; 2 ½ dl; 1 cup) all-purpose flour
½ tsp baking powder [or ¼ tsp hartshorn salt]
pinch of salt
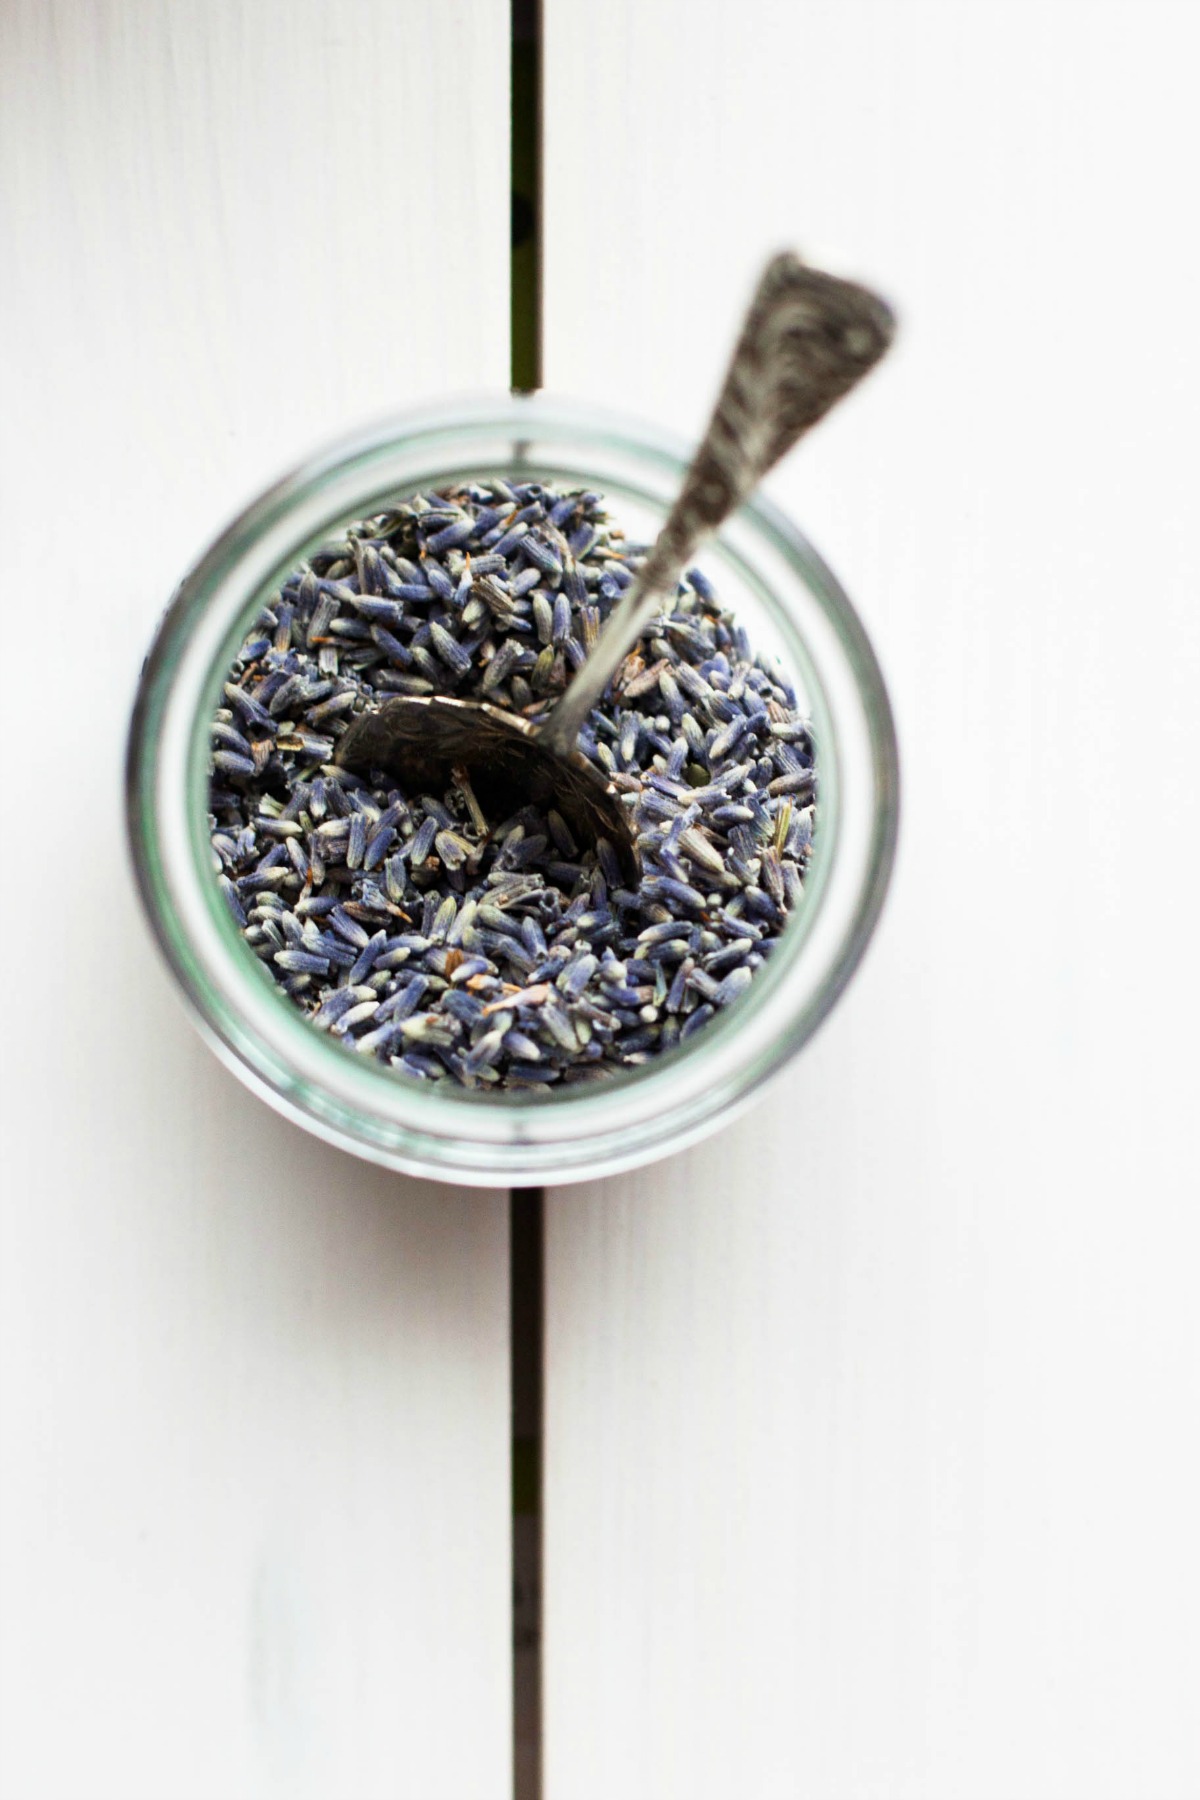
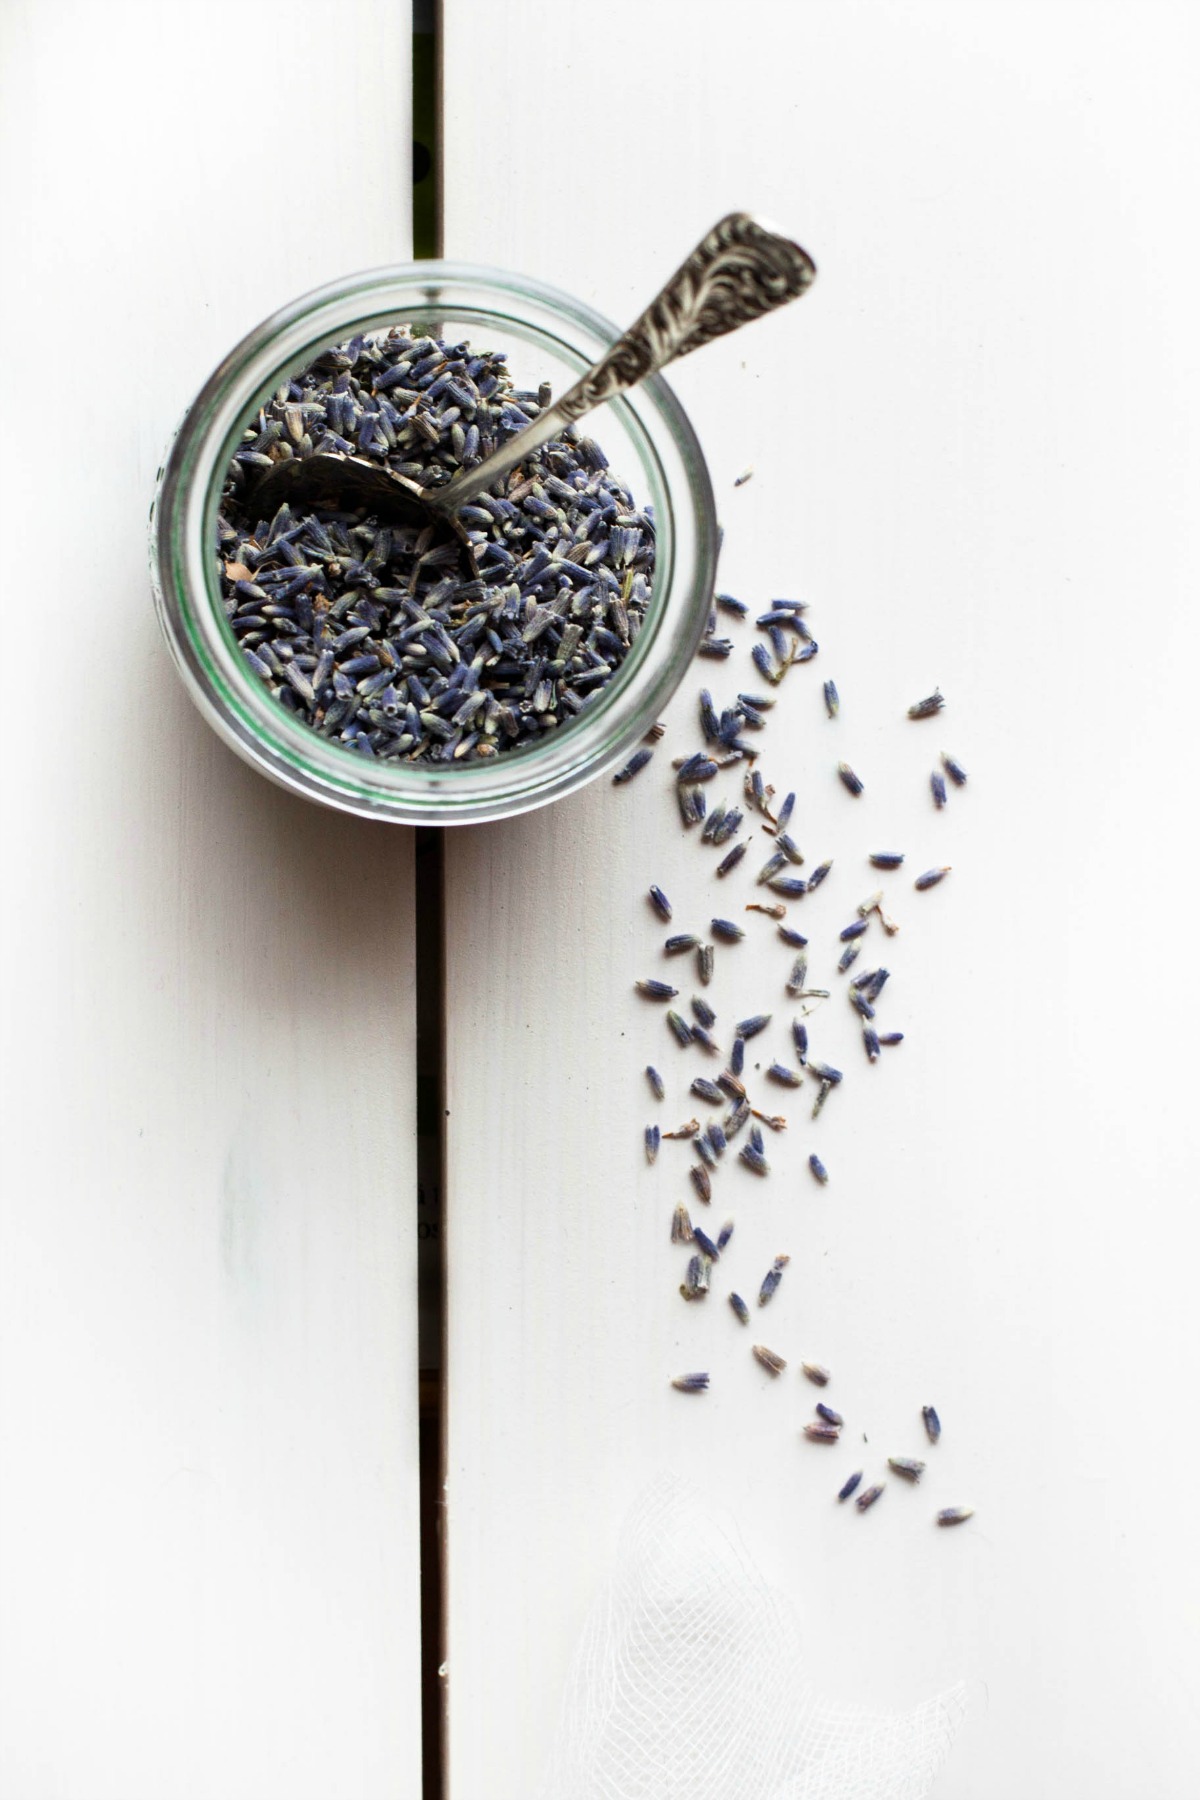
1 tbsp dried (or fresh) lavender buds

powdered sugar, for rolling


Preheat the oven to 150°C (300°F). Line a baking sheet with parchment paper.

In a separate bowl, combine the flour, baking powder, salt, and lavender. In the bowl of a stand mixer, cream the butter and sugar until light and pale in color. Add the vanilla bean paste. Add the dry ingredients and mix just until combined.

With the help of a small ice cream scoop or a spoon, scoop out the dough, about 1 tablespoon at a time, and, using your hands, form little balls. Place them on the baking sheet about 2,5 cm / 1 " apart.

Bake on the middle rack for about 15–20 minutes until lightly golden and not falling apart when touched. Let them cool for about 5 minutes. Roll them in powdered sugar while still warm.

Store in an airtight container.


Miss Gorgeous – Rhubarb Strawberry Datschi

"Good afternoon, Miss Rhubarb. You look gorgeous today!"

And she blushed the most beautiful red I had ever seen.

Rhubarb Strawberry Datschi | my blue&white kitchen

Ever since I arrived in Germany, I had this idea of a Datschi topped with spring ambassadors: tart rhubarb and juicy, sweet strawberries. As it's Datschi we're talking about here, it was clear that there also needed to be streusel. Lots of it.

Have you ever heard of Datschi? I basically grew up eating this treat. It's a type of sheet cake, which is especially enjoyed in Bavaria and the Allgäu. The topping alternatives for a Datschi are endless; an apricot version won my heart last summer. The most known variation of Datschi is, however, Zwetschgendatschi. It is, as its name says, made with Zwetschgen, Italian Prune Plums.

Until a few years ago, there was an old, big Zwetschgentree growing in my grandparents' and uncle's garden. [...yes, until someone got the brilliant idea to cut down the tree. I'm still a bit mad.] There was always a baking sheet of Zwetschgendatschi waiting for me when we came to visit. My Oma kept the Datschi in the oven. Piece by piece, crumb by crumb, it disappeared.

And so it was time to make a new one.

I was beyond excited when my Opa told me there was rhubarb growing in the front yard garden, waiting to be harvested. So I put on some boots I found in the house and walked into the small garden. A garden full of treasures. A place where joy resides. "I want to have a garden like this one day", I thought to myself.

It was raining slightly. It was a gentle, almost meditative kind of rain, not a stormy one. One that was gratefully welcomed by nature and farmers alike. It had been such a dry winter and spring so far which could be seen just by looking at the mighty Alp on the horizon: the peaks were almost snow-free. As I walked into the garden, I listened how the wet, soft ground sounded under my feet. I had to be very careful not to step on all those snails. Some of them even carried their home with them, on their backs. Small, yellow homes looking both solid and fragile. To carry all your belonging with you...it reminded me of the months spent traveling the world with nothing more than a 10 kilo (22 lb.) backpack on my shoulders.

One by one, I harvested the very thin, delicate stalks. With every stalk, the feeling of joy in my heart grew bigger. Often, it's the small, humble things that make you smile so hard that you don't know how to stop. I also knew that in less than one hour I would have something delicious to share with my loved ones. Food is most beautiful when it's shared with others.

So I made a Datschi. I swear it didn't survive the first half an hour. Slice by slice; crumb by crumb.

Next day, I made a second one. It proved to be equally popular. Just like the ones my beloved Oma used to make in this house.

Rhubarb Strawberry Datschi | my blue&white kitchen

Rhubarb Strawberry Datschi

dough adapted from delicious:days

The rhubarb and strawberries as well as the thin crust make this Datschi the more sophisticated, elegant sister of the traditional Zwetschgendatschi. I made two slightly different versions: with and without cinnamon. It was, however, impossible to decide which one was more delicious so I will leave it up to you. I strongly encourage you to serve it with whipped cream, although, I'm sure coconut whipped cream or vanilla ice cream would be wonderful as well. On a different note, I like to make this dough by hand, but you can definitely make it in your stand mixer if you wish to.

Oh, and sorry for giving weight measurements only (except for the milk). There weren't even measuring spoons in this house... But, thankfully, a scale. On a quick note, you should definitely get a scale if you don't already have one. It makes cooking, and especially baking, so much easier: fewer dishes, more constant and accurate results. Need I say more?


for the dough:
1 dl ( cup + 1 ½ tbsp) lukewarm milk
14 g (0.5 oz) fresh yeast [or 4,5 g / 0.16 oz / 1 ½ tsp (intant) active dry yeast, used according to packet instructions]
55 g (2 oz) granulated sugar
pinch of fine sea salt
1 egg
~ 300 g (10.6 oz) all-purpose flour
55 g (2 oz) unsalted butter, at room temperature

for the streusel:
130 g (4.6 oz) all-purpose flour
70 g (2.5 oz) granulated sugar
large pinch of fine sea salt
70 g (2.5 oz) unsalted butter

for the filling:
350 g (12.5 oz) rhubarb, sliced
350 g (12.5 oz) strawberries, hulled & sliced
2 tbsp granulated sugar
optional: cinnamon

to serve:
whipped cream


To make the dough
In a medium-sized bowl, combine milk and crumbled yeast. [If using instant active dry yeast, skip this step. Combine yeast with some flour and add to warm, about 42°C / 108°F, milk mixture just before adding the rest of the flour.] Stir until yeast is completely dissolved. Add sugar, salt, and egg. Whisk until combined. Gradually add most of the flour and knead. Add butter and knead until well combined. Continue to knead and add flour until the dough comes clean off the sides of the bowl and doesn't stick to your hand.

Shape into a ball and cover with a kitchen towel. Let the dough rise in a warm place for about 1 hour, or until it's almost double in size.

Meanwhile, preheat the oven to 180°C / 355°F. Line a baking sheet with parchment paper.


To make the streusel
In a small bowl, combine flour, sugar, salt, and butter until you have a crumbly mixture. If not using immediately, put the bowl into the fridge.


To assemble the Datschi
With a rolling pin, roll out the dough until roughly the size of the baking sheet. Spread out on the baking sheet and pull into shape. Spread the rhubarb and strawberries in an even layer over the dough. Sprinkle with sugar and, optionally, with some cinnamon. Sprinkle the streusel over the fruit.

Bake for 25–30 minutes, or until the edges are dark brown. Let cool and cut into squares and serve with a generous dollop of whipped cream.


A Different Pace – No-Bake Yogurt Cream Cake with Strawberries

I'm sitting here at the kitchen table and typing these words on my notebook. The rhythmical sound is, in its own way, very soothing. This is a 100-year-old house with squeaky old wooden floors. A house with a story, a history. It has seen both birth and death, peace and war, joy and sorrow, love and hatred, hope and despair, full bellies and hungry souls.

What stories would these walls tell us if they could speak?

There's a window right in front of me. Probably my most favorite window ever. The light that shines through is magical. Totally different from the one we have in the north.

When I look out of the window, I see green fields and hills. A forest too. There's also a big apple tree full of beautiful, delicate, white flowers that cheers me up every time I look at it. On the left, I can see the mighty Alps with their white peaks glistening in the spring sun. It's a view I never really seem to get used to.

my blue&white kitchen

On some days, I'm lucky enough to spot a hawk on a hunting trip. Flying in wide circles before plunging into a deep dive. On other days, there are light brown cows grazing under the window. They wrap their tongues around the lush grass and snip it off. When they walk, you can hear the sound of cow bells. So cliché, really.

No-Bake Yogurt Cream Cake with Strawberries | my blue&white kitchen

It's a different way of life here. A different feel and pace. In a small village near the Alps, everyone knows everything about everyone else. Or at least they think they do. I would lie if I would say that wouldn't freak me out a bit. Everyone knows who you are although you only visit once or twice a year. The lady at the bakery where we get fresh bread every morning always asks "How do you do?" and "For how long will you stay?". She doesn't ask it out of politeness; she asks it because she really wants to know.

No-Bake Yogurt Cream Cake with Strawberries | my blue&white kitchen

It was my Opa's birthday so I made a cake. A light, fresh, not-too-sweet yogurt cream cake topped with luscious strawberries. The strawberries really are the heroes here. The perfect cake to celebrate 85 years and the awakening of nature.


No-Bake Yogurt Cream Cake with Strawberries

makes one 28 cm / 11" cake (you could, however, make it in a smaller pan as well)

for the base:
200 g (7 oz) graham crackers, like digestive biscuits
100 g (3.5 oz) butter, melted

for the filling:
400 ml (1  cups) whipping cream
500 ml (2 cups + 1 heaping tbsp) yogurt (3.5 %), at room temperature
75 g (2.6 oz) granulated sugar
1 large organic lemon, juice & zest
7 sheets of gelatine

to finish:
300 g (10.5 oz) strawberries, washed, dried, hulled, & cut into thin slices
optional: 1 packet clear cake glaze, sugar, & water (according to package instructions)


To make the base
Line a 28 cm / 11" springform pan with parchment paper. In a food processor, mix the biscuits until finely ground. Add the butter and pulse again until combined. Pour the base into the prepared springform pan and press firmly down to create an even layer. Put into the fridge.
 

To make the filling
Whip the cream and put into the fridge. Mix the yogurt, sugar, and lemon zest. Set aside.

Soak the sheets of gelatin in cold water for 5 minutes (check package instructions). Meanwhile, in a small pot, warm the lemon juice. Once soft, lift the sheets from the water and gently wring to remove any excess water. Dissolve in warm (but not boiling!) lemon juice stirring until completely dissolved. Gradually add the lemon juice-gelatine mixture to the yogurt while stirring vigorously. Gently fold in the whipped cream.

Pour the filling into the prepared springform pan and smooth the surface. Refrigerate for at least 6 hours, better still overnight.
 

To assemble the cake
Arrange the strawberry slices on top. If you're making the cake in advance or would want to keep the cake fresh for one to two days, cover the top with clear cake glaze. For the glaze, follow the package instructions and refrigerate for at least half an hour.


A Toast To Spring: Vadelmasima – Finnish Raspberry Mead

Sima – Finnish Raspberry Mead | my blue&white kitchen

I want to feel both the beauty and the pain of the age we are living in.
I want to survive my life without becoming numb.
I want to speak and comprehend words of wounding without having these words become the landscape where I dwell.
I want to possess a light touch that can elevate darkness to the realm of stars.

― Terry Tempest WilliamsWhen Women Were Birds

I still remember my mom standing in the kitchen squeezing lemons over a white plastic bucket where the first fermentation would take place. The next day, the pre-fermented Sima was bottled into brown glass bottles with lightning stoppers. Full of excitement, I watched how the raisins slowly rose to the top because that indicated that the Sima was ready to be enjoyed...

Sima – Finnish Raspberry Mead | my blue&white kitchen

Today, I have a recipe for Sima, Finland's most popular spring drink, for you. This sweet sparkling mead is typically enjoyed on Vappu (May Day), which is one of the four biggest holidays along with Midsummer, Christmas, and New Year. Vappu is all about cherishing spring and all that magical Nordic light after the long, dark winter. It's typically celebrated with the first picnic of the year; good company, balloons & paper streamers, plentiful to eat, something bubbly to drink, and smiling faces. Doesn't sound bad, does it?

Sima is traditionally made with lemons. However, I made a raspberry version with a friend of mine last year, and it turned out to be a real crowd-pleaser. Although Sima is a May Day drink, I don't see a reason why it couldn't be enjoyed on any other day of the year as well. It's just too delicious to be abandoned for a whole year! I've drunk it on 5 nights out of 5 now, and my dad described it as being süffig, meaning as much as "I can't get enough of it". Oh yes, it sure is addictive. And because of that, I'm definitely going to make a new batch soon. Very soon.


Cheers to spring!


Sima – Finnish Raspberry Mead | my blue&white kitchen

Vadelmasima – Finnish Raspberry Mead

Recipe adapted from Dansukker
Makes about 2 l / 9 cups of Sima, can easily be doubled or tripled

Note 1: Sima has a very low alcohol content, and homemade Sima has such a low alcohol content that it's considered safe for children to consume.

Note 2: Fresh yeast is widely available in Finland (you can buy it in 2 oz packages at almost any store), and it's the type of yeast I'm most used to work with. I'm, however, aware of the fact that fresh yeast can be hard to find in many other countries. You can make Sima with (instant) active dry yeast as well. I did some research, and it seems like fresh yeast can be substituted with ¼ tsp (instant) active dry yeast. However, be sure that your liquid has the right temperature when adding the (instant) active dry yeast: a temperature of about 4245°C / 108113°F is needed. If the liquid is too cold, the yeast will not activate properly, and if it's too warm (50°C / 122°F), you'll end up killing it.


2 l (9 cups) water
200 g (7 oz) raspberries (fresh or frozen)
juice of 1 lemon
250 g (9 oz) granulated sugar
a piece of fresh yeas, the size of half a pea [for (instant) active dry yeast, see the note above]

for bottling:
dried cranberries (or raisins)
granulated sugar

to serve:
ice cubes (I made some with mint and raspberries)


In a medium-sized pot, bring water to a boil. Add raspberries, lemon juice, and sugar. Stir to dissolve the sugar. Let simmer for 3 minutes. Turn off the heat.

Let cool until lukewarm (about 36°C / 97°F). Add yeast and stir until the yeast is completely dissolved. Cover with a lid and let ferment at room temperature for about 24 hours.

Strain the fermented lemonade into clean bottles. Add 1 teaspoon of granulated as well as a couple of dried cranberries into each bottle. Close tightly.

The dried cranberries will act as an indicator of readiness for consumption (so clever!). The Sima is ready when all the cranberries have risen to the top of the liquid. This will typically take 2 to 3 days. Furthermore, as it ferments, the yeast will sink, and the Sima will start to clear. Sima will keep in the fridge for about a week. Just be careful when opening the bottles.... I nearly blew off one of my eyes. True story.

Serve chilled over ice cubes. Discard any cranberries as we don't want to actually drink them. 

[You could definitely serve it with some booze, such as vodka, and call it a cocktail.]


Saying Thank You & Having Ice Cream For Breakfast...Well, Kind Of

Frozen Bilberry Cardamom Yogurt | my blue&white kitchen

You may have noticed that badge on the sidebar. Maybe you also saw my updated March Love&Inspiration post. Or you stumbled upon my euphoric/totally perplexed tweets (poor you) or my instagram pic...oh and I surely mentioned it on Facebook as well. It was a truly surreal Monday night. I'm still pinching myself just to check I'm not sleeping. If this is a dream, it's a pretty realistic director's cut...

I'm extremely honored to be nominated for a Best Food Blog Award from Saveur Magazine, in the category Best New Blog. 'OMG'  has been my mantra for the last couple of days. I'm truly over the moon about the nomination. For you who don't know what the Saveur Best Food Blog Awards are about, well, the music industry has the Grammys, the film industry the Oscars, and we food bloggers, we have the Saveur BFBAs. I still don't know how I ended up being nominated with all those super talented people; people I look up to. But there I am. BOOM!

I want to thank you for all your support, cheers, and congrats. For making my recipes. For reading this humble space of mine, for leaving comments, and for being such a constant source of inspiration. It's truly special to be honored for something you have created yourself. For something you have not only invested time in but that you've done with a big heart.

Thank you.

If you would like to vote and send me to Vegas for the Best Food Blog Awards party (Saveur will fly the winners to Vegas for free. I know, totally crazy.), please click the badge on top or on the sidebar. You'll need to register to Saveur, but it's straight forward, and there won't be any spam emails or anything. You can vote until April 9th which is next Wednesday.

But let's move on to today's recipe, shall we? I have a huge crush on it. It makes my pupils dilate, and my heart flutters like hummingbird wings when I have a spoon of it. There's berries in it which does not only turn it into a bright, cheerful color but makes it a vitamin bomb too.

As some of you already know, I often have yogurt with homemade granola, berries, and a drizzle of maple syrup or honey for breakfast. Nothing special there, but at least it's delicious. However, after I stumbled upon this recipe, all I saw in my morning bowl were the ingredients for something so much more fun. I mean, who doesn't want to have ice cream for breakfast, right? Well, maybe not real ice cream but something that totally feels like ice cream but isn't. Does this make any sense to you? [I'm sure the BFBAs are messing up with my brain...]

Frozen Bilberry Cardamom Yogurt | my blue&white kitchen

However, I didn't want any bananas in my wannabe ice cream. Those are reserved for milkshakes only (right, dad?). Adding bananas would yield in a firmer consistency, but I've always preferred my ice cream half frozen anyway. So all berries. I chose bilberries cause I still needed to clean my freezer from last summer's berries. Some of you may wonder "How much berries does this girl have in her freezer?". The answer is: way too much. It was a good summer with lots of berry picking trips. I felt the urge to spice it up with cardamom cause bilberries and cardamom are such a wonderful flavor pairing. And then maple syrup. Yesss.

Because we're talking about breakfast here and granola is such a staple on my breakfast table, we'll of course sprinkle some on top. The granola you see in the pictures is this one. It's one of the best granolas I've ever made. I like to add millet and some extra seeds to my batch.

Ooooh, heaven!


Frozen Bilberry Cardamom Yogurt

serves one hungry soul or two as a side (eat that croissant!)

I encourage you to use bilberries rather than 'regular' blueberries both for their vibrant color and for their taste. If you, however, can't find bilberries, blueberries will be just fine.

Side note: You may or may not have blue lips and a blue tongue after enjoying a bowl of this goddess of breakfast. I  strongly encourage you to have a look in the mirror before leaving the house, and to wash your teeth after rather than before breakfast. Just sayin'...


200 g (7 oz; 2 dl; ½ +  cups) Greek yogurt
200 g (7 oz; 3 dl; 1 cups) + 35 g (1.2 oz; ½ dl; ¼ cup) frozen bilberries
¼ tsp ground cardamom (preferably freshly ground)
2 tbsp maple syrup

homemade granola, to serve
 

Blend yogurt, 200 g / 7 oz bilberries, cardamom, and maple syrup in a blender until smooth. Add the remaining blueberries and mix with a spoon (we want these berries to remain whole for some additional texture). Serve with granola on top. Cheers!