A Thunderstorm & Redcurrant Buttermilk Cake

You know when you laugh so hard that you eventually can't breathe anymore and every single muscle in your body seems to hurt? Yes, that happened multiple times during last weekend. I don't think I've laughed so much and wholeheartedly in a while. I think I've never stared at the night sky for several hours in a row. Seriously, when was the last time you gazed at bright stars and spotted shooting stars and satellites? Promise me you'll do that. It's epic.

I spent last weekend in the Finnish archipelago where we threw a bachelorette party for my dear friend. I was so exhausted after those three days...okay, a total understatement. I actually think that my IQ was below zero for several days after I came back home. Not because of alcohol but simply due to emotional and physical exhaustion. Maybe I still haven't fully recovered, so I'll just start talking about today's recipe which is one I connect many childhood memories with.

Redcurrant Buttermilk Cake | My Blue&White Kitchen

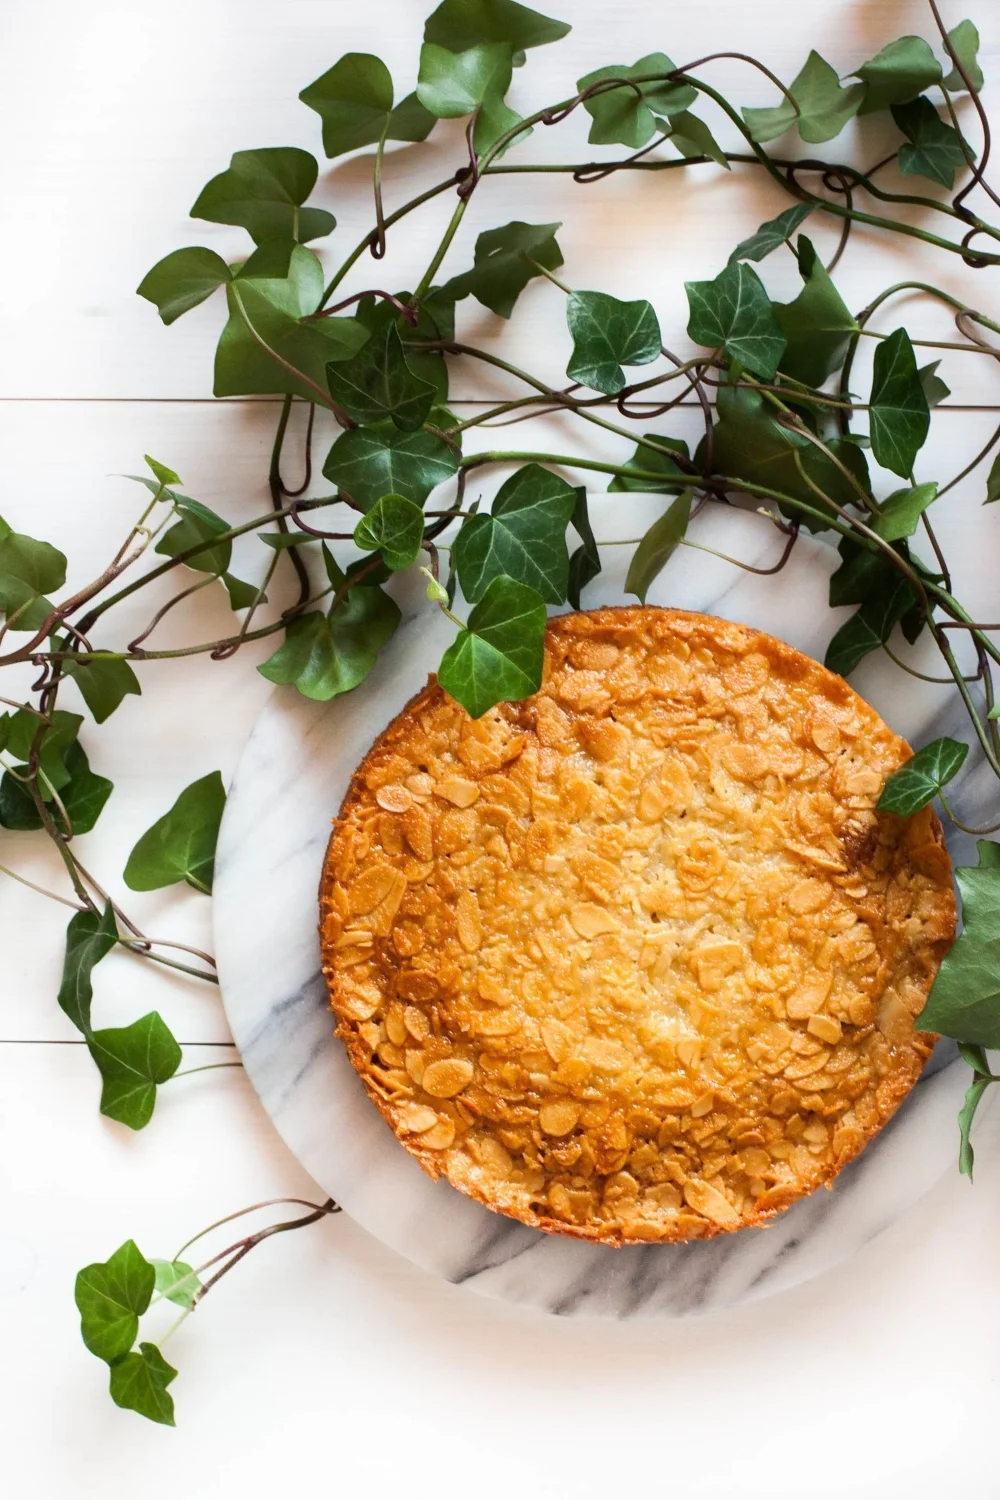
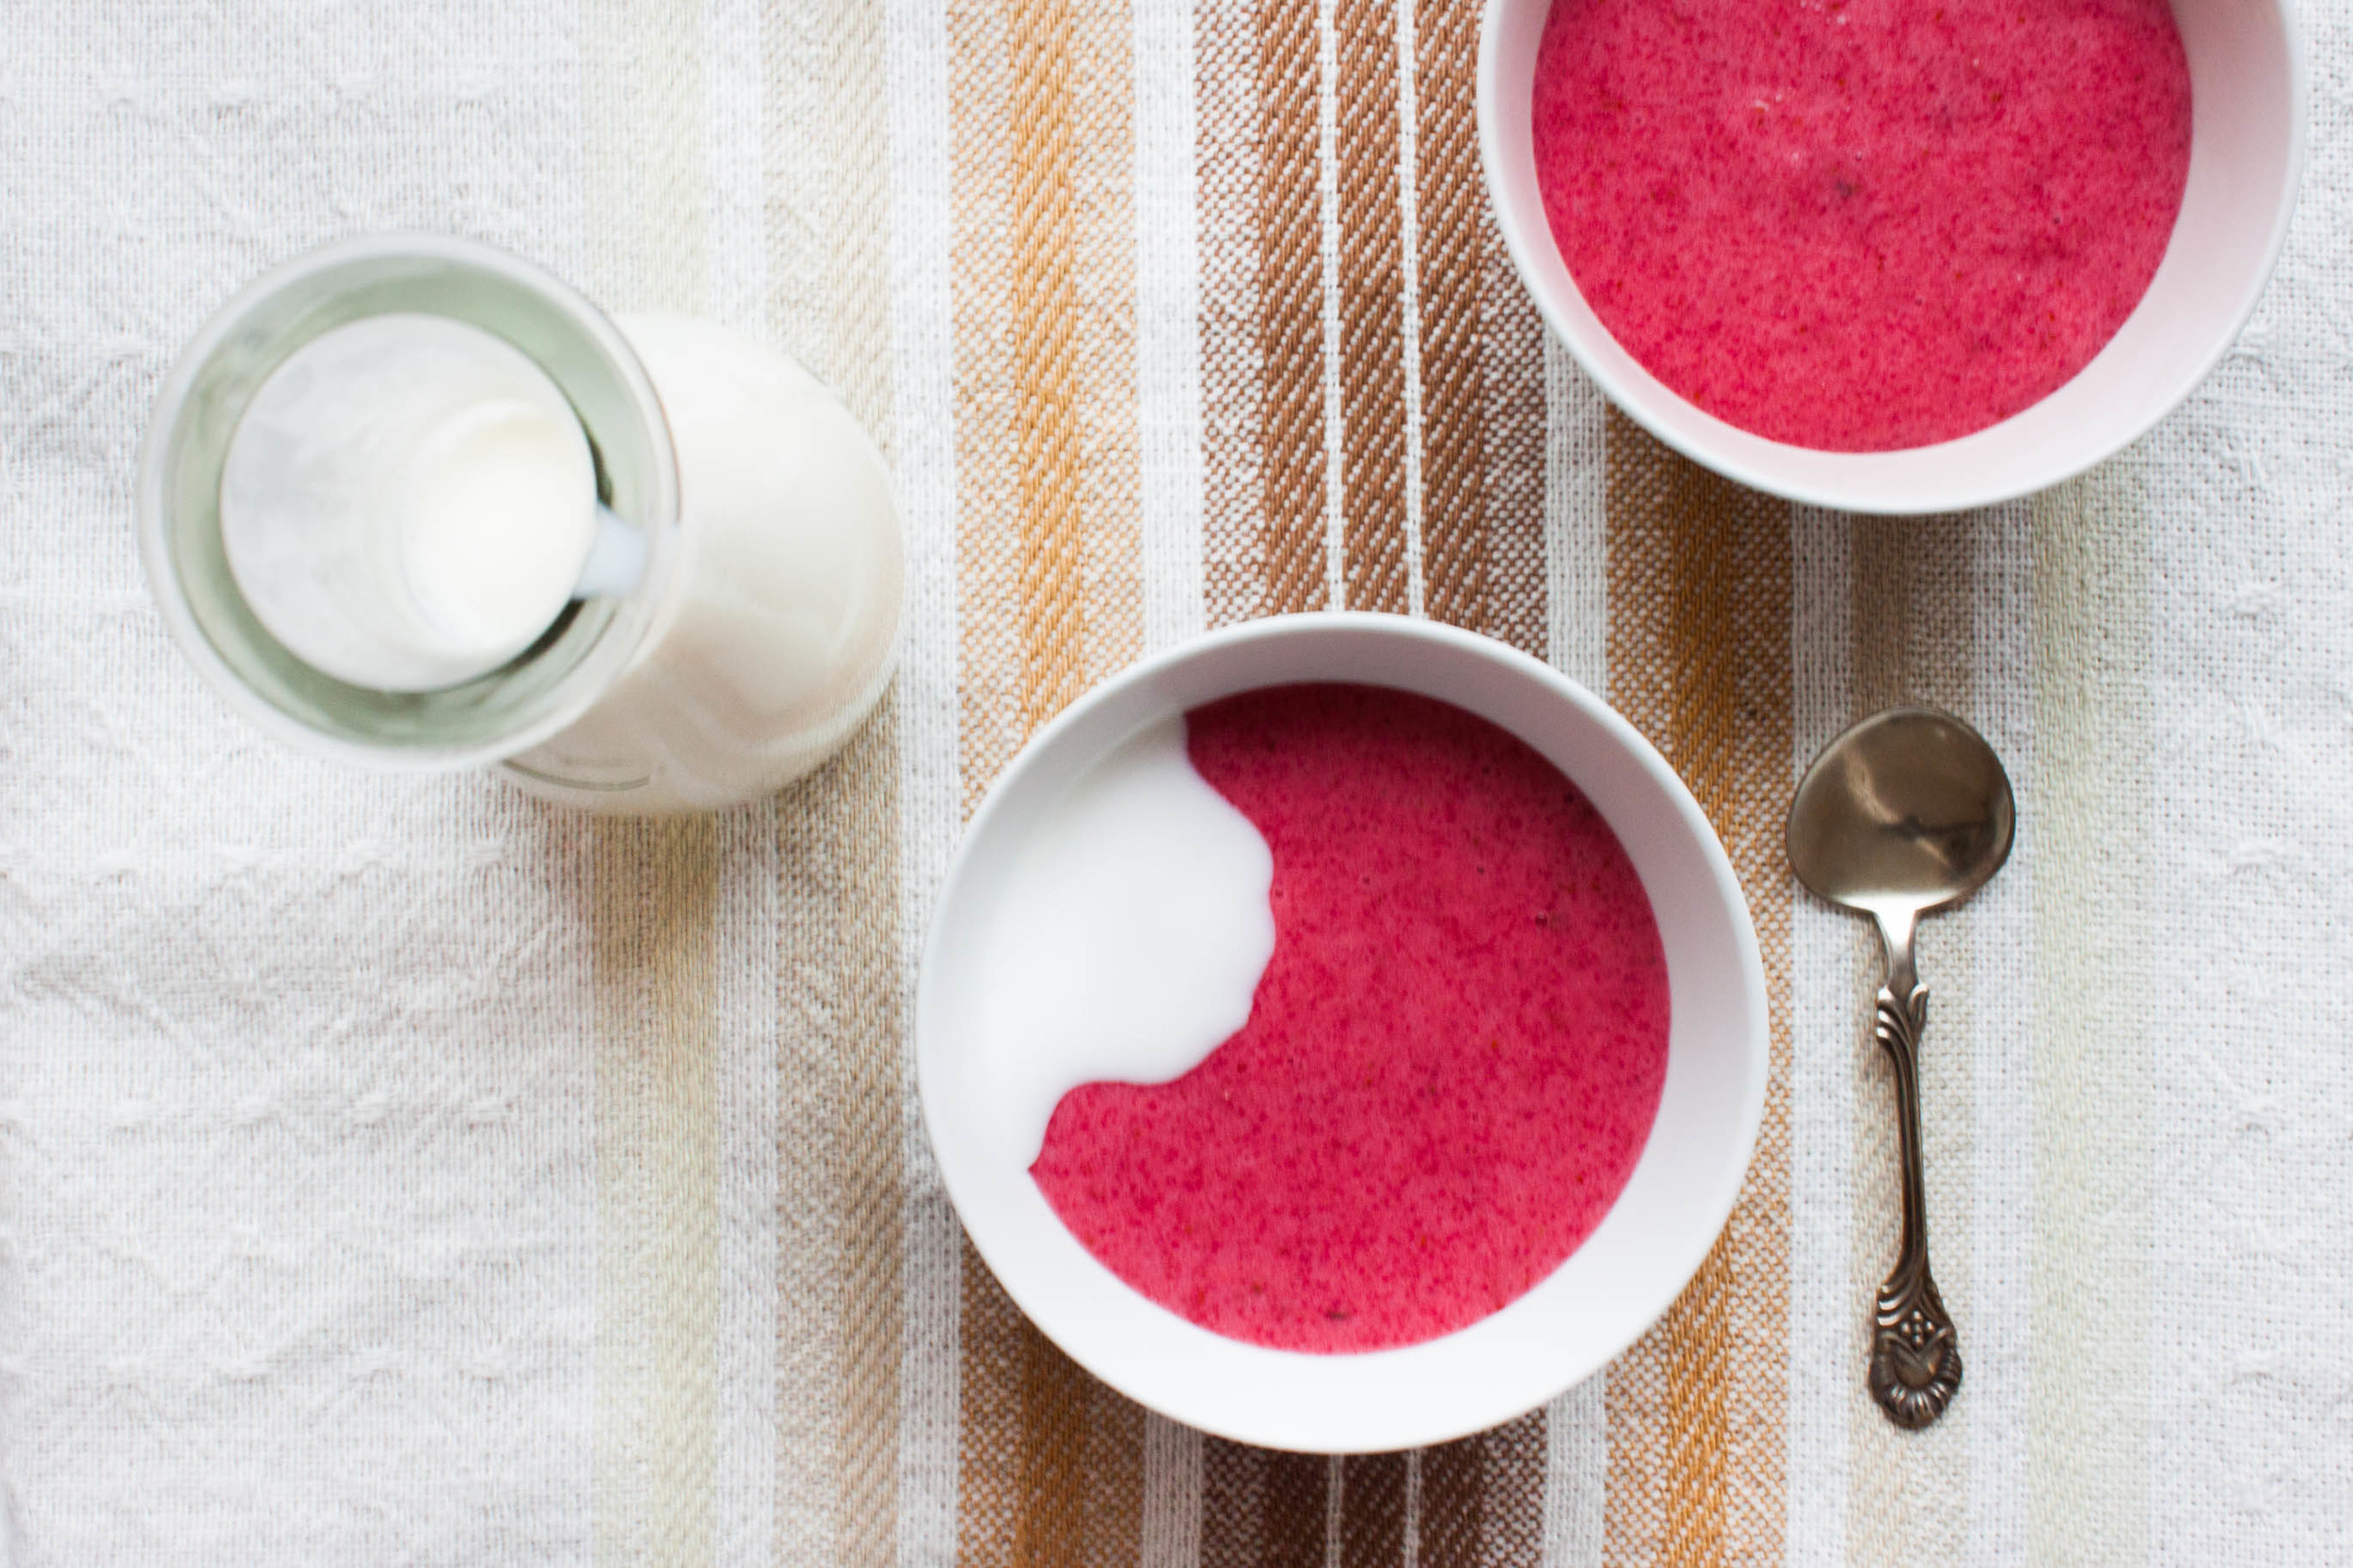
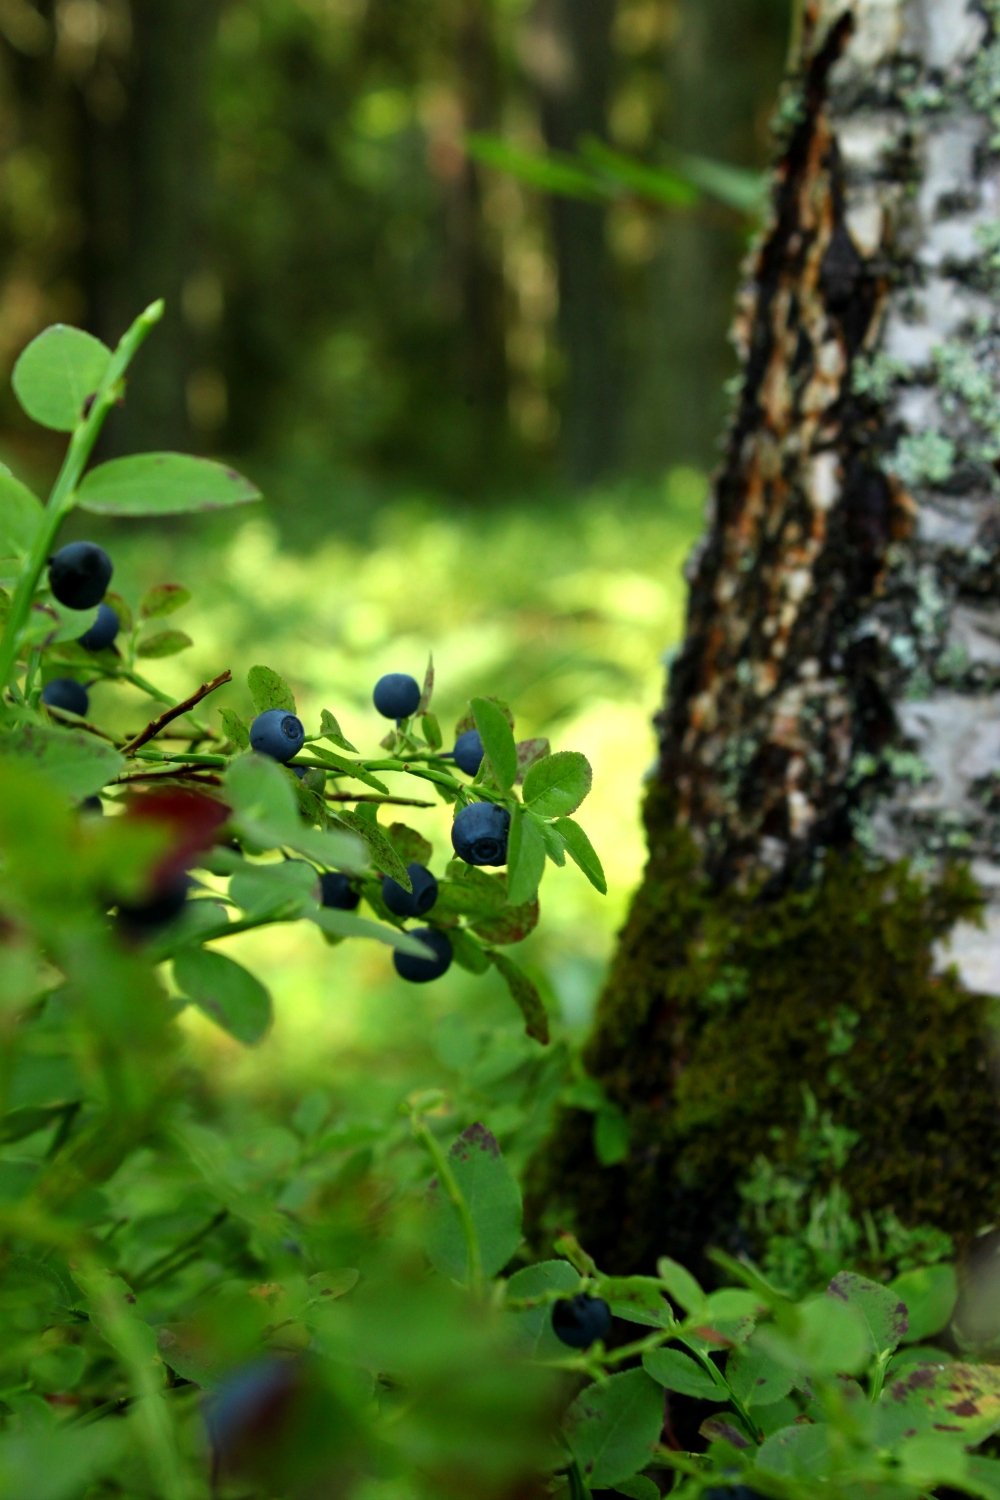
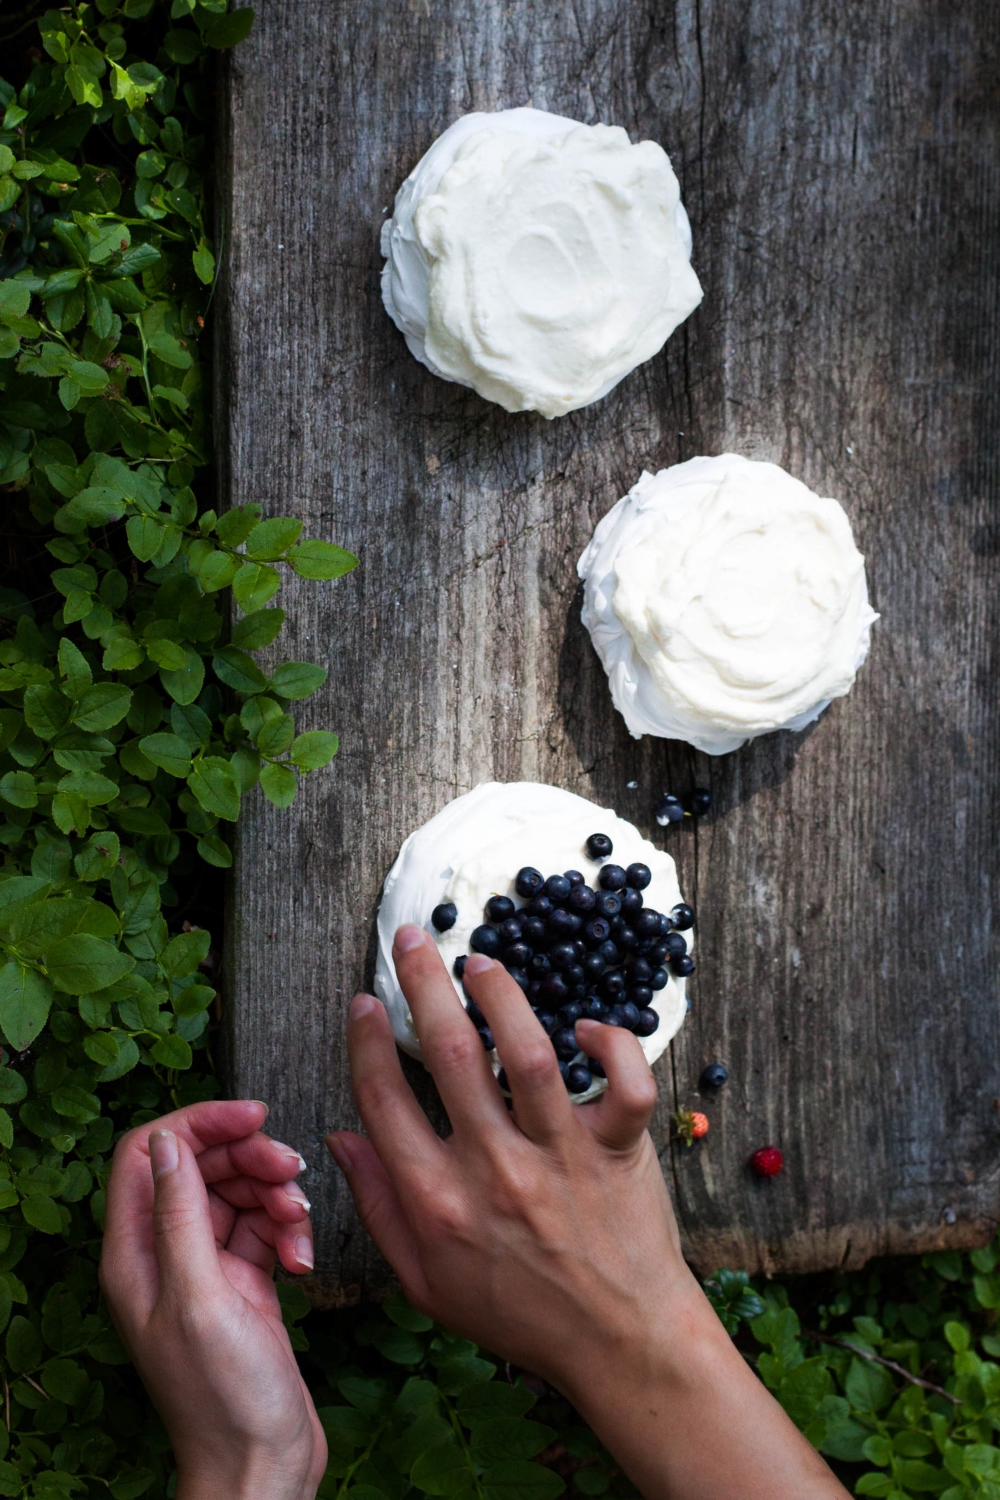
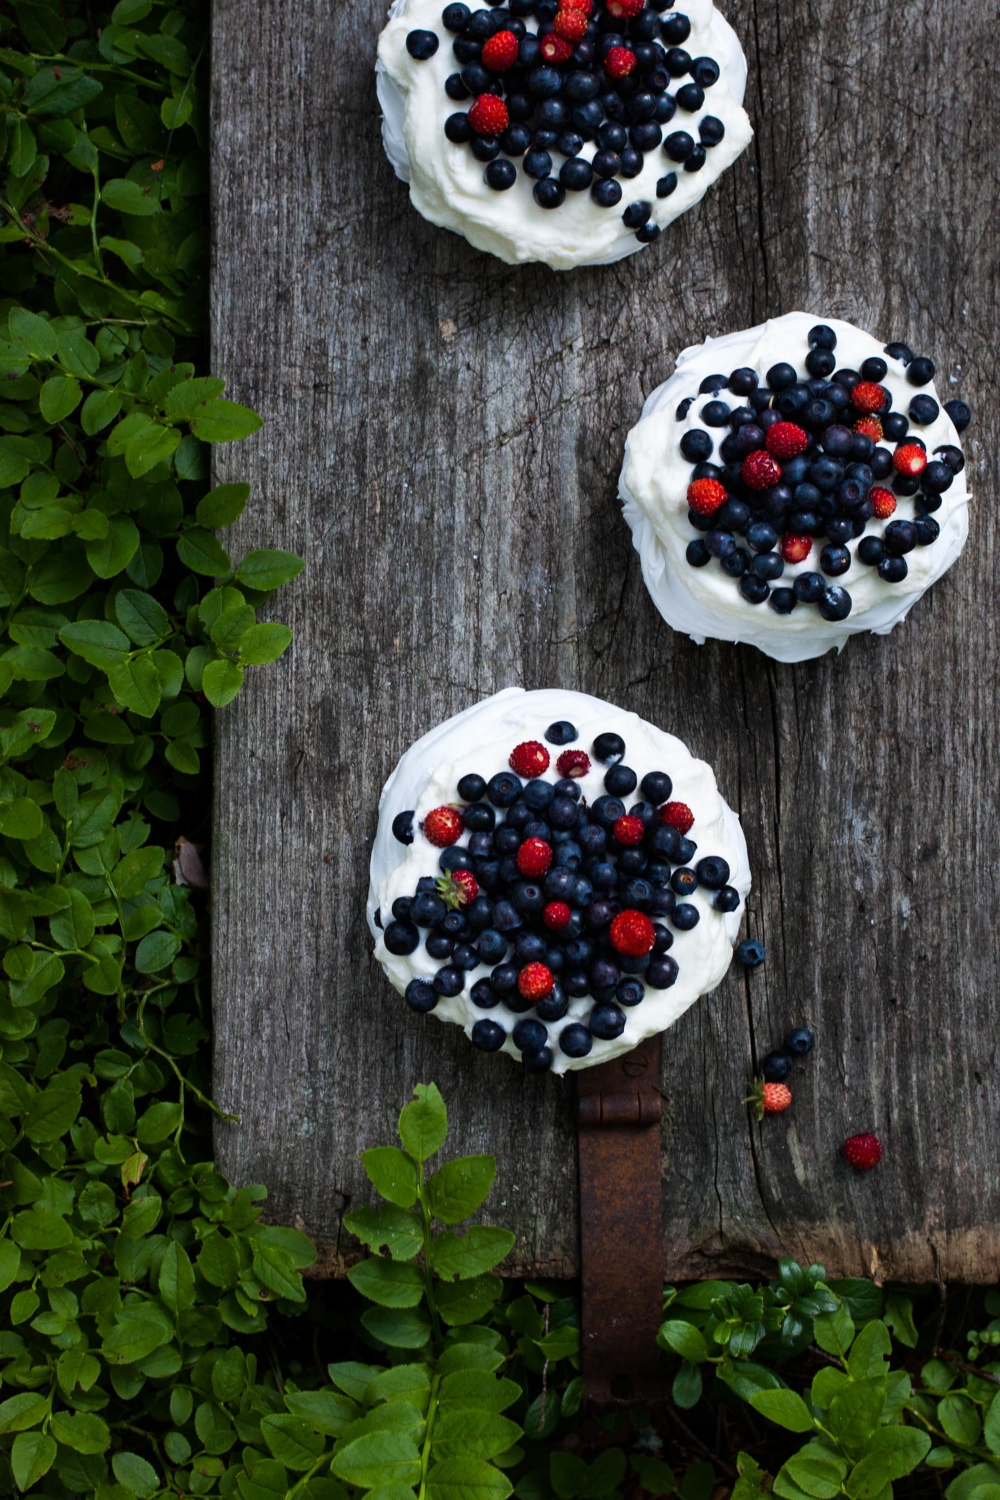
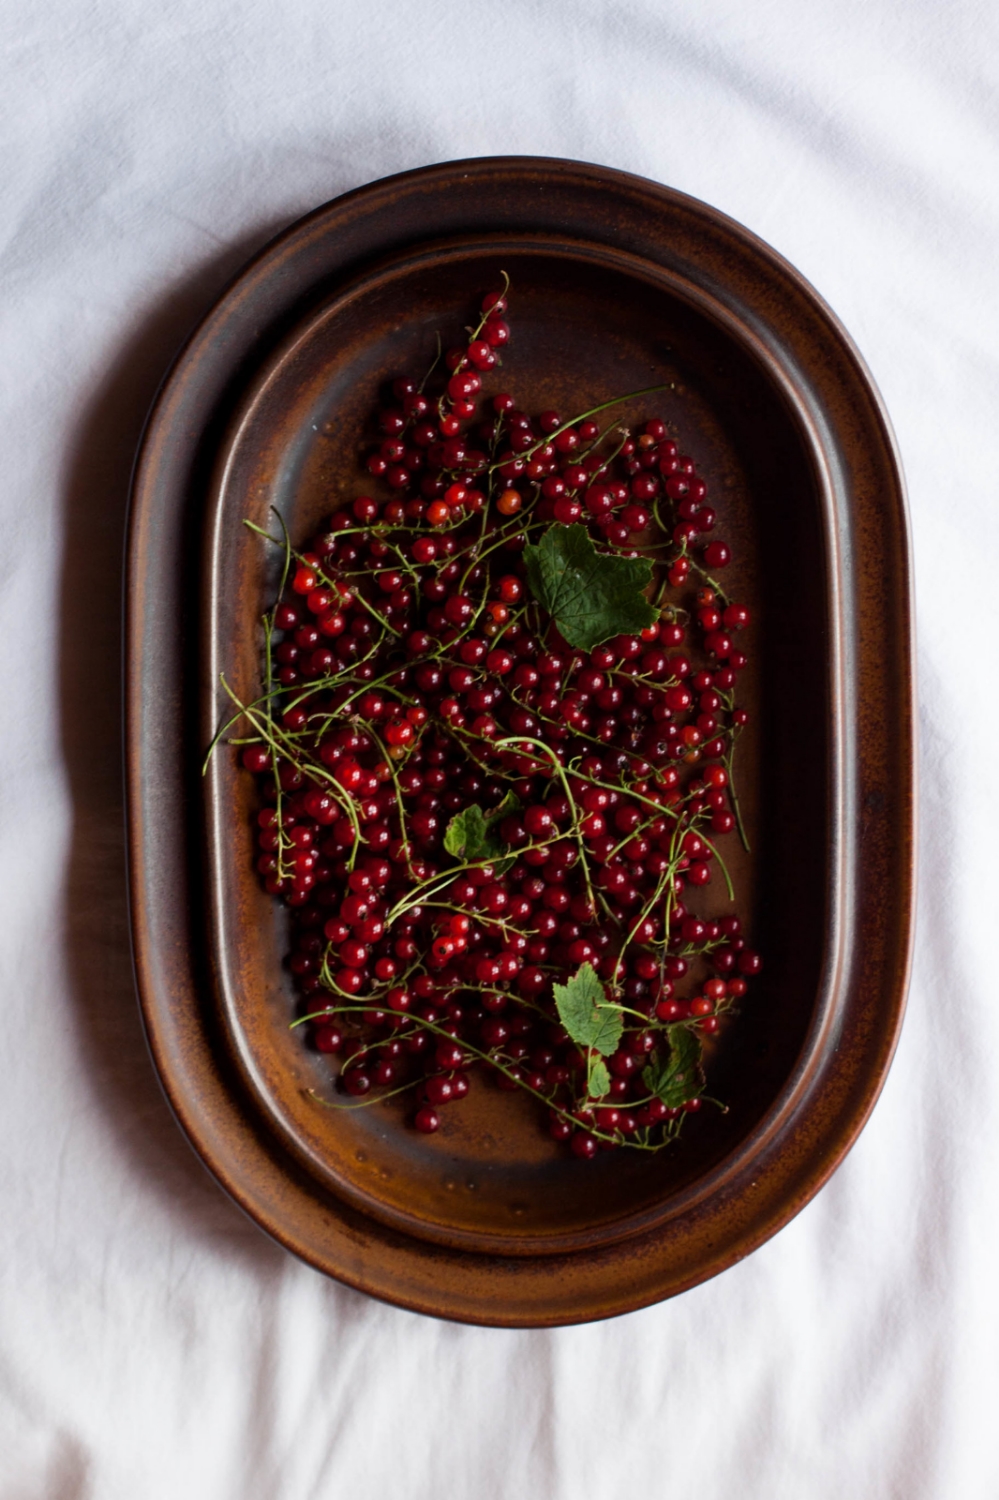
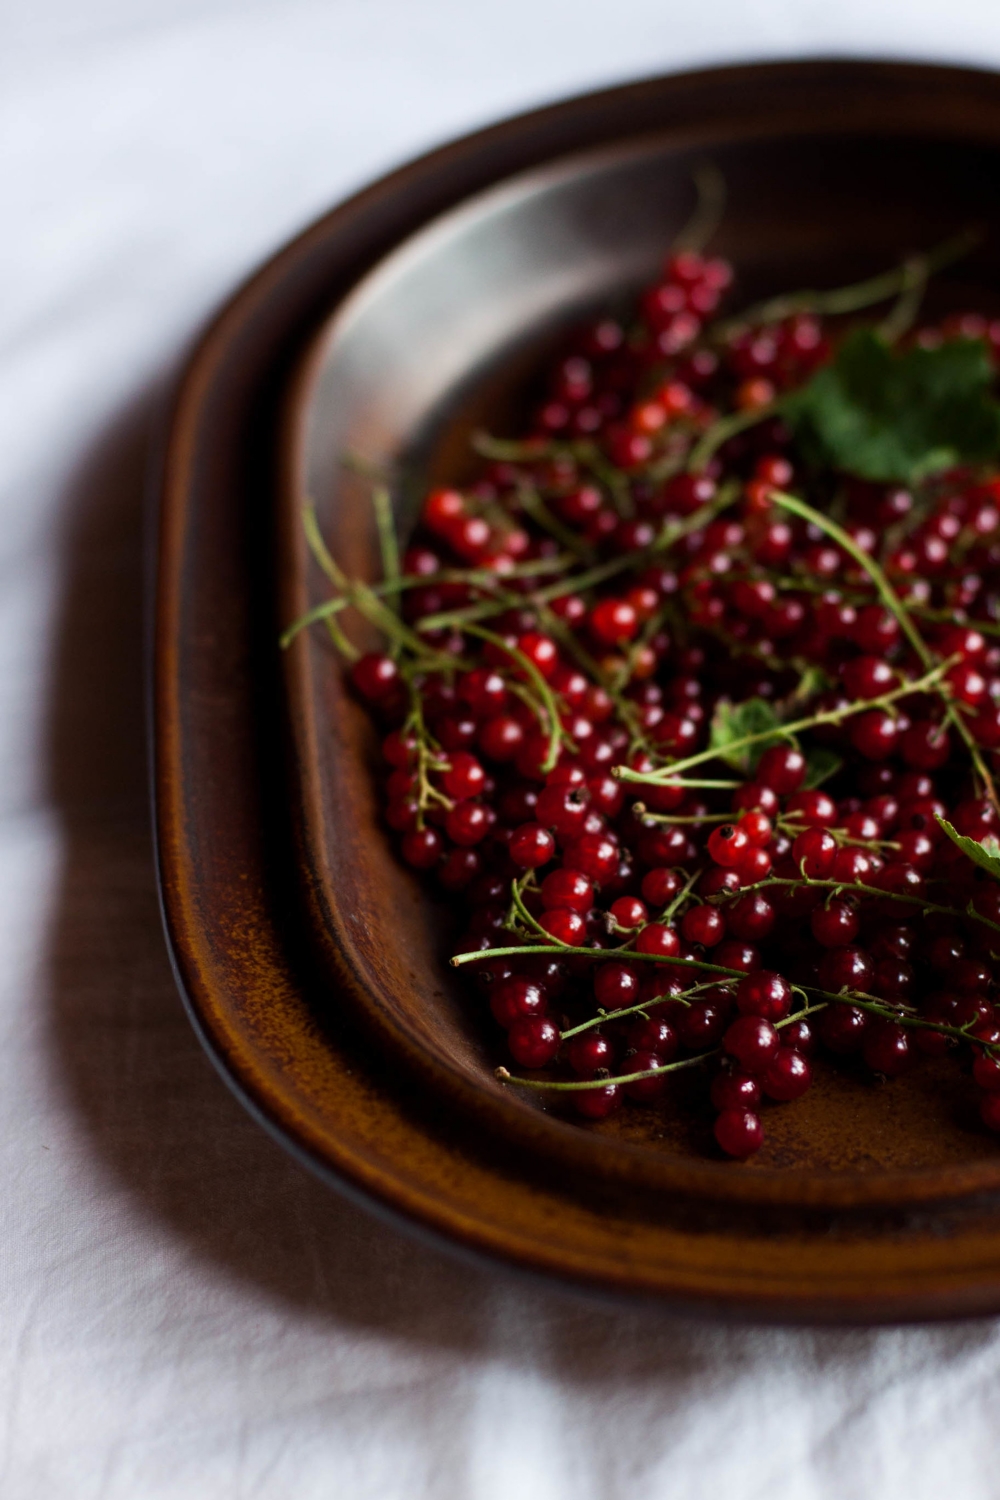
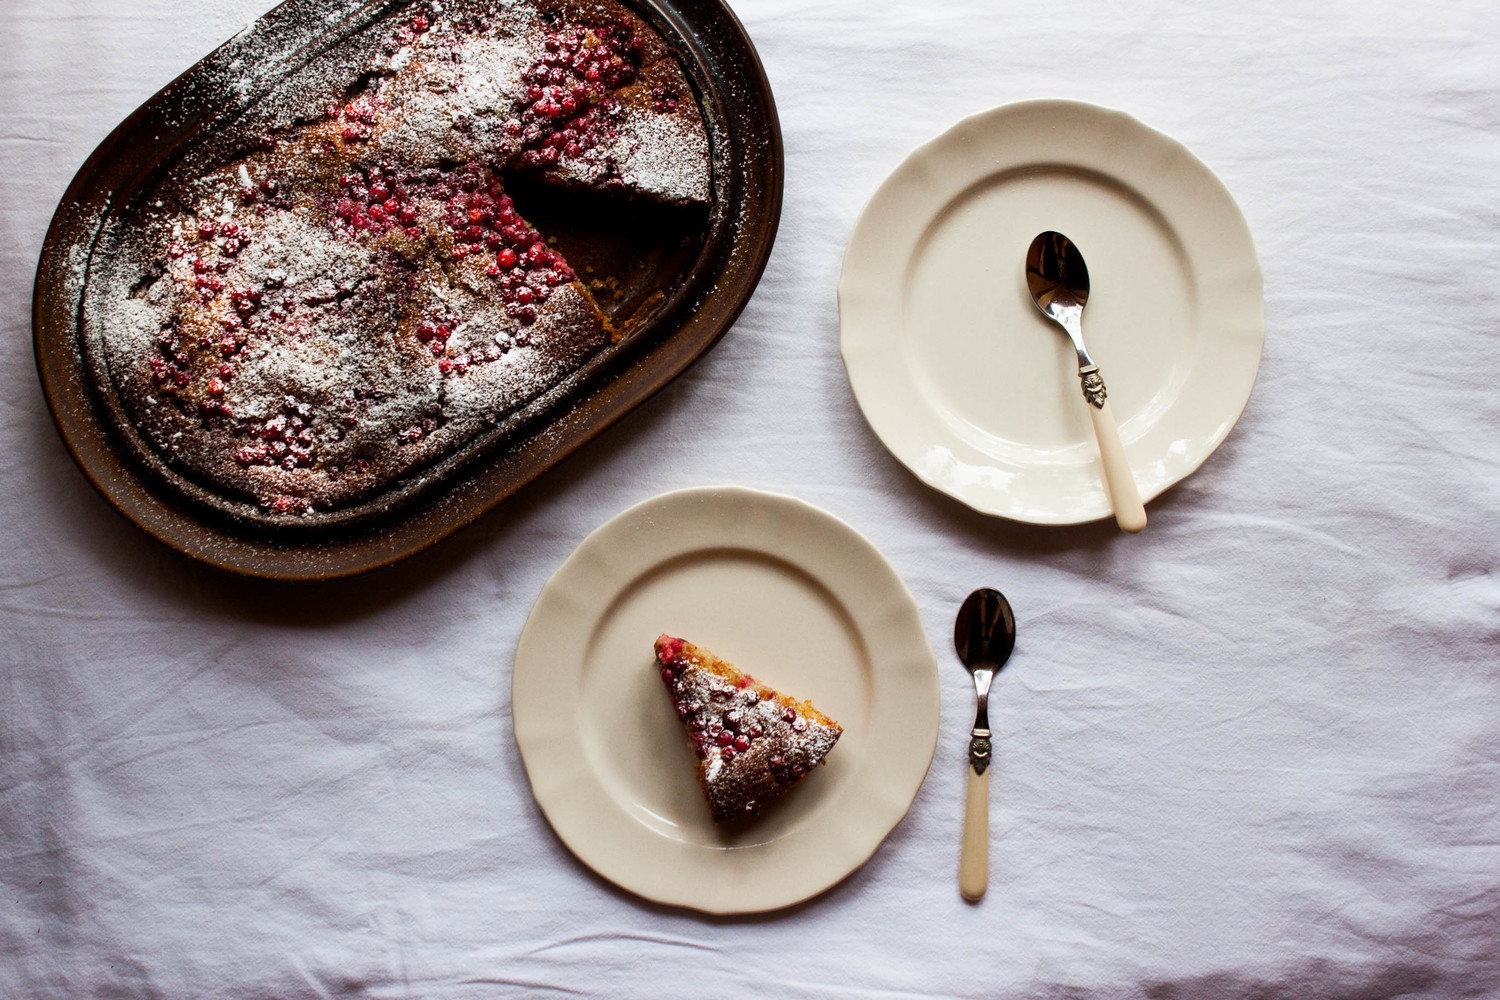
The cake I share with you today is one my mom used to make when I was a kid. It's actually one of the most traditional berry cakes here in Finland. I made it with redcurrants because I had a bunch of them at hand after a recent berry picking trip. Also, I think that this batter works best with tart berries or fruit due to its relative sweetness. You could, however, substitute currants with blueberries or other fruit of your choice. The cake is moist and sweet, the currants add a wonderful tartness to it, and as it bakes, a lovely dark crust forms thanks to the buttermilk. The cake is a real no-brainer and I'm pretty confident you could even make this with an IQ below zero. Just mix everything together (according to my mom it's irrelevant in which order; just make sure everything is incorporated) and scatter the berries over, bake, done.

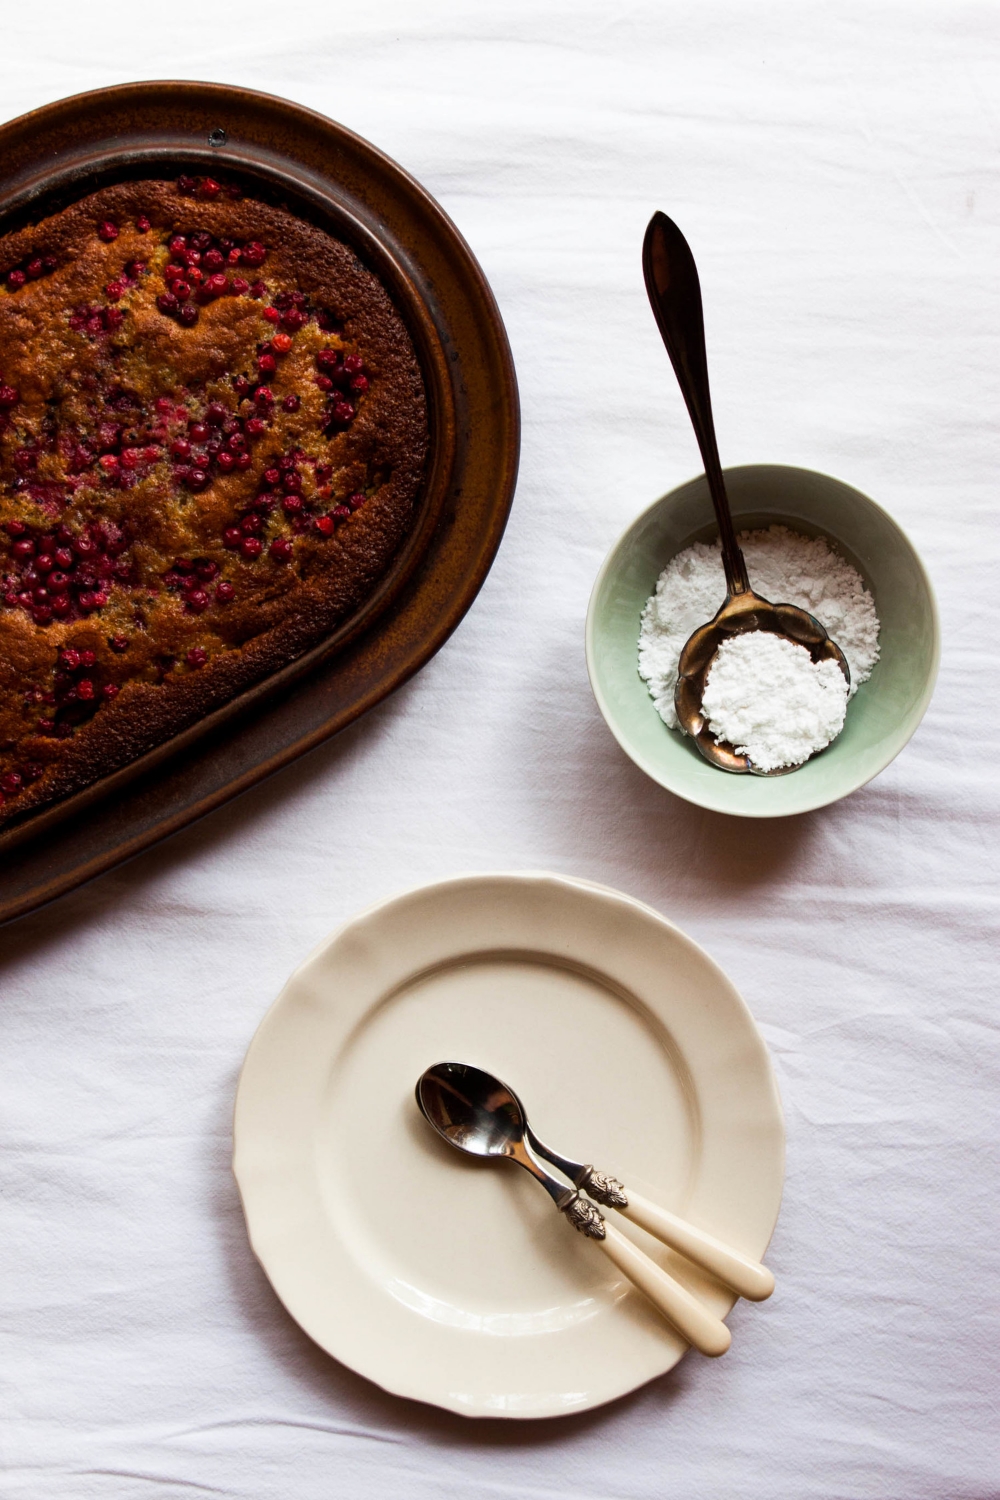
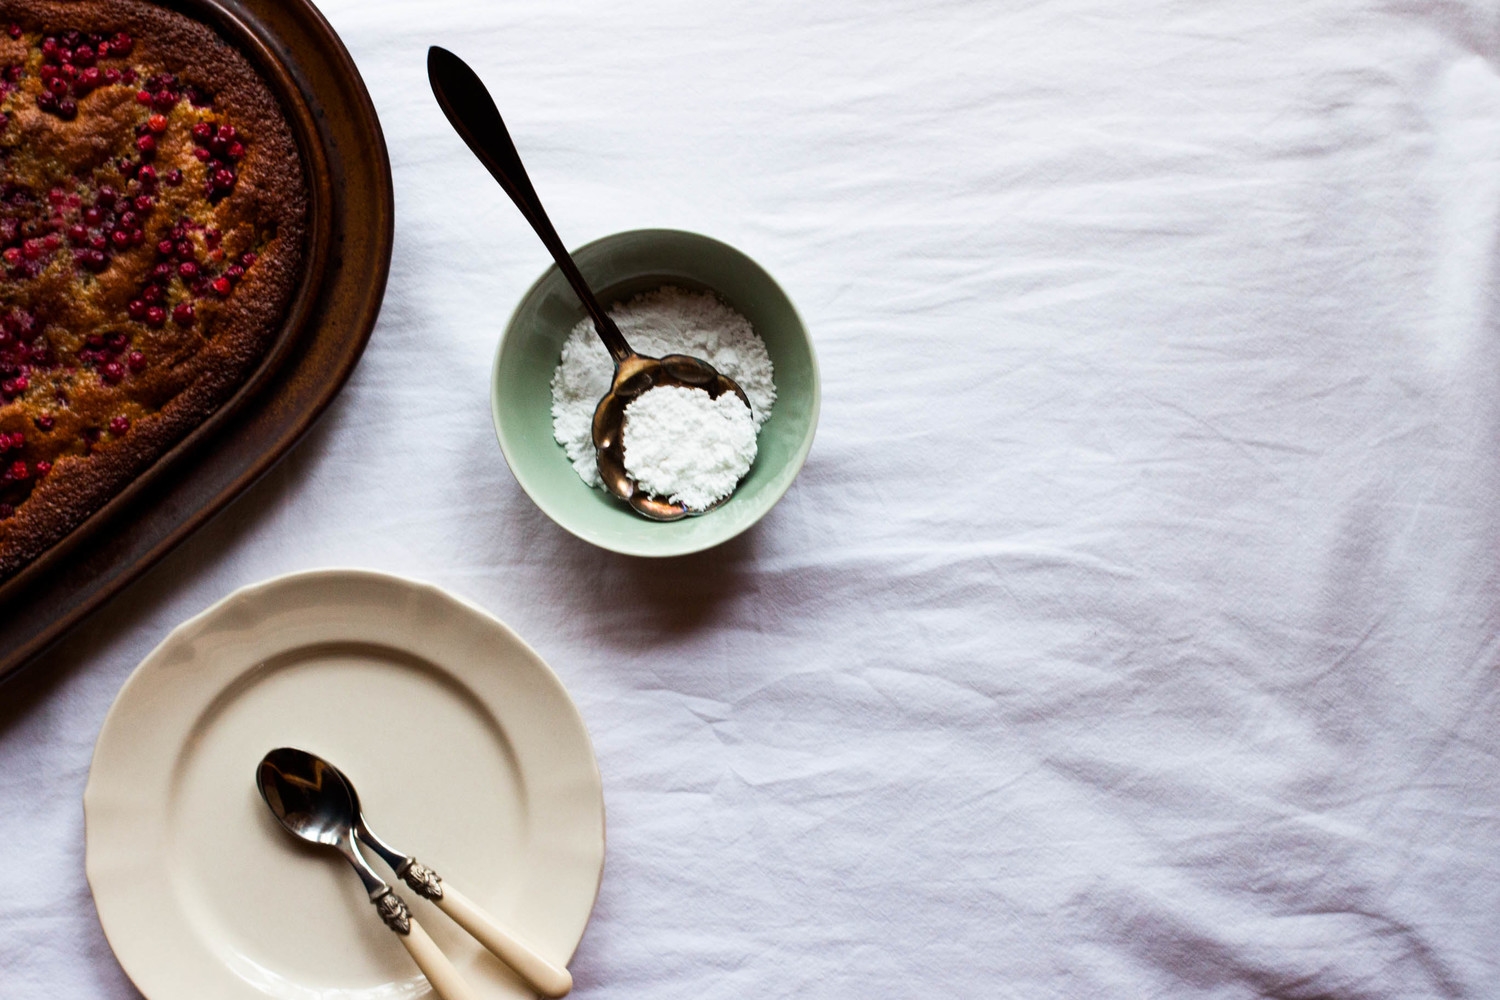
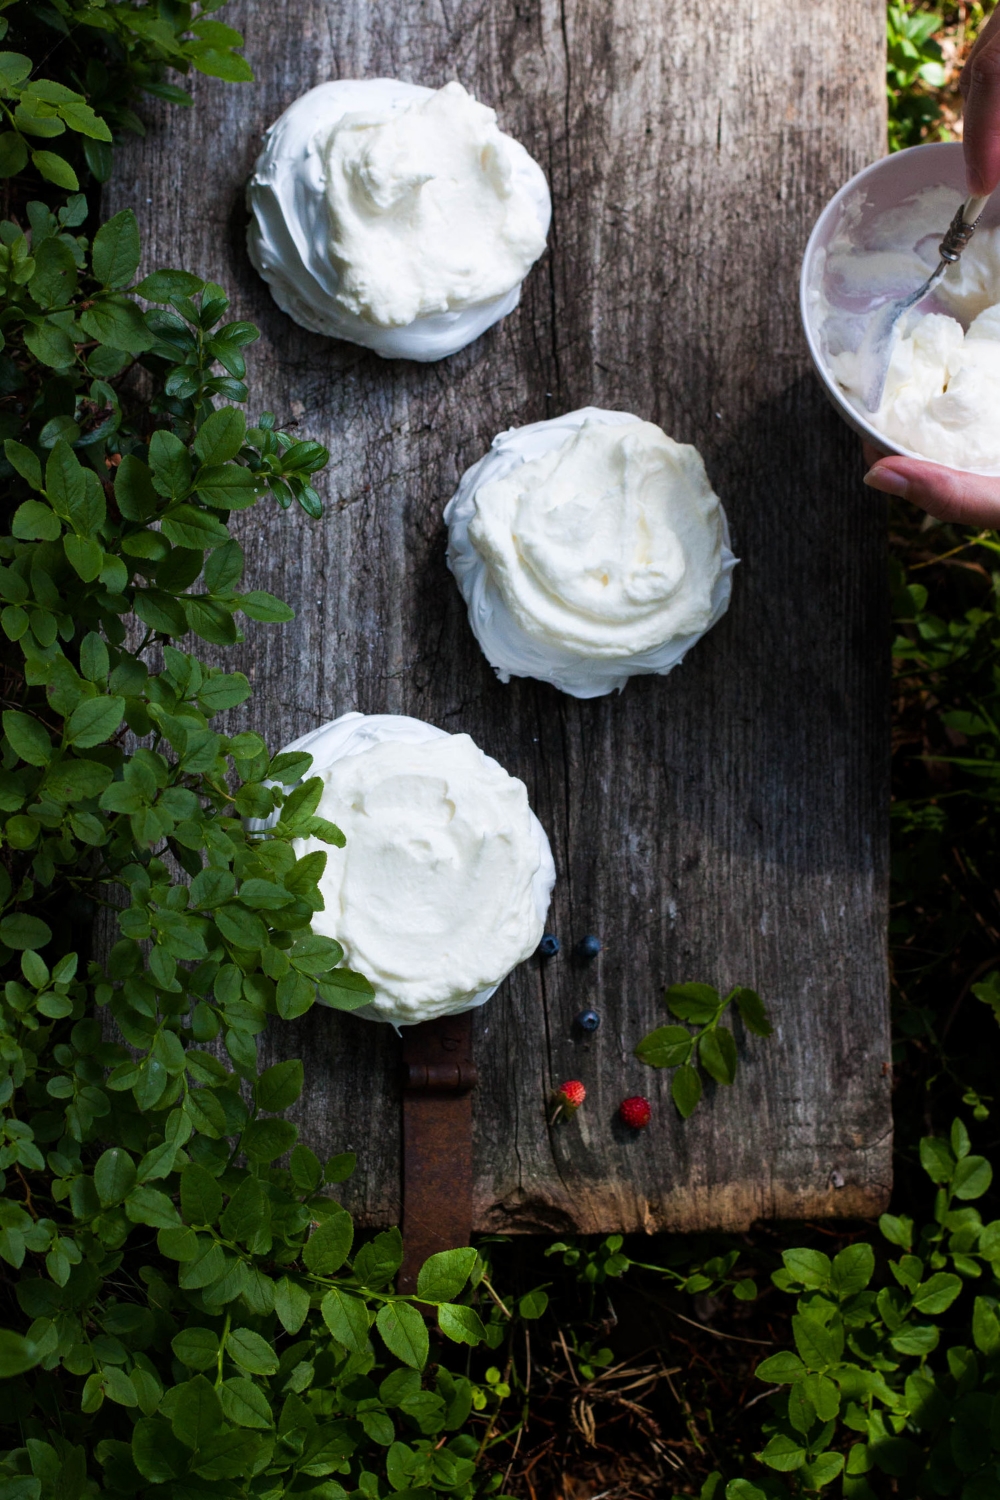
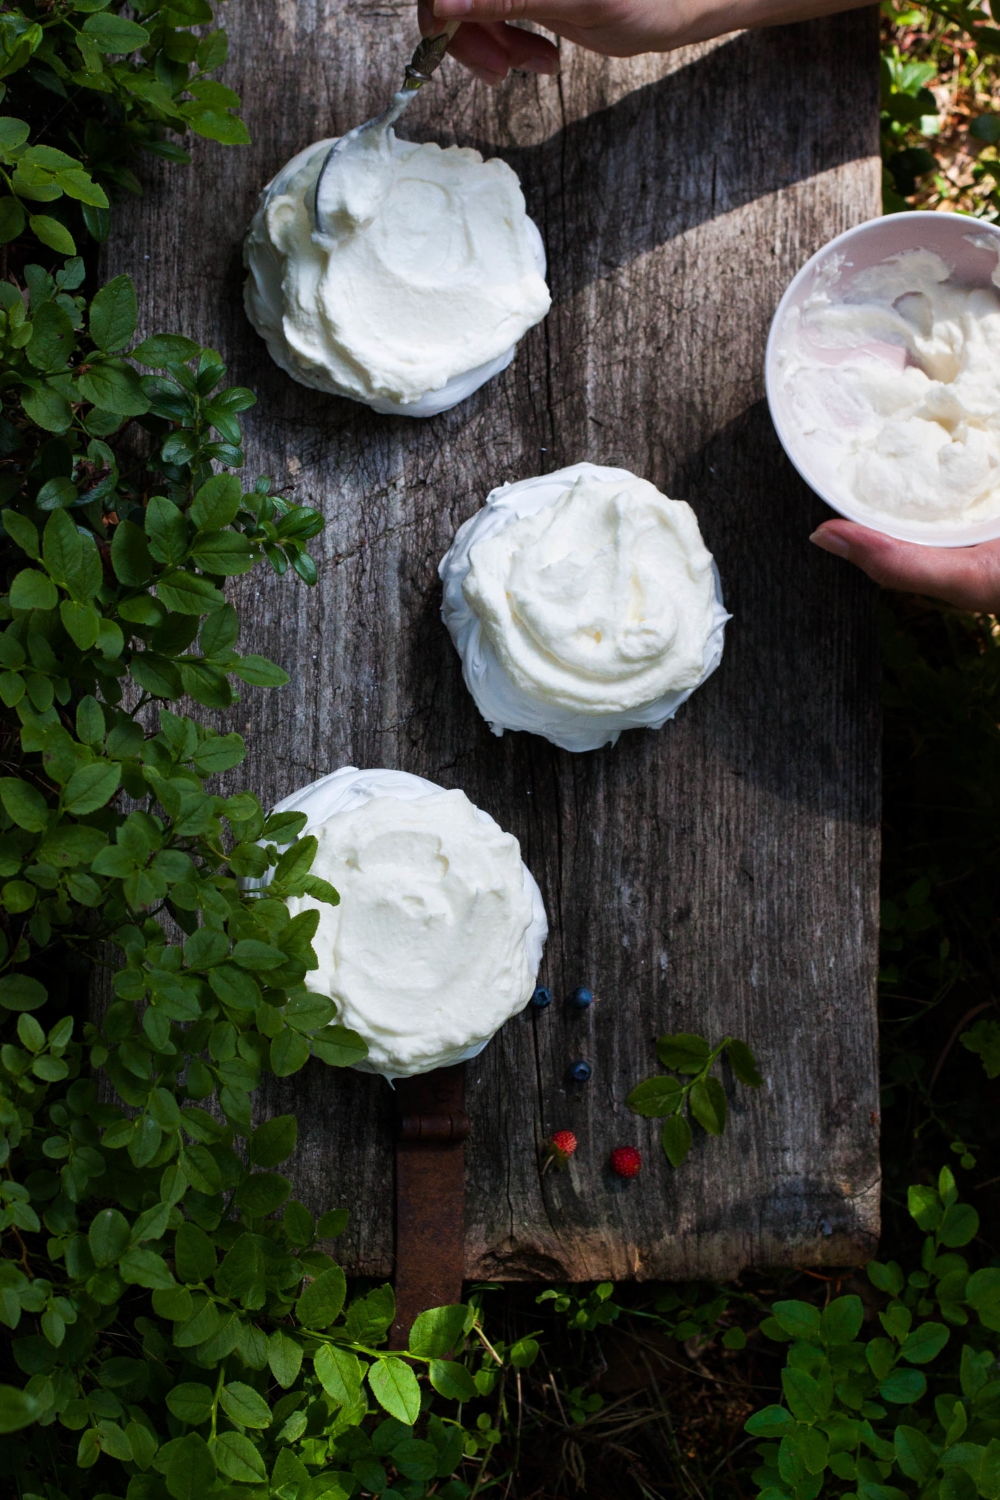
I shot these pics right before this summer's worst thunderstorm. It was a stormy day, and I actually thought twice before I found the courage to bake the cake despite the weather forecast. The worst scenario in my head: thunderstorm hitting, power cut, and the cake still baking in the oven = disaster. However, I succeeded to bake the cake (while constantly tracking weather forecasts) and shot it in the doorway cause that basically was the place with the best light source. So there I stood with a camera in my hands and the door wide open while the storm was building up outside. I really had not much styling in my head; I just wanted to get some shots before the skies opened up. These may not be the best pictures but I like them anyway simply because I'll always recognize the moment they were taken in.

The thunderstorm eventually hit, but luckily we (including the cake) were all doing fine. I sat in the dark cottage with all lights and electrical devices turned off and silently ate my cake while gazing out the window. Happy face.


Redcurrant Buttermilk Cake

makes 1 sheet cake

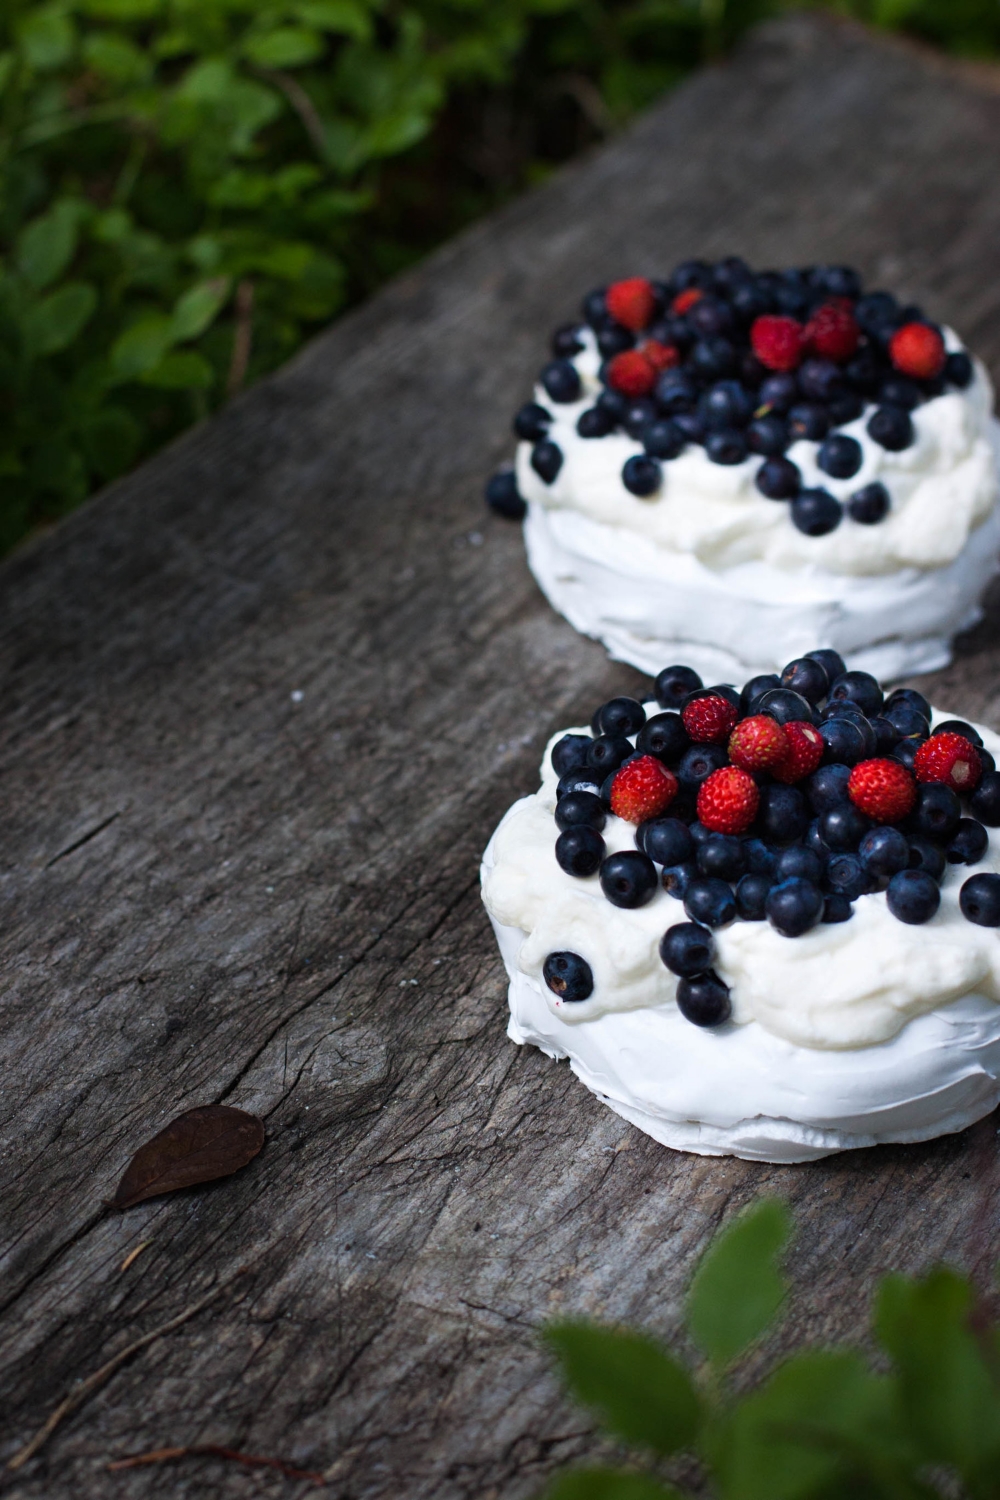
The cake is usually made as a sheet cake, but to make a cake as seen in the pictures just halve the recipe and bake in a cake pan (I used a shallow 28 cm / 11" to 17 cm / 7" pan). Note that the berries must be dried carefully to prevent them from sinking to the bottom while baking. If your berries are really juicy and you feel nervous about them, simply toss the berries in some flour or potato starch to give them a light coating before sprinkling them on top of the cake. The flour/starch will absorb the potential liquid and keep the berries from sinking.

100 g (1 ½ dl; cup) graham flour
290 g (5 dl + 2 tbsp; 2 cups + 4 tbsp) all-purpose flour
2 tsp baking powder
1 tsp baking soda
pinch of salt
4 ½ dl (1 ¾ cups + 2 ⅓ tbsp) buttermilk (if you are in Scandinavia, you can use filmjölk instead or make your own buttermilk)
150 g unsalted butter, melted
350 g (4 dl; 1 ⅔ cups) granulated sugar
1 tsp vanilla paste (or 1 vanilla bean, split open & seeds scraped out)
2 eggs (M)

~ 600 g (~ 1 ½ lb) redcurrants, cleaned & dried carefully

powdered sugar, to dust

optional: vanilla ice cream, to serve


Preheat the oven to 250°C (475°F). Line a deep baking sheet with parchment paper.

In a small bowl, combine the flours, baking powder, baking soda, and salt. Set aside. In a medium-sized bowl mix together the buttermilk, melted butter, sugar, vanilla paste, and eggs. Add the dry ingredients and whisk until combined. Let the batter sit for about 5 minutes.

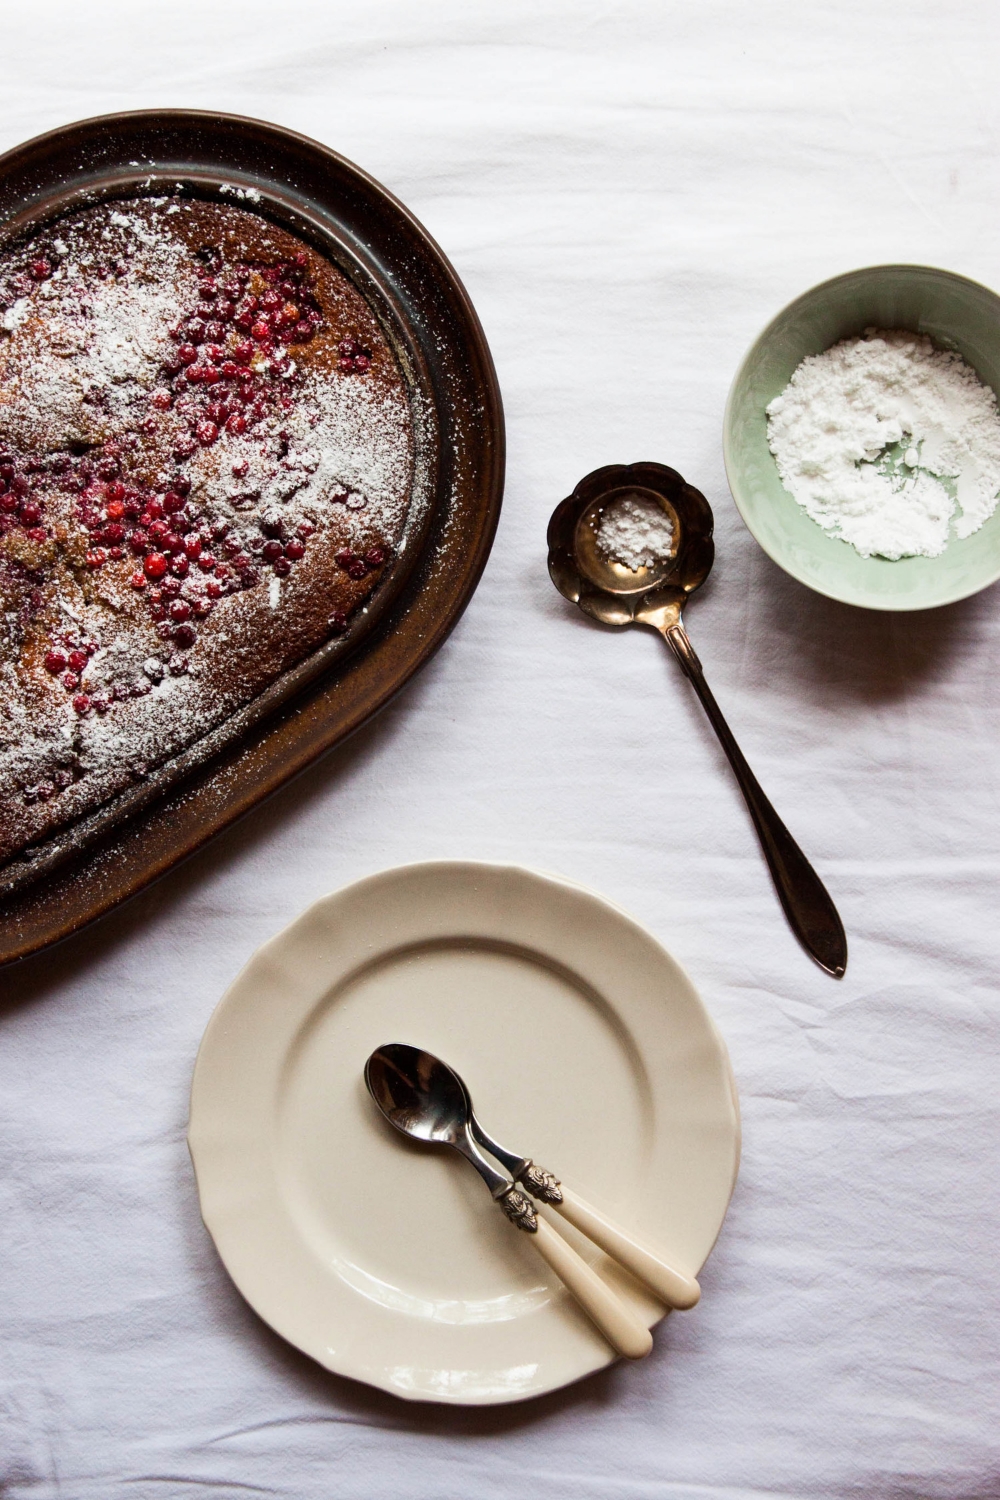
Pour the batter into the baking dish and top with the redcurrants. Bake on the middle rack for 20 to 30 minutes, or until deep brown in color. Let cool a bit and dust with powdered sugar. Enjoy warm or at room temperature plain or with a scoop of vanilla ice cream. The cake will keep for up to two days.


Redcurrant Buttermilk Cake | My Blue&White Kitchen

Related posts

About The Blog Turning One & Being A Wild Raspberry Scone Warrior

Raspberry Buttermilk Scones | My Blue&White Kitchen

The truly creative mind in any field is no more than this: A human creature born abnormally, inhumanly sensitive. To him, a touch is a blow, a sound is a noise, a misfortune is a tragedy, a joy is an ecstasy, a friend is a lover, a lover is a god, and failure is death. Add to this cruelly delicate organism the overpowering necessity to create, create, create – so that without the creating of music or poetry or books or buildings or something of meaning, his very breath is cut off from him. He must create, must pour out creation. By some strange, unknown, inward urgency he is not really alive unless he is creating.

– Pearl S. Buck

Raspberry Buttermilk Scones | My Blue&White Kitchen

First of all, this little blog baby of mine has turned one! Wohoo! Happy birthday, blog! It still can't walk on it's own or talk or write posts but I'm proud of it anyway. It all started with my love for food and photography and my inner longing to share that passion with others. Never in my wildest dreams could I have imagined all the goodness that I would experience as a result of me finally finding the courage to start my own blog. Isn't it weird how one decision can have such a huge impact on your life?

Thank you for being here. Thank you for saying "hi!" and leaving encouraging comments. Thank you for making my recipes. You can't even imagine how exciting it is to hear that one of you has baked or cooked a recipe and loved it as much as I have! Thank you for your friendship. Oh, how many wonderful people I've met along the way! So many creative, inspiring, and strong souls. I've been welcomed to this community of food bloggers with such kindness and for that, I'm so very grateful. Thank you.

Raspberry Buttermilk Scones | My Blue&White Kitchen

Now to these scones... They were a result of some serious battles. First, there was that raspberry picking trip where I had to fight against a whole mosquito army. There was blood. There was cursing and physical violence. And casualties. I came home with itching mosquito bites, some blood on my forehead, and a red knee cause I walked straight into a nettle bush and was so very clever to wear shorts (Don't do that. Just don't.). However, this all was worth it as my bucket was heavy with large and juicy raspberries. 

Then there was the day when I made these scones and shot the post. Real talk: I almost had a breakdown cause I had such a hard time trying to get these babes look beautiful and do them justice. I spend several hours trying to get that perfect shot (yes, several hours). Trying different angles, lighting, props. Nope. This wasn't my day, and I and these scones would definitely not become friends anymore. I struggled with serious self-doubts. By that time I had already declared them as enemy. I walked away. However, the scones still lingered on my frustrated mind. "Okay, let's approach these in a whole new way", I thought. You see the results here. I like these shots. A lot. Sometimes it's good to walk away to get some distance, and come back later with new eyes and a clear mind.

These scones and pictures are a labor of a true wild raspberry scone warrior.

Raspberry Buttermilk Scones | My Blue&White Kitchen

I really love these scones. Actually, the scones in the pictures aren't the most beautiful ones as I, in my frustration, ate the really pretty ones (sorry guys). They are light and tender but have a wonderful crust as well. They aren't too sweet and are speckled with pink raspberries. I decided to substitute part of the all-purpose flour with whole wheat spelt flour to make them a bit more wholesome. Furthermore, as I recreated the recipe a few times during last week I ended up making the scones a bit smaller and thicker to support the rising. I and these scones have made peace again. They are lovely little fellas.

They say that scones are best eaten while still warm and fresh, but I think potential leftovers are great on the next evening or even the next morning toasted in a toaster or pan. Add a knob of butter or enjoy with some brie (!!). I almost was turning these into some kind of French-toast-meets-scones thing but thought that it would be worth another post and story. Let's start with the basics and play wild and reckless another time. That said, the recipe can easily be halved as eight scones tends to be quite a lot unless you are feeding a whole family or hosting a brunch for a bunch of friends.

Raspberry Buttermilk Scones | My Blue&White Kitchen

Raspberry Buttermilk Scones

makes 8 scones

There are two essential things to keep in mind when making scones: keep it cold and work fast. Make sure that your butter and liquids, such as buttermilk, are really cold. Never overwork the dough: just mix and fold until everything is incorporated. Be sure that you've preheated your oven, lined a baking sheet with parchment paper, and have all ingredients at hand (preferably already measured) before starting to make the dough.

The first time I made these, it was a hot summer day. On the evening before I was wondering if I should change my plans of baking scones in the forecasted heat. However, I was too eager to hide the harvested raspberries in scone dough... What I made to ensure that the dough would be as cold as possible despite the challenging circumstances was the following: the night before, I measured the flours, sugar and salt, added them to the bowl I was going to make the dough in and stored it in the freezer. I also weighted the required amount of butter and froze it as well. The following morning, I added the baking powder and baking soda to the dry ingredients. Using a box grater, I coarsely grated the frozen butter and stirred it into the dry ingredients. After that, I proceeded as depicted below.

The recipe can easily be halved. Baked scones can be frozen.


190 g (3 ½ dl; 1 ½ cups) all-purpose flour
100 g (2 dl; ¾ cup + 1 ½ tbsp) whole wheat spelt flour
45 g (½ dl; 3 tbsp + 1 tsp) granulated sugar
2 tsp baking powder
½ tsp baking soda
135 g (1 ¼ sticks) cold unsalted butter, cubed
2 dl (¾ cup + 1 ½ tbsp) buttermilk (if you are in Scandinavia, you can use filmjölk instead or make your own buttermilk)
130 g (2 ½ dl; 1 cup) raspberries

melted butter


Preheat the oven to 225°C (450°F). Line a baking sheet with parchment paper and set aside.

In a medium-sized bowl, combine the dry ingredients. Cut the butter into the dry ingredients with a pastry cutter until the dough is crumbly and resembled small peas. Alternatively, you can do this by hand. Work quickly to ensure that the butter stays cold. Add the buttermilk and mix just until the dough comes together. At this point the dough should feel slightly sticky but still be easy to handle. If the dough feels too sticky add a bit more flour.

Transfer the dough to a lightly floured work surface. Pat the dough into an about 1,5 cm (0.5") thick circle and scatter the raspberries on top of the dough. Fold the dough over the raspberries 3 to 4 times. Because of the berries, the dough will probably feel quite sticky at this point. Lightly flour the work surface and dough to prevent sticking. Pat into an about 3 cm (2") thick circle. Cut into 8 wedges and place on the prepared baking sheet. Slightly brush with melted butter.

Bake the scones on the middle rack for 12 to 15 minutes, or until golden brown. Enjoy while still warm.


Related Posts

A New Summer Favorite – Grilled Watermelon Salad

Grilled Watermelon Salad | my blue&white kitchen

I love borders. August is the border between summer and autumn; it is the most beautiful month I know.

Twilight is the border between day and night, and the shore is the border between sea and land.
The border is longing: when both have fallen in love but still haven't said anything.
The border is to be on the way. It is the way that is the most important thing.

– Tove Jansson

Grilled Watermelon Salad | my blue&white kitchen

I can feel it; I can see it with my own eyes. The days are getting shorter and the nights cover the sky with a dark cloak. Only the moon and bright stars shed some light on the serene midnight lake scenery. But as much as I love the Nordic summers and the nightless nights, this shift of seasons feels good. It feels right and I welcome it with open arms. To be honest with you, it would be very hard for me to live in a place without four distinct seasons. I think I would get bored. And as much as I hate to admit it, I think I would miss the snow and darkness as well.

There's certainly something utterly comforting in these dark, warm summer nights. They invite you to light a candle and read a good book. They make a tremendous backdrop for a crayfish party. They call you into the kitchen to bake a loaf of bread or even a cake.

Grilled Watermelon Salad | my blue&white kitchen

Although kids are returning to school after their 10-week-long summer vacation and life is slowly shifting from simple, slow-paced summer cottage life to the usual urban routines, summer isn't over yet. We've had a very unusually long and warm weather during the last couple of weeks with temperatures around 30°C (85°F). It's not quite the weather I fancy to spend much time in the kitchen, so I've been grilling a lot. Grilled vegetables are a staple, and I've particularly fallen in love with the taste of grilled fennel (Haven't tried it? You must!). I often add grilled vegetables to my salads. The smoky flavor is very welcome and I like to combine different flavors and textures to make my salads more interesting and complete. 

This grilled watermelon salad is a new summer favorite. I got a few skeptical looks when I told what I was planning to make for dinner. "You're going to grill that watermelon? How? Are you sure? Is this your own idea?"  I replied that no, this wasn't my idea, and that I had come across it every now and then but had never got the chance to try it myself, and that I was quite sure that I had something absolutely delicious in the making. "Trust me", I said. The first bite convinced even the most skeptical ones. The whole table came to the conclusion that this salad was a winner; the peppery arugula, the saltiness of feta cheese, the crunchy pumpkin seeds, the protein rich beluga lentils, and the juicy, sweet watermelon pieces with a wonderful smokiness. Furthermore, it looks gorgeous and is quick and easy to make. The prefect summer salad, so to speak.

Grilled Watermelon Salad | my blue&white kitchen

Grilled Watermelon Salad

serves 4

This salad can easily be prepared in advance and assembled just before serving. If you want to serve the watermelon so that it's still hot, grill it just before ready to serve.

130 g (1 heaping dl; ½ cup) beluga lentils, rinsed & picked over
90 g (1 heaping dl; ½ cup) pumpkin seeds
200 g (7 oz) feta cheese, drained & broken into chunks
2 red scallions, sliced
2 large bunches of arugula, washed & dried
half a small watermelon (mine was about 1300 g / 3 lb), cut into 2,5cm (1") thick slices
olive oil

For the vinaigrette
5 tbsp extra-virgin olive oil
3 tbsp white balsamic vinegar
a drizzle of honey or agave nectar
fine sea salt & freshly ground black pepper, to taste

Cook the beluga lentils al dente according to packet instructions. Toast the pumpkin seeds in a dry frying pan over medium-high heat stirring regularly until they start to brown slightly, pop open, and are fragrant. Be careful not to burn them as this happens rather quickly. Add a pinch of salt and set aside.

To make the vinaigrette, whisk together the olive oil, balsamic vinegar, and honey. Season with salt and pepper. Set aside until ready to assemble.

To grill the watermelon, heat your grill on medium-high heat. Lightly brush the watermelon slices with olive oil. Grill for 2 to 3 minutes per side, or until charred. Remove from heat and dice. Set aside.

To assemble, put the lentils, about two-thirds of the pumpkin seeds, feta, scallions, arugula, and dressing into a large bowl. Toss to combine. Assemble the watermelon cubes on top of the salad and sprinkle the remaining pumpkin seeds on top. Serve and receive rave reviews.


Grilled Watermelon Salad | my blue&white kitchen

Related posts

Farmers' Market Glory – Summer Potato Salad

Summer Potato Salad | my blue&white kitchen

How can one not be inspired by summer’s bounty? I’m like a kid in a candy shop whenever I visit a farmers’ market these days as I easily get overwhelmed by all the fresh produce: berries, fruit, vegetables, herbs... So much goodness! I’m lucky to live within a short walking distance of not only one but two farmers’ markets, so I try to find my way to them several times a week. You almost never see me leaving without a bagful of green peas (I eat them raw – one of the best things I know), some local strawberries while still in season (they're amazing at the moment), and new potatoes (cause I just can't get enough of their lovely, delicate flavor). Also, I’m addicted to the sweet-like-candy cherry tomatoes that an old lady sells at her stall every summer. They are the best tomatoes I’ve ever tasted, and I never miss the chance to tell her that.

I buy what looks fresh and vibrant, what inspires me the most. When you have great produce at hand, you don’t need to do much to them anymore. Rather, let the textures, flavors, and colors speak their own language. That's my summer cooking philosophy.

Potato salad has always been a summer staple out our home. It's the perfect side dish to accompany grilled meat or fish without having to spend too much time in the kitchen. To be honest, I often make salads on the porch. That way I don't have the feeling I'm trapped inside missing all the fun. Potato salad is also what I most often get asked to bring with me to a summer potluck with friends or family. It's a crowd-pleaser and we rarely end up having leftovers. You would never see mayonnaise in my potato salads as I like to prepare them the way it's done back home in southern Germany with a simple vinaigrette. In this recipe, I added some dijon mustard to the vinaigrette as well as honey which may not be traditional but definitely delicious. Feel free to play around with different vegetables and herbs; use what's in season, what inspires you, or what simply make your mouth water.

Summer Potato Salad | my blue&white kitchen

I’m keeping it short today as the sun is shining so brightly outside and it would be a waste to spend more time sitting here in front of the laptop telling you how wonderful summer evenings are. Go outside, soak up the sun while it's still shining so gleefully! That's exactly what I'm going to do right now.

Summer Potato Salad | my blue&white kitchen

Summer Potato Salad

serves 6 as a side

This salad can be prepared in advance. If doing so, add the radishes, peas, and herbs just before serving or they'll lose their color and/or wilt. You may also need to add some more vinaigrette before serving as the potatoes will probably soak up most of it. Furthermore, if you decide to make the salad in advance, I would let the potatoes cool completely before adding the other vegetables and herbs; you can, however, add the vinaigrette while the potatoes are still warm.
 

1 kg (2 lb) new potatoes (preferably small ones), scrubbed
2 small cucumbers (I love to use Kirby cucumbers), sliced
1 red scallion, sliced
1 small bunch of pink radishes, cut into sticks
a couple of handfuls of cherry tomatoes, preferably in several colors, cut into wedges
2 ½ dl (1 cup) shelled green peas
a bunch of fresh herbs, such as dill, chive, or parsley, roughly chopped

For the vinaigrette
5 tbsp extra-virgin olive oil
2 tbsp white wine vinegar
1 tsp dijon mustard
a drizzle of honey or agave nectar
fine sea salt & freshly ground black pepper


Boil the potatoes in salted water until tender. Drain and return the potatoes to the pot. Put the pot back to the stove top and let sit for a while to absorb any water that may still cling to the potatoes and potentially make them soggy. Let the potatoes cool a bit. Halve or slice the potatoes, depending on their size. [note: New potatoes usually have only a very thin skin. Therefore, I prefer them unpeeled.] Add to a big bowl.

To make the vinaigrette, whisk together the olive oil, vinegar, mustard, and honey. Season with salt and pepper. Add to the still warm potatoes and mix to combine.

Boil the green peas in salted water for 3 minutes. Drain and rinse under ice cold water to stop them from cooking further as well as to help them keep their bright color.

Add everything to the dressed potatoes and toss gently. Serve with grilled fish or meat.


Summer Potato Salad | my blue&white kitchen

A Quarter of a Century – Mini Almond Pavlovas with Forest Berries

Almond Pavlova with Forest Berries | my blue&white kitchen

In elementary school, we had to write an essay about how we pictured our lives as twentysomethings. I've tried to find that essay without any success but I'm pretty sure I know what that piece of paper contains. I probably dreamed of a life in a red cottage (so Scandinavian!) with a gorgeous husband and lovely children (so cliché!), as well as a cat, dog, and horse (cause I wasn't able to decide which one was cuter). Little did that brown eyed, open-minded, stubborn, and self-confident girl, who was born 200 years after 'Liberté, Égalité, Fraternité ou la Mort!' echoed inside the Bastille, know about where life would take her to in the coming years; that life doesn't always look like the ones in Astrid Lindgren's stories. But does it make it disappointing? Not at all. I've traveled the world and realized both how wonderful and cruel it is at the same time. I may have missed opportunities but I've also said 'yes' and 'no' at just the right moments. I am loved. I'm able to create a career path of my dreams. I can be creative and share it with others; with you. My life may not be perfect but it's good. It's more than good. And that I'm tremendously grateful for.

My life is a bit like these mini pavlovas  maybe not as perfect looking as a layer cake with buttercream frosting but definitely enjoyable and lovable. Pavlova is probably my favorite summer cake and that's why I make it (almost) every year for my birthday. Of course, you can top a pavlova with any fruit of your choice but those winter pavlovas with kiwis and citrus fruit have never really grown on me. I like mine topped with lots of seasonal berries, such as blueberries, bilberries, strawberries, and raspberries. If you're living outside Europe, you may wonder about bilberries. Are they the same as blueberries? Well, not quite but they're closely related. They’re the European wild growing counterpart (and to make it a bit more confusing, we call them 'blueberries' as well). Bilberries are smaller and darker than blueberries but have a fuller, more flavorful taste which is why I most of the time prefer bilberries over blueberries. They’re also a bit messier as their skin and flesh stain everything blue from your fingers and lips to your tongue. As our summer cottage is surrounded by bilberry bushes (I literally have to walk two meters to pick a berry), they’re a heavily consumed summertime favorite. For these pavlovas I used bilberries and wild strawberries which I foraged earlier that day. However, feel free to use whatever berries you have around. I also won't judge you should you prefer to use kiwis and mandarines.

A few notes on meringue. There basically are three different types of meringue which all have distinct characteristics: French, Swiss, and Italian meringue. French meringue is the simplest one and especially popular among home cooks. Egg whites are whipped until stiff peaks start to form, sugar is gradually added, and the mixture is whipped until glossy. Quick and easy, right? Swiss meringue is made by warming egg whites and sugar over a water bath until sugar crystals dissolve completely. The mixture is then whisked until it has cooled to room temperature. Swiss meringue is more stable than French meringue and is ideal if you want meringue that’s crisp on the outside and marshmallow-like on the inside. Personally, I prefer Swiss meringue when making pavlovas because I want to achieve that chewy inside. Furthermore, the heating process makes the egg whites edible without having to bake them. Salmonella isn’t a problem here in Finland (it basically is non-existent), but Swiss meringue may be your top choice especially if living in a country where you have to be careful when consuming raw eggs. The third meringue type is Italian meringue that is made with boiling sugar syrup. It’s the most stable of these three and is, like Swiss meringue, safe to consume without baking. Of course, there are other techniques as well, such as Ottolenghi’s method that I can’t wait to try, but these are the three classic ones.

Now that we’ve covered the three different types, let’s talk about what ensures a perfect meringue. There are a few simple yet important things to keep in mind when making meringue:

  • Make sure that your equipment is absolutely dry, clean, and grease-free. Any small amount of fat will keep your egg whites from getting fluffy. Egg yolks are fat as well so be careful when separating the eggs! Furthermore, it may be a good idea to rub your bowl with half a lemon before starting to make meringue to eliminate any grease.
  • Prefer stainless-steel, glass, or copper bowls when making meringue as plastic bowls can hold onto grease.
  • While eggs are easier to separate when cold, make sure your egg whites are at room temperature when you start making your meringue. However, this isn’t crucial if making Swiss meringue as the egg whites are warmed anyway.
  • Think twice before making meringue on a very humid day. The sugar will absorb moisture from the air keeping your meringue from getting stiff.
  • You often see vinegar or cream of tartar as well as cornstarch added to meringue. Vinegar and cream of tartar mainly stabilize while cornstarch helps to achieve a crisp outside and a chewy inside. These are optional, not necessary to make a successful meringue. In this recipe, I use lemon juice instead of vinegar or cream of tartar and omit cornstarch completely.
  • My meringue formula is really simple and easy to remember: 1 part egg whites to 2 parts sugar (by weight). In addition, lemon juice, vinegar, cream of tartar, or cornstarch as well as any kind of flavoring may be added.
  • Meringue is versatile! You can mix in cocoa powder, berry sauce, different extracts, etc.

Mini Almond Pavlovas with Forest Berries

makes 6 small or 1 big (about 23 cm / 9")
 

For the meringue
4 egg whites (M)
290 g (3 dl + 2 tbsp; 1 cups + 1 tbsp) granulated sugar
1 tbsp lemon juice
about 30 g (½ heaping dl; ¼ cup) sliced almonds

For the topping
200 g (2 dl; 1 scanted cup) heavy cream
200 g (2 dl; 1 scanted cup) Greek or Turkish yogurt
2 tbsp powdered sugar

about 500 g (1 l; 4 cups) berries


To make the meringue
Preheat oven to 125°C (260°F). Line a baking sheet with parchment paper.

Combine the egg whites, sugar, and lemon juice in an absolutely dry, clean, and grease-free medium-sized bowl, pot, or bain-marie. Place over a water bath. While constantly whipping, heat until the mixture has reached 60°C (140°F). At this point the sugar should have dissolved and the mixture starts to get thicker and glossier. Take off the heat. With the help of a standing mixer or electric hand mixer, whisk on high speed until the mixture is cool and stiff peaks form. (You can of course whisk it by hand if you fancy a nice workout. Been there, done that.) This usually takes 6 to 10 minutes. Carefully fold in the almonds.

Spoon the meringue into six equal rounds. Make sure that the meringue is slightly higher at the rims so that the meringue later holds the topping better. Lower the oven temperature to 100°C (200°F). Bake for 55 to 60 minutes. At this point, the outside should be crisp while the inside still has a marshmallow-like consistency (you can lift a meringue round and poke a hole in the bottom; no one will notice). If you decide to make one big pavlova, you'll need to bake the meringue for further 10 or so minutes. Let cool completely.

Unless you're living in a very humid area, you can bake the meringues one day in advance. Store them uncovered at room temperature until ready to assemble.
 

To assemble
To make the topping, whip the heavy cream until very stiff. Gently fold in the yogurt and sugar.

Just before serving, top each meringue with the cream yogurt mixture. Generously top with berries. Serve immediately.